
5 Steps to Transforming the ZimaBoard 2 Into a Nostalgic Arcade Beast


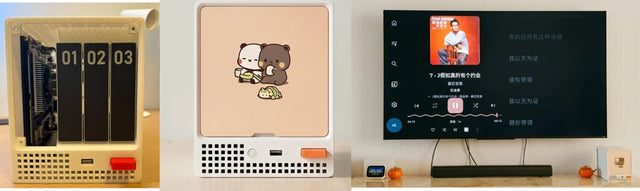
We are constantly amazed by the creativity of our community, and today we have a truly special project to share. The talented team at Leap (creators of the Leap Cade) recently embarked on building a custom 3D-printed PlayStation 1 and PlayStation 2 arcade cabinet. Instead of their usual setup, they decided to power this ambitious project with the ZimaBoard 2.
As the team behind Zimaspace, we are thrilled to transcribe and share their journey. This post highlights their full project reveal, the technical setup, and exactly why they chose our hardware to bring their retro gaming vision to life. A massive thank you to Leap for showcasing what’s possible when creative DIYers meet powerful tech! Here is a breakdown of their incredible build.
The Vision: Moving Beyond the Standard Arcade Setup
For years, the standard approach to DIY arcade machines has relied on traditional 32-bit boards. While a standard Raspberry Pi 3 or 4 works well for older retro games, Leap’s new project demanded much more. They are building complete PS1 and PS2 arcade machines featuring full European game sets.
To handle this massive library and emulation requirement, they needed raw processing power and superior storage options.
While the ZimaBoard 2 is widely known as a hyper-performance single board home server—perfect for handling media streaming, firewalls, homelabs, and AI containers—Leap saw its potential as the ultimate emulation engine. Many call it a mini server that looks like a toy but runs like a beast, and this project proves exactly why.

🚀 Why the ZimaBoard 2 Outshines the Competition
When building a dedicated emulation cabinet, hardware limitations can quickly become a bottleneck. Here is why Leap found the $250 investment in the ZimaBoard 2 to be completely worth it compared to a standard Raspberry Pi 5 setup:
- Flawless Build Quality & Cooling: Usually, traditional boards require a myriad of add-ons (extra fans, heat sinks, and custom cases) just to remain stable. The ZimaBoard 2 comes incredibly well-made with all cooling features and connectivity built right in from the start.
- Superior Storage Flexibility: Emulating entire PS1 and PS2 libraries requires massive storage. The ZimaBoard 2 allows users to plug and play an M.2 NVMe drive (up to 2TB) directly. Furthermore, thanks to its Native SATA & PCIe support (no hats, no hassles), Leap easily 3D-printed adapters to pop in standard 2.5" and 3.5" drives.
- Raw Processing Power: When running side-by-side tests with a Pi 5, the ZimaBoard 2 delivered significantly smoother gameplay, running Leap's custom PS2 emulator absolutely flawlessly.
Quick Hardware Comparison for Arcade Builds
| Feature | Traditional SBC (e.g., Pi 5) | ZimaBoard 2 |
|---|---|---|
| Cooling & Add-ons | Requires aftermarket fans/heatsinks | Built-in passive cooling, ready to go |
| Storage Expansion | Limited (often requires USB adapters) | Native SATA, PCIe, and M.2 NVMe support |
| Performance | Good for 32-bit / early 3D | Handles heavy PS2 emulation flawlessly |
The Setup: From ZimaOS to RetroPie
Leap’s approach to building arcade machines is highly systematic: always get the complete setup done outside of the arcade machine before installing it.
Here is the step-by-step software workflow they used to turn this single board home server into a retro gaming powerhouse:
- Initial Boot with ZimaOS: They started by booting into ZimaOS (our native, user-friendly operating system designed for easy server management).
- Remote Configuration via SSH: From the ZimaOS desktop, they enabled SSH (Secure Shell, a network protocol that gives users a secure way to access a computer over an unsecured network). This allowed them to manage the rest of the setup comfortably from their main PC.
- Virtual Machine Deployment: Using the board's robust virtualization capabilities, they built an Ubuntu VM (Virtual Machine, a software-based computer that runs inside another physical computer).
- Custom RetroPie Installation: Finally, they installed their heavily modified version of RetroPie, optimized specifically for their plug-and-play USB arcade kits.
The verdict on the setup? Incredibly simple and highly user-friendly.

The Final Verdict: Out with the Old, In with the New
Once the software was tested and stable, Leap opened the back of their tried-and-tested Leap Cade two-player machine, disconnected the old board, and mounted the ZimaBoard 2. Using a custom 3D-printed mount (which they plan to release for free on Maker World) and some Gorilla Tape for temporary securing, the board fit beautifully into the cabinet.
The results speak for themselves. Testing a huge variety of games, the team experienced zero glitches or performance drops.
If you are a creative DIYer or tech lover looking for a user-friendly platform with serious heavy-lifting power, Leap highly recommends making the switch. In fact, they were so impressed that they have already purchased a second ZimaBoard 2 for their upcoming dedicated PS2 machine!
Want to build your own? Keep an eye on Leap’s social channels for their upcoming free 3D print files and full step-by-step tutorials. And if you're ready to upgrade your own homelab or DIY project, explore what the ZimaBoard 2 can do for you today.

Recommended products

Zima Campaign Hub
More to Read
How a Small NAS Became a Family Archive With ZimaOS
A real home NAS story about preserving medical records, family photos, music, and everyday memories—and the practical lessons for protecting irreplaceable data.
2026 Software Freedom Day: The Best Open-Source Apps to Self-Host at Home
Explore useful self-hosted tools for storage, photo backup, media streaming, documents, and home automation on one reliable server at home.

World Photography Day: How to Back Up and Organize a Lifetime of Photos
Gather scattered photos, build a simple archive, automate backups, verify recovery, and learn when centralized storage becomes worthwhile.


