
How to Build a CasaOS NAS With a Mini PC and Multi-Bay USB DAS


A reliable CasaOS NAS starts by treating the mini PC, USB DAS, and software layer as three different parts of one system.
The mini PC supplies compute and networking, the DAS supplies directly attached disks, and CasaOS provides the dashboard, shares, and application layer. The build becomes fragile when those responsibilities blur—especially when changing USB device names, one shared cable, or a failed boot drive can make storage paths disappear. Plan the topology and recovery path before importing important files.
Define the Mini PC, DAS, and CasaOS Roles Before Connecting Drives
A mini PC plus multi-bay DAS can behave like a NAS, but the DAS itself is not the NAS. It has no user accounts, network services, application layer, or independent recovery workflow. The host must recognize the disks, mount them consistently, and expose selected folders to clients.
A practical mini-PC NAS guide describes a NAS as a combination of storage, network file services, and management. That three-layer NAS model is useful here: the DAS supplies storage, Linux supplies the filesystem and mounts, and CasaOS sits above them as the management and application interface.
Choose the server’s primary jobs before installing apps. A simple first build might provide one shared media folder, one computer-backup destination, and one private application-data area. The existing ZimaSpace guide on how to build a first home server around three services can help keep the first CasaOS stack bounded.
Choose a DAS That Exposes Each Drive Predictably
Bay count alone does not determine whether an enclosure is suitable for a server. Confirm whether the host sees each disk independently, whether the enclosure has its own stable power supply, how cooling behaves with all bays populated, and whether the controller changes disk identity after a reboot or replacement.
A real-world five-bay DAS review paired the enclosure with a mini PC and described the DAS as a simple box containing bays, a controller, fan, and power supply. The test shows why a multi-bay DAS can serve as the storage layer for a mini PC NAS, while the host remains responsible for the operating system and data services.
Prefer direct disk exposure when the operating system will manage filesystems, pooling, or backup jobs. Avoid assuming that a hardware RAID mode is safer merely because several drives appear as one device. It can hide individual drive health and make recovery dependent on the enclosure’s controller.
Treat USB Bandwidth and Power as Shared Resources
Every disk in the enclosure eventually shares one host connection. Sequential reads from one HDD may be modest, but simultaneous backup, media scanning, thumbnail generation, and file copying can compete for the same USB link. The enclosure fan and all installed drives also depend on one power system.
A mini-PC NAS guide notes that external USB enclosures are practical but carry USB reliability concerns, and that multiple HDDs can saturate a shared 10Gbps link under concurrent work. This is why USB bandwidth should be planned for the combined workload, not judged from a single-drive speed test.
Connect the DAS directly to the mini PC rather than through an unpowered hub. Use the enclosure’s supplied power adapter, secure the data cable, and verify that all drives return after a cold boot. If the enclosure offers automatic sleep, test database writes and scheduled backups after the disks have been idle.
Create Stable Mount Points Before CasaOS Sees the Storage
Linux device names such as /dev/sdb and /dev/sdc can change when USB disks reconnect or boot in a different order. An application that expects media at one path may silently find another disk—or an empty folder—after reboot.
A current Linux disk guide recommends mounting data filesystems by UUID because raw device names are not guaranteed to remain stable, particularly with several disks or USB storage. Its UUID-based persistent mount workflow provides the correct foundation before CasaOS maps storage into shares or containers.
Create descriptive mount points such as /mnt/storage/media, /mnt/storage/backups, and /mnt/storage/archive. Test the mount configuration before rebooting, restart the server twice, and confirm that every path still points to the intended filesystem. CasaOS should inherit a stable storage map rather than becoming the place where disk identity is guessed.
Separate the Boot Drive, App Data, Shared Files, and Backup
Do not place every layer inside one bulk-media folder. The mini PC’s internal SSD should normally hold Linux, CasaOS, and replaceable application code. Persistent application state—databases, configuration, indexes, and secrets—needs its own protected path. Shared files and media can live on the DAS, while backups should have a destination that is not treated as ordinary working storage.
Better Stack explains that container data must be placed in persistent storage if it needs to survive replacement of the container. That independent lifecycle for application data is essential in a CasaOS build because reinstalling or updating an app should not erase its database or force the media library to be rescanned from scratch.
| Layer | Recommended location | Recovery expectation |
|---|---|---|
| Linux and CasaOS | Internal SSD | Reinstallable from documented steps |
| Application state | Dedicated app-data path | Frequent backup and tested restore |
| Shared files and media | DAS data disks | Protected according to value and replaceability |
| Backup copies | Separate disk, system, or off-site target | Recoverable without the live CasaOS host |
Add CasaOS Shares and Apps Only After Storage Survives a Reboot
CasaOS can simplify app installation and storage mapping, but it should consume an already stable filesystem layout. A third-party CasaOS overview notes that the dashboard can display drives, mount external storage, and assign storage paths to applications, while RAID or ZFS remains an operating-system-level responsibility. That separation between CasaOS management and the underlying storage model prevents the interface from being mistaken for data protection.
Install CasaOS only after the base Linux system has a fixed local address and the DAS mounts reliably. The ZimaSpace guide on installing CasaOS on a mini PC or home server covers that installation stage. Afterward, create shares with named users, map each app only to the folders it needs, and avoid giving experimental containers the entire DAS root.
Test one client before importing the full library. Create, rename, and delete a disposable file; restart the app; reboot the mini PC; then confirm the same share and data path return without manual remapping.
Test Disconnects, Restores, and the Upgrade Boundary
A finished setup must survive more than a normal read test. Disconnect the DAS while no writes are active and confirm that services fail visibly rather than writing into empty mount-point folders. Reconnect it, reboot, and check that the expected disks and paths return. Then restore one application configuration and one deleted file from backup.
TechTarget’s backup-testing tutorial emphasizes restoring data and validating that the resulting workload functions, because the presence of backup files alone does not prove recovery. Use that functional restore test as the final gate before the CasaOS NAS becomes the only location for important household data.
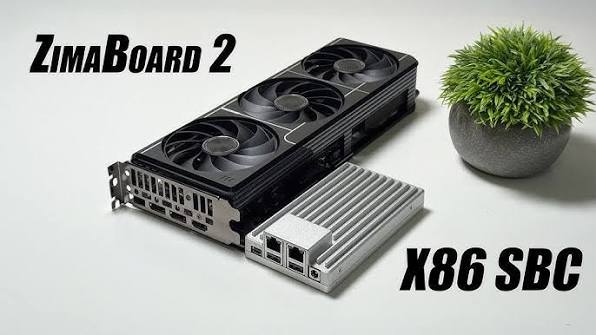
A ZimaBoard 2 Mini Home Server fits this topology when the priority is compact x86 compute, direct storage attachment, and an app-first CasaOS stack. A ZimaCube 2 AI NAS becomes the clearer architecture when several drives, integrated storage management, multi-user capacity, and storage-first recovery matter more than preserving a separate USB DAS.
The build is complete when every drive has a stable identity, every service has a bounded data path, the DAS can disappear without creating silent writes, and recovery does not depend on remembering how the dashboard looked.

Recommended products

NAS & Server Setup
More to Read
A Local RAG Setup for Research Papers, Notes, and Private Documents
Keep original documents authoritative, make indexing repeatable, require citations, and separate replaceable models from private source data.
Why Are Developers Using a Gateway Node for Private DNS, VPN, and Test Apps?
A gateway node gives private apps one controlled name and access path, while compute nodes stay unexposed and replaceable.
How to Build a Reproducible App Stack With Compose Files, Secrets, and Persistent Data Separated
Keep Compose definitions portable, secrets protected, and app data independently backed up so the stack can be rebuilt on a clean host.


