
How to Install CasaOS on a Mini PC or Home Server


Quick Start
You can install CasaOS on a mini PC or home server by first preparing a compatible Linux base system, making sure you can access the machine through a local terminal or SSH, and then running the CasaOS installer from the command line. For most beginners, the simplest path is: install a clean Linux server OS, connect the machine to your local network, update the system, run the CasaOS installer, and open the dashboard from another device on the same network.
The main point is that CasaOS is usually not the first operating system you install on the hardware. It runs on top of a compatible host system, so the base OS, network setup, storage setup, and terminal access all matter before the CasaOS dashboard appears.
A safe beginner flow looks like this:
-
Confirm your mini PC or server hardware is compatible.
-
Install a clean Linux base system.
-
Make sure the server has stable network access.
-
Access the terminal locally or through SSH.
-
Run the CasaOS installer.
-
Open the web dashboard and create your admin account.
-
Check whether storage, apps, and Docker data paths behave as expected.
What Is CasaOS and What Does It Actually Install?
CasaOS is a home server interface designed to make self-hosting feel simpler. Instead of asking beginners to manage every service manually from the command line, it gives users a web dashboard for apps, files, drives, and basic server management.
The important distinction is that CasaOS is not usually installed as a full standalone operating system on bare hardware. According to the CasaOS quick setup instructions, the recommended flow is to freshly install a supported system first, then run a one-line installation command on that system.
That means CasaOS works more like a management layer on top of a Linux host. The base OS handles the machine, networking, packages, users, and low-level system behavior, while CasaOS gives you a friendlier interface for home server tasks.
What You Need Before Installing CasaOS on a Mini PC
Before installing CasaOS, think of your mini PC as a small server that needs five things to work correctly: compatible hardware, a clean base OS, network access, terminal access, and storage that the host system can see.
| Requirement | Why It Matters | What to Check First |
| Compatible hardware | The installer and services need a supported CPU architecture and host system | CPU architecture, storage, RAM, USB boot ability |
| Clean Linux base system | CasaOS runs on top of a host OS in many setups | Debian, Ubuntu Server, Raspberry Pi OS, or another supported system |
| Stable local network | The web dashboard is usually accessed through a local IP address | Ethernet or reliable LAN connection |
| Terminal access | The installer is run from a command line | Local keyboard/monitor or SSH |
| Storage visibility | Apps and files depend on what the host system can see | Internal drives, mounted drives, permissions |
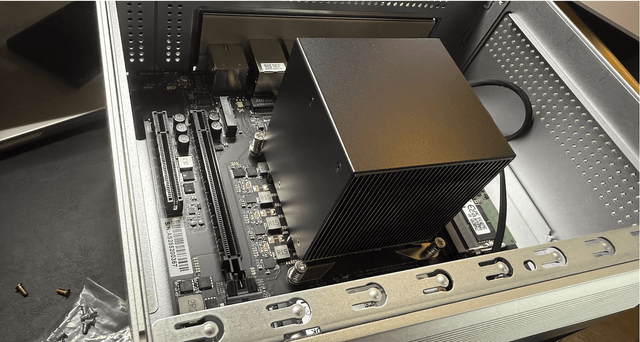
A Compatible Mini PC or Home Server
CasaOS can run on several common home server devices, but compatibility should be checked before installation. The official compatibility notes list architectures such as amd64 / x86-64, arm64, and armv7, and mention systems such as ZimaBoard, Intel NUC, and Raspberry Pi as supported examples.
For a mini PC, the main practical checks are whether the machine can boot a supported Linux system, whether it has enough storage for the base OS and apps, and whether it can stay online as an always-on server. If the device has multiple drives or external storage, the host OS must recognize and mount them before CasaOS can manage them in a useful way.
A Clean Linux Base System
For most beginners, a clean base OS is easier to troubleshoot than a machine that already has many packages, old services, or unclear storage mounts. CasaOS documentation lists Debian 12 as tested and recommended, and Ubuntu Server 20.04 as tested, so those are reasonable starting points when hardware supports them.
A clean base system reduces uncertainty. If an installation command fails, you can narrow the problem to network, package, permission, or compatibility issues instead of guessing whether older services are interfering.
A Stable Local Network Connection
CasaOS becomes useful only after you can reach the machine from another device on the same local network. If the server cannot get an IP address, the web dashboard will be difficult to open even if the installer completes.
For headless setups, SSH is often the practical way to manage the server. Ubuntu describes OpenSSH as a secure way to remotely control networked computers and transfer data, and its OpenSSH server setup documentation explains that the server component listens for client connections and supports remote control sessions after authentication.
A Way to Access the Terminal
You need terminal access because CasaOS installation depends on running a command on the host system. This can be done directly with a monitor and keyboard, or remotely through SSH if the base OS has remote access enabled.
Be careful when changing SSH configuration on a remote-only machine. If SSH is your only access method and the configuration is changed incorrectly, you may lose the ability to reach the server without physical access.
The Simple Setup Path for a First Home Server
A beginner-friendly way to think about the install is The Base-to-Dashboard Setup Path. It separates the process into responsibility layers so you can understand what each part is supposed to do.
| Setup Layer | What It Covers | Success Signal | Common Failure Point |
| Hardware Readiness | Mini PC, storage, USB boot, display or SSH plan | The device can boot an installer or base OS | USB boot disabled, wrong boot mode, unsupported device |
| Base OS Layer | Debian, Ubuntu Server, or another compatible host | The OS boots and you can log in | OS not installed cleanly, wrong architecture |
| Network and Terminal Access | LAN connection, IP address, SSH or local terminal | You can reach the machine and run commands | No IP address, SSH not enabled, unstable connection |
| Installer and Dashboard Path | System update, CasaOS installer, web dashboard | CasaOS dashboard opens in a browser | Installer fails, command unavailable, network issue |
| First-Use Validation | Drives, apps, Docker storage, next steps | Apps and storage behave as expected | Drives not mounted, app data path unclear |
This framework prevents a common beginner mistake: treating the CasaOS installer as the only important step. In practice, the installer is just one layer in a longer path from hardware to a working home server dashboard.
Step 1: Choose the Right Base OS
Choose a base OS that is supported, well documented, and comfortable for your skill level. For most beginners, Debian or Ubuntu Server is easier to research and troubleshoot than a niche or heavily customized Linux distribution.
The choice matters because CasaOS depends on the host system for packages, networking, users, storage, and permissions. If the base OS is unstable or unfamiliar, troubleshooting CasaOS becomes harder later.
Step 2: Flash and Install the Base System
To install a base OS, you usually download an OS image, write it to a USB drive, boot the mini PC from that drive, and follow the installer. This is where BIOS or boot menu access matters.
Before writing an image to a USB drive, confirm that you selected the correct target device. Flashing an image can erase the selected USB drive, and choosing the wrong target can destroy data on another drive.
Step 3: Update the System Before Installing Anything
Once the base OS is installed, update the system before adding CasaOS. This reduces the chance of dependency conflicts, outdated package indexes, or missing tools during installation.
For most beginners, this is also the point where you should confirm that the server has network access and that you can reach it reliably. If you are using SSH, test the connection before starting longer setup steps.
Step 4: Run the CasaOS Installer
After the base system is ready, run the CasaOS installer command from the terminal. CasaOS documentation provides one-line installation options using
wget or curl, so the host needs internet access and the required command-line tools.Do not paste commands into a machine you do not understand without checking the source first. For a home server, especially one that will store personal files, the safer habit is to confirm the installer comes from the official project source before running it with elevated permissions.
Step 5: Open the Web Dashboard and Create Your Admin Account
When installation completes, CasaOS should provide a way to access the dashboard from a browser, usually through the server’s local IP address. Use a device on the same network and open the dashboard address in the browser.
Creating the admin account is not the end of setup. After first login, confirm that the dashboard loads consistently, storage is visible, and any apps you install can store data where you expect.
CasaOS Is Not a Full Operating System: Why That Matters
CasaOS is often described like a home server OS because the dashboard feels like a complete environment. However, in a typical install, the underlying Linux host is still responsible for the low-level system.
This matters because some problems are not really CasaOS problems. If the device does not boot, the issue is likely below CasaOS. If the server has no IP address, the dashboard cannot be reached. If a drive is not mounted by the host OS, it may not appear in the CasaOS interface in the way a beginner expects.
A simple boundary is:
-
Base OS handles boot, users, packages, network, disks, and system services.
-
CasaOS provides the dashboard, app management layer, and simplified home server interface.
-
Docker apps bring their own container behavior, including separate paths and persistent storage rules.
Common Installation Problems New Users Run Into
Many first-time problems happen because users skip one layer of the setup path. The installer might be fine, but the base OS, network, terminal access, storage mount, or Docker path can still be wrong.
The Installer URL Does Not Respond
If the installer URL does not respond, avoid repeatedly running random copied commands from forums or old tutorials. First check whether the server has internet access, whether DNS works, and whether the official install source is reachable from another device.
A practical order is:
-
Test network connectivity on the server.
-
Confirm the command was copied correctly.
-
Check whether
curlorwgetis installed. -
Verify the installer source from the official CasaOS page.
-
Wait and retry later if the endpoint appears temporarily unavailable.
The Server IP Address Is Hard to Find
If you cannot find the server IP address, the dashboard may be working but unreachable. Check your router’s device list, the server console, or the output of network commands on the base OS.
This is also why Ethernet is often easier for first setup. A wired connection removes Wi-Fi credential and signal issues from the initial install path, making it easier to isolate problems.
Drives Do Not Appear in the Dashboard
If a drive does not appear in CasaOS, first check whether the base OS sees the drive. CasaOS cannot reliably manage storage that the host system has not detected, mounted, or given proper permissions.
For new drives, this may involve formatting, mounting, and confirming that the mount persists after reboot. Be careful with formatting operations because they can erase existing data.
Docker Apps Work but Storage Paths Feel Confusing
A Docker app can appear to work even when the storage path is not what the user expects. Containers can create, change, and delete files inside their own environment, but those changes may disappear if the container is removed unless persistent storage is configured.
Docker explains this through volumes: the Docker container data persistence guide describes volumes as a storage mechanism that persists data beyond the lifecycle of an individual container. For CasaOS users, this means app data, host storage, and container paths should be checked before treating a setup as finished.
How to Check Whether Your Home Server Setup Is Working
A working CasaOS setup is more than a successful install command. You should verify the system from the hardware layer up to the app layer.
Use this checklist after installation:
-
The mini PC boots without the installer USB.
-
The base OS is reachable locally or through SSH.
-
The CasaOS dashboard opens from another device on the same network.
-
You can log in with the admin account you created.
-
Internal or external drives appear where expected.
-
A simple app can be installed and opened.
-
App data is stored in a location you understand.
-
The server still works after a reboot.
If any item fails, use the Base-to-Dashboard Setup Path to locate the likely layer. Hardware and boot issues are different from dashboard access issues, and Docker storage issues are different from CasaOS installation issues.
When CasaOS May Not Be the Best Long-Term Choice
CasaOS is a good fit for users who want a simple dashboard for lightweight self-hosting and home server apps. It may not be the best fit if your main goal is advanced storage management, complex virtualization, large multi-drive NAS workflows, or a system where you want to manage Docker Compose directly without a dashboard layer.
This is not a reason to avoid CasaOS. It is a reason to match the tool to the job. For most beginners, CasaOS can be a useful entry point; for more complex storage-heavy setups, you may eventually need a more specialized NAS or virtualization platform.
A practical decision rule:
| If Your Main Goal Is... | CasaOS Fit | What to Consider |
| Learning self-hosted apps | Strong fit | Start simple, then learn Docker paths |
| Running a few home apps | Often a good fit | Confirm storage persistence |
| Advanced multi-drive NAS | Depends on setup | Compare dedicated NAS systems |
| Heavy virtualization | Limited fit | Consider Proxmox or another hypervisor |
| Maximum control over Docker | Depends on skill level | Plain Linux + Docker Compose may be clearer |
How to Move From Concept to Configuration
Once you understand the generic setup path, the next step is applying that logic to a real system or device. A device-specific setup may still need its own image, boot mode, USB flashing process, installation target, and first-login method.
For example, the ZimaOS installation guide shows how one x86-64 NAS-oriented system handles image download, bootable USB creation, UEFI boot requirements, installation, reboot, and first web access. That kind of official installation path is useful because it turns the general “prepare, flash, boot, install, access” model into a concrete configuration sequence.
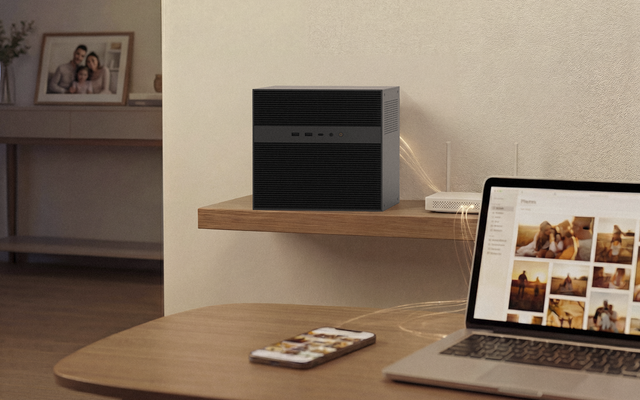
For users turning a small server into a lightweight self-hosted environment, ZimaBoard 2 single-board server fits the type of low-power, always-on device scenario where local services, Docker apps, and storage expansion often become the next practical step. It should be treated as one possible device path, not the only way to build a home server.
FAQ
Can I install CasaOS on any mini PC?
You can install CasaOS on many mini PCs, but not every device is automatically a good fit. Check the CPU architecture, base OS compatibility, storage, boot support, and whether you can access the machine locally or through SSH.
Do I really need Debian or Ubuntu before installing CasaOS?
In many beginner setups, yes, you should install a supported Linux base system first. CasaOS usually runs on top of that host system, so the base OS handles boot, networking, users, storage, and package management.
Is CasaOS the same as a full NAS operating system?
Not exactly. CasaOS provides a home server dashboard and app management layer, while the base OS still handles low-level system behavior. For advanced storage pools, RAID planning, or virtualization, you may need to compare it with more specialized systems.
What happens if the CasaOS installer link is down?
First confirm that your server has internet access and that
curl or wget works. Then check the official CasaOS setup source from another device before trying third-party copies of the installer command.Should I use CasaOS, plain Debian with Docker, or a dedicated NAS system?
Use CasaOS if you want a simpler dashboard for getting started with self-hosted apps. Use plain Debian with Docker if you want more direct control and are comfortable managing services manually. Consider a dedicated NAS or virtualization system if your main goal is complex storage, many drives, or heavier infrastructure.

Recommended products

Support & Tips
More to Read

How to Deploy a Local LLM Without Breaking Storage or Apps
This guide explains how to safely deploy a local LLM on a shared home NAS or home server. It covers model storage paths, Docker...
What to Check Before Adding a GPU to a Home NAS
This guide explains what to check before adding a GPU to a home NAS. It covers workload fit, PCIe slots, physical clearance, PSU headroom,...
What Are the Local AI Limits of a Home NAS?
This guide explains the local AI limits of a home NAS by workload type, hardware resources, and real-world impact. It covers OCR, media analysis,...


