
ZimaOS kan voor testdoeleinden in een Proxmox-virtuele machine worden geïnstalleerd. Een tutorial van de IceWhale Community uit mei 2025 beschreef hiervoor een eenvoudige methode met UEFI-firmware en USB passthrough. De oorspronkelijke auteur maakte een normale VM aan, selecteerde OVMF/UEFI, gaf een USB-installer door aan de VM, plaatste die USB als eerste in de opstartvolgorde en startte de ZimaOS-installer via de Proxmox-console.
Dit moet worden beschouwd als een communityworkflow voor tests, niet als garantie dat elke ZimaOS-functie officieel wordt ondersteund onder virtualisatie. In latere communityberichten werd expliciet vermeld dat ZimaOS is ontworpen als zelfstandig besturingssysteem en dat gevirtualiseerde implementaties beperkingen kunnen introduceren op het gebied van geneste virtualisatie, device passthrough, opslag en de guest-agent. In 2026 meldde een andere gebruiker bovendien dat het moeilijk was om het oude Proxmox-proces met nieuwere ZimaOS-installers te reproduceren. Gebruik de historische schermafbeeldingen daarom om de architectuur te begrijpen, zonder ervan uit te gaan dat elke exacte stap uit 2025 ongewijzigd is.
Stap 1: Maak de Proxmox-VM aan met UEFI
De belangrijkste VM-instelling in de brontutorial was het firmwaretype. Selecteer tijdens het aanmaken van de VM een OVMF/UEFI-BIOS in plaats van SeaBIOS.
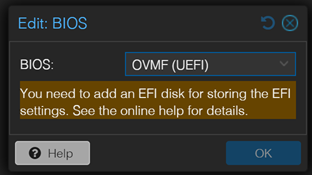
Als de VM al met de verkeerde firmware was aangemaakt, zei de oorspronkelijke auteur dat dit kon worden gewijzigd via:
VM → Hardware → BIOS → OVMF (UEFI)In het historische bericht stond dat voor die specifieke testconfiguratie geen EFI-schijf nodig was. Een nieuwer script van derden voor Proxmox-ZimaOS maakt in de handmatige workflow nu wel EFI-opslag aan. Beschouw dit daarom als een verschil in versie of tooling, niet als een tegenstrijdigheid.
Voorbeeld van de VM-definitie uit de oorspronkelijke thread
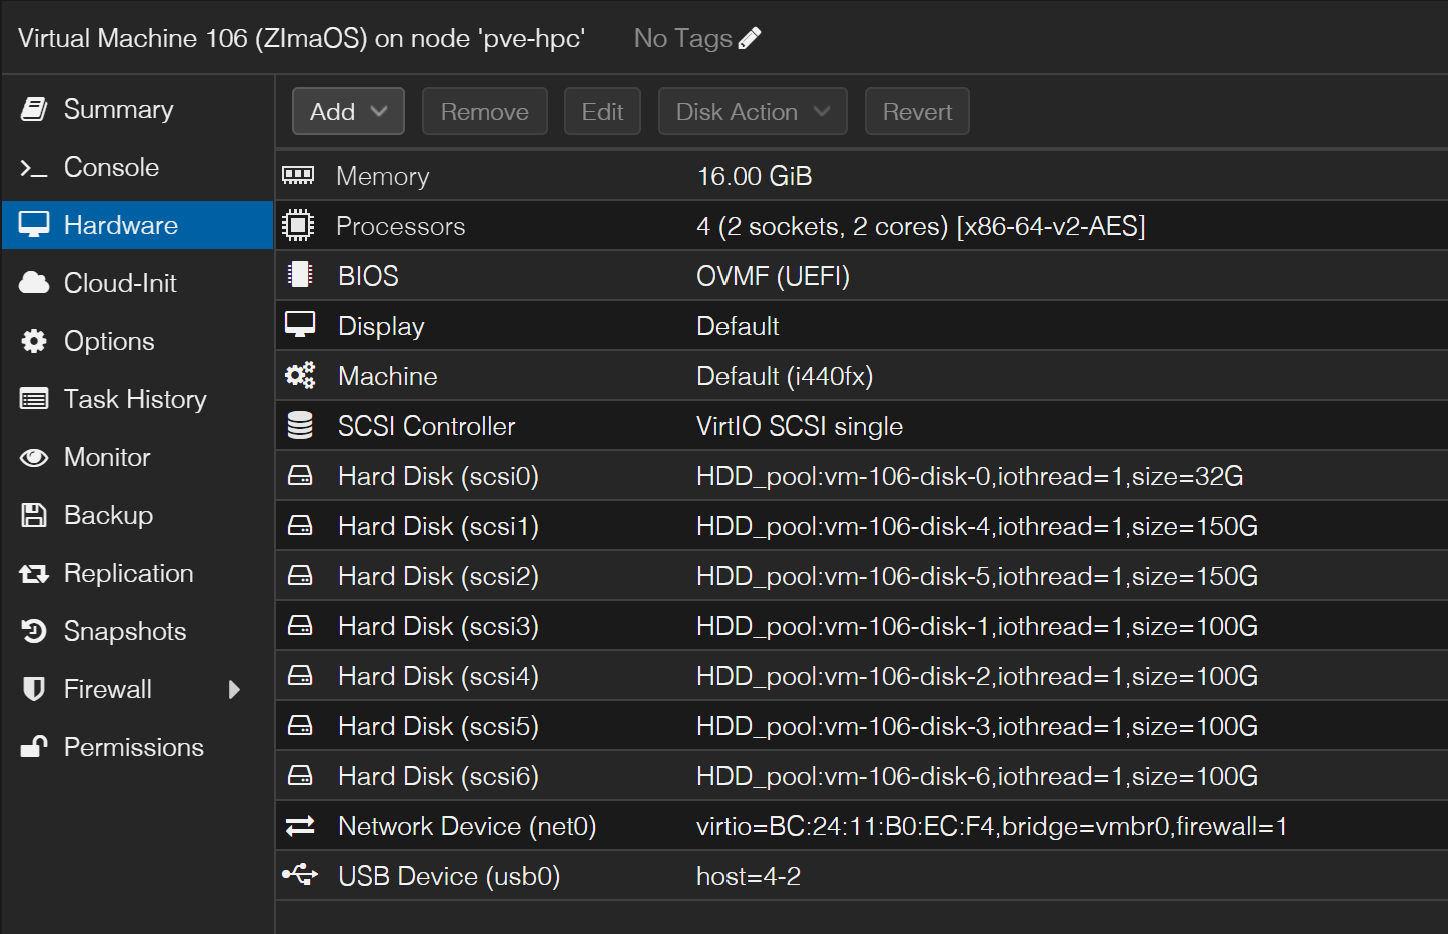
CPU, geheugen, grootte van de virtuele schijf en netwerkinstellingen kunnen worden aangepast aan de testbelasting. Gebruik geen te kleine VM om de prestaties van opslag, Docker, transcodering of ZVM te beoordelen als die later op echte hardware zullen worden uitgevoerd.
Stap 2: Gebruik de huidige ZimaOS-installer
In de tutorial uit 2025 werd lezers aangeraden de nieuwste ZimaOS-installerimage te downloaden.
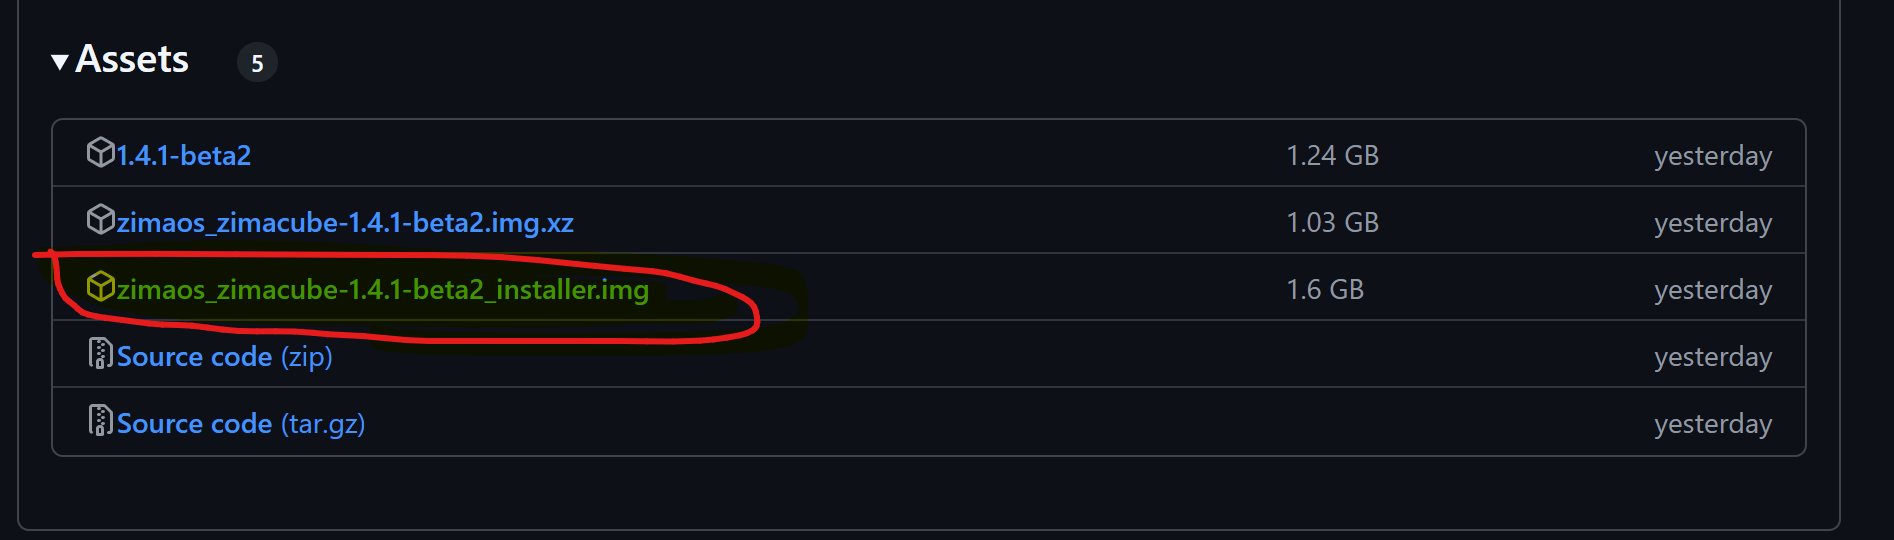
Het release- en distributiemodel van de ZimaOS-installer is sinds deze thread uit 2025 gewijzigd. Neem de oude namen van de 1.4.0- of 1.4.1-bèta-images niet hardcoded over in een actuele workflow.
Stap 3: Schrijf het installatieprogramma naar USB
De oorspronkelijke auteur schreef het installatieprogramma met Balena Etcher naar een fysieke USB-schijf en sloot dat USB-apparaat vervolgens aan op de fysieke Proxmox-host.
Deze methode is eenvoudig omdat hiermee een normaal installatiepad op bare metal binnen de VM wordt nagebootst. Er is wel een vrije USB-stick en USB-passthrough in Proxmox voor nodig.
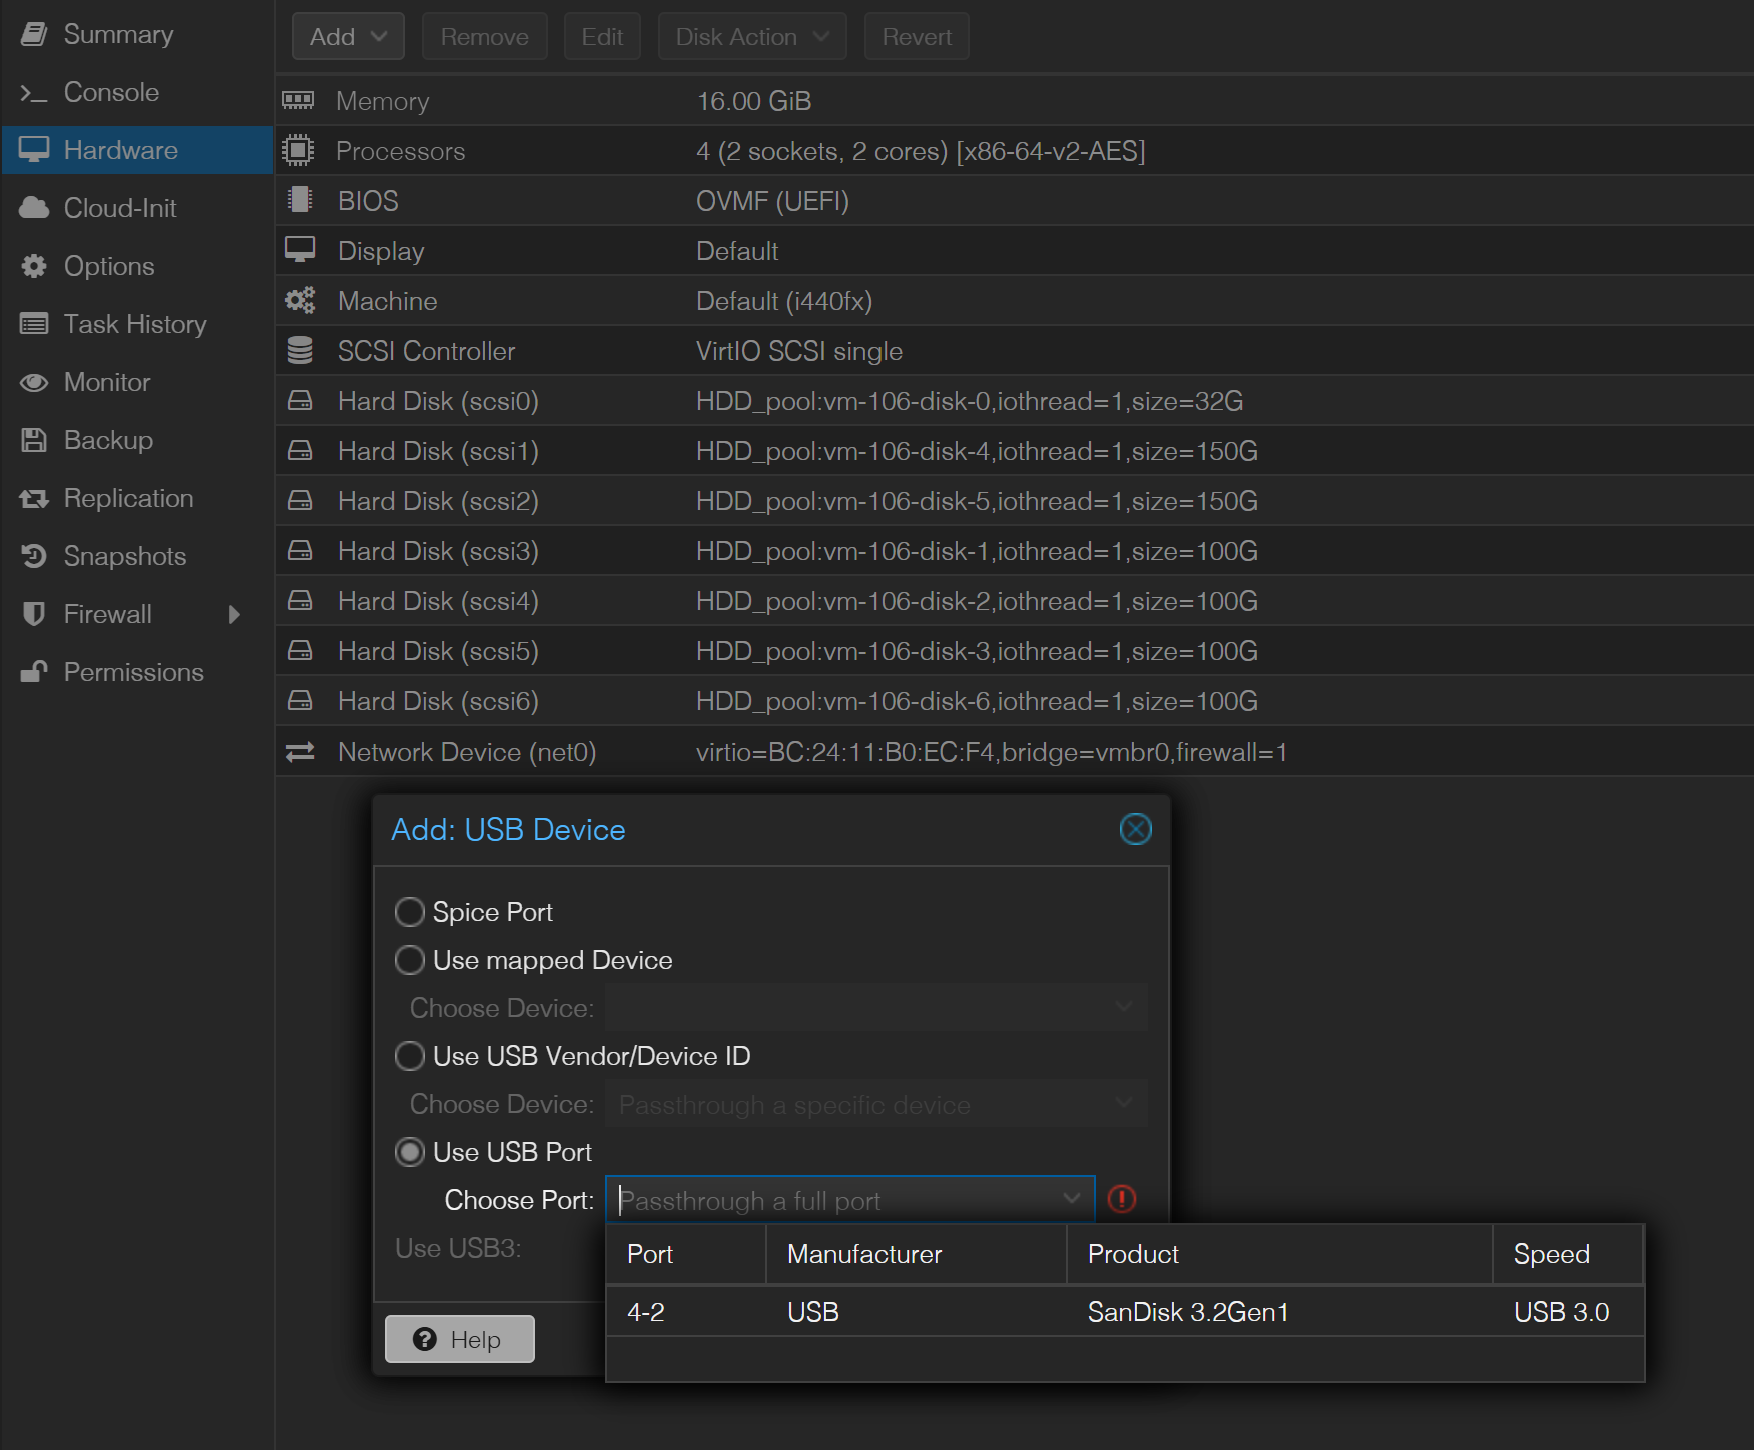
Stap 4: Geef de installatie-USB door aan de VM
In Proxmox:
VM → Hardware → Toevoegen → USB-apparaatSelecteer USB-poort gebruiken en kies de poort met de ZimaOS-installatieschijf.
Stap 5: Plaats de USB als eerste in de opstartvolgorde
Open:
VM → Opties → OpstartvolgordeSchakel het doorgestuurde USB-apparaat in en plaats het boven de systeemschijf van de VM.
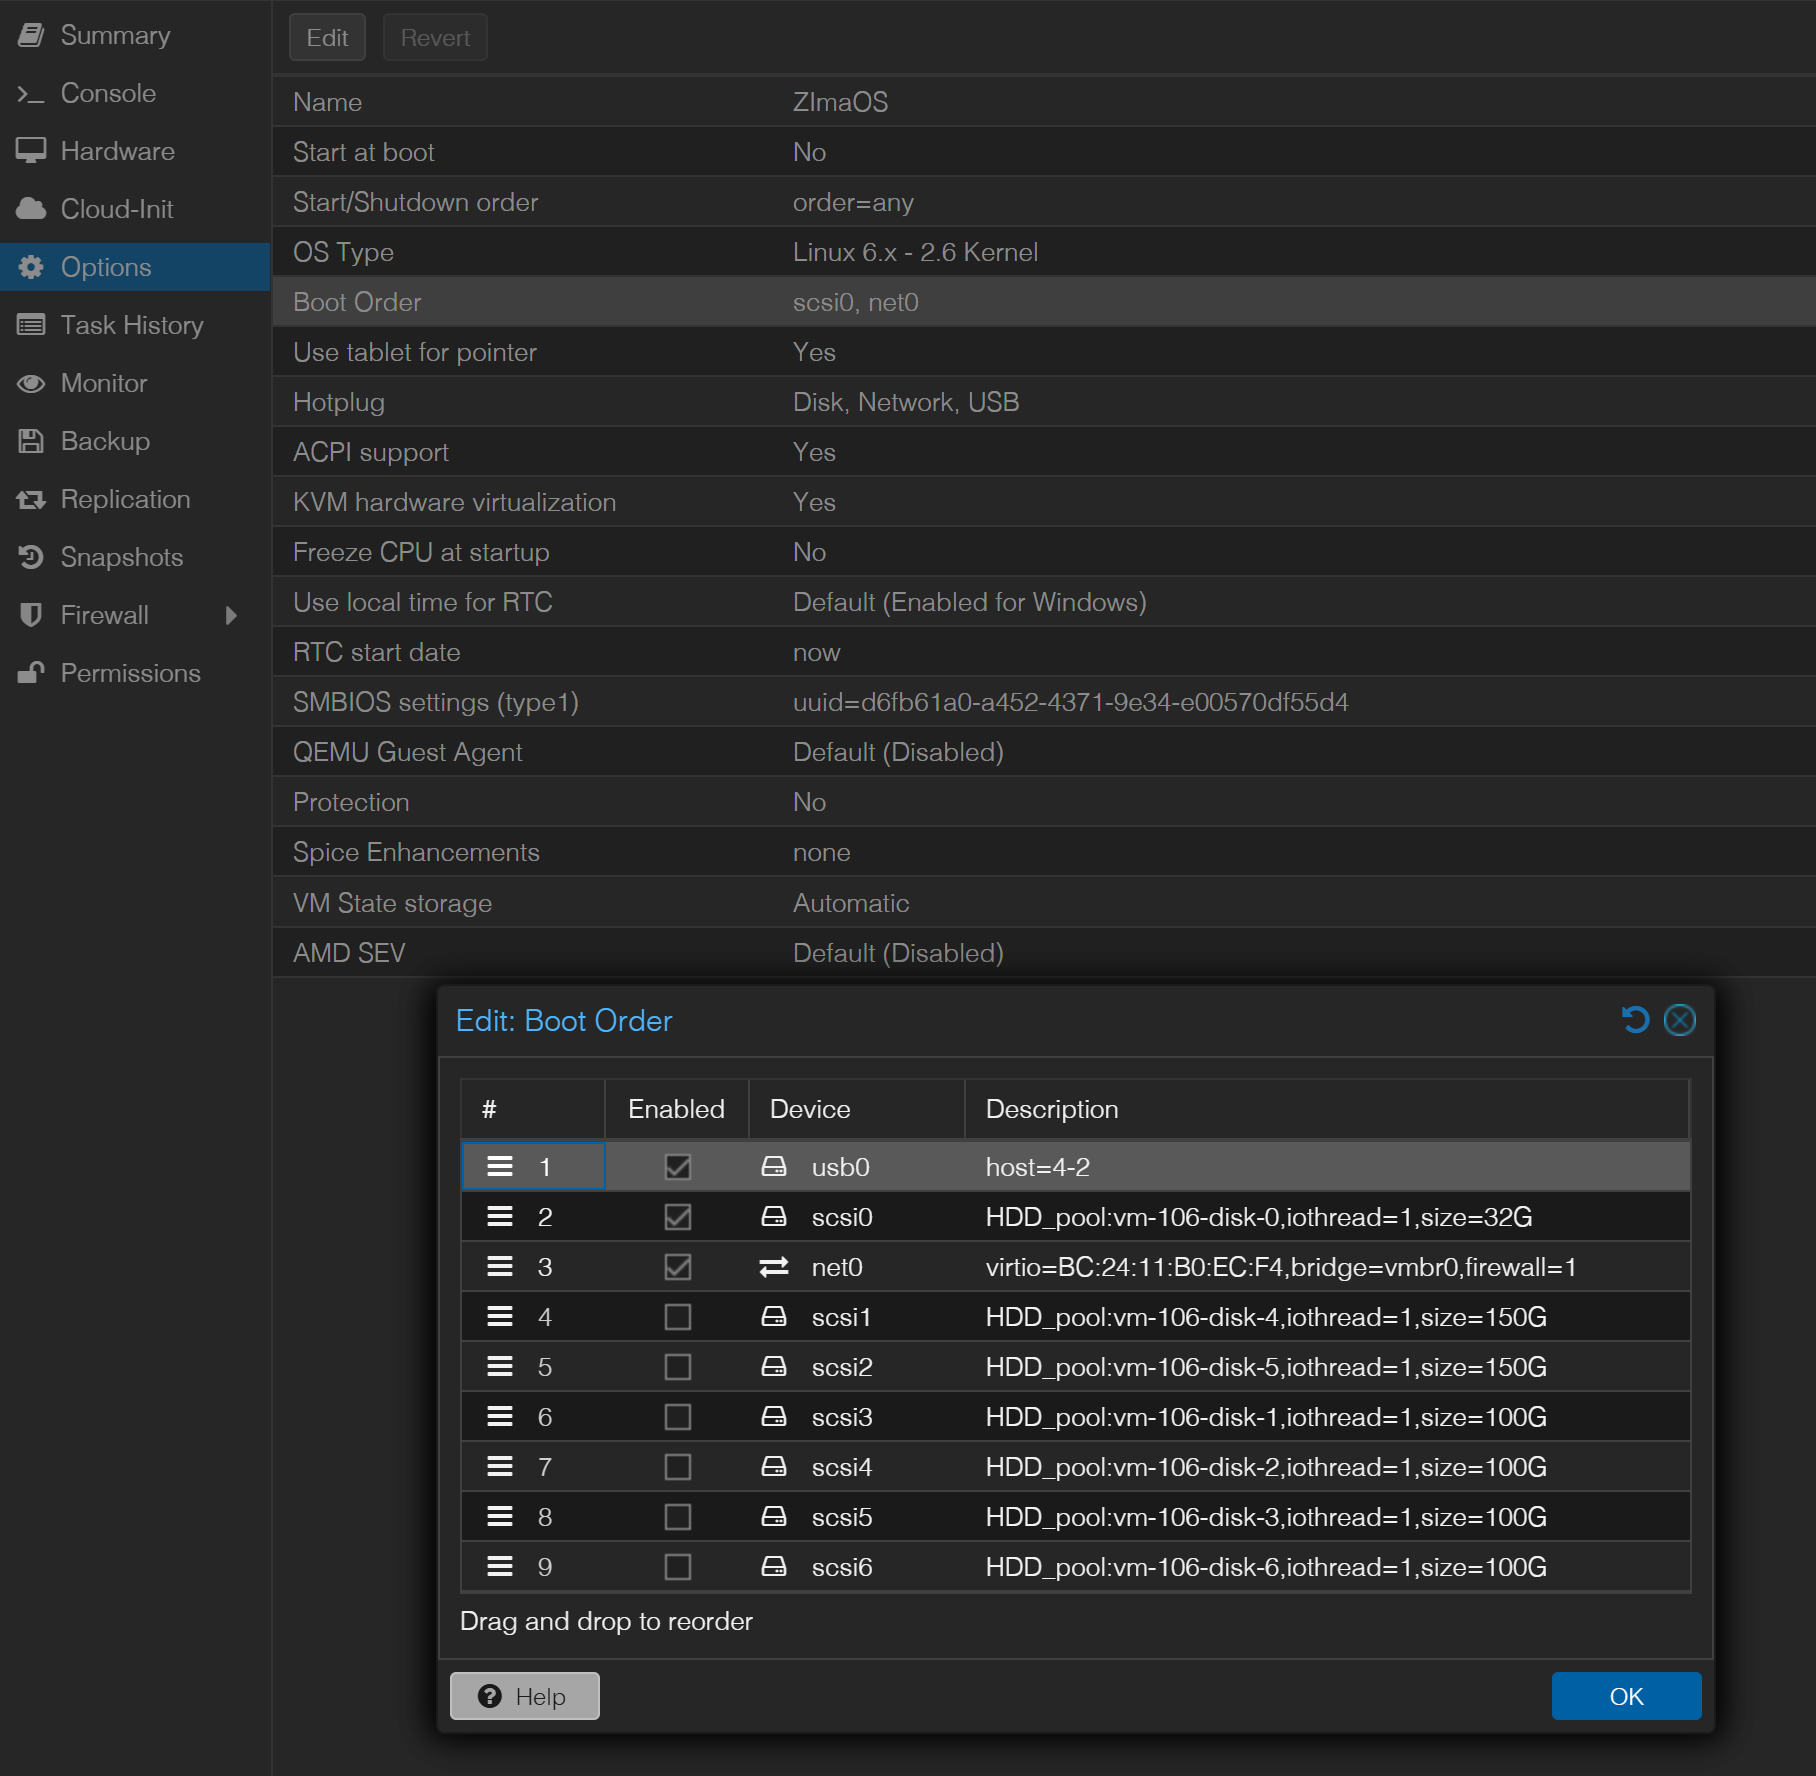
Stap 6: Start de VM en voer de installer uit
Open de Proxmox-console en start de VM. De ZimaOS-installer zou moeten verschijnen. Installeer ZimaOS op de beoogde virtuele schijf en verwijder het installatiemedium of plaats het lager in de opstartvolgorde nadat de installatie is voltooid.
De oorspronkelijke auteur meldde dat ZimaOS 1.4.0 en 1.4.1-beta2 in deze configuratie opstartten, terwijl 1.4.1-beta1 dat niet deed. Deze versiespecifieke resultaten zijn historisch en mogen niet worden gebruikt om een huidige release te kiezen.
Een latere communityreactie verwees naar een Proxmox-automatiseringsscript
In juli 2025 zei een andere deelnemer dat die ZimaOS met een script in Proxmox had geïnstalleerd. De link verwijst nu naar de externe R0GGER/proxmox-zimaos-repository.
De repository ondersteunt momenteel zowel automatische als handmatige installatieworkflows. De eigen documentatie vermeldt een belangrijke huidige beperking: de distributie van ZimaOS is gewijzigd van rechtstreeks gepubliceerde images naar installers, waardoor het automatische script mogelijk een oudere basis installeert en daarna een update binnen ZimaOS vereist.
De repository bevat ook een afzonderlijke installatievideo, maar die video was niet opgenomen in het oorspronkelijke IceWhale-bericht. Daarom wordt deze als externe verwijzing behouden en niet als broninhoud gemigreerd.
Controleer scripts voor installatie van derden voordat je ze uitvoert
De communityrepository bevat opdrachten die een shellscript downloaden en het rechtstreeks op de Proxmox-node uitvoeren. Dat is handig, maar geeft het script beheerdersrechten voor het aanmaken van VM's en het beheren van opslag en netwerken.
Controleer de broncode van het script voordat je het uitvoert op een Proxmox-host met belangrijke VM's of schijven. Een virtualisatiehost is een systeem met grote impact en een verkeerd opslagdoel kan gegevens vernietigen.
QEMU Guest Agent is een bekende beperking van standaard ZimaOS
Een latere reactie vroeg hoe je qemu-guest-agentCommunitylid gelbuilding meldde dat standaard ZimaOS een onveranderlijk en vergrendeld systeem is, zonder een normale workflow met een pakketbeheerder om de guest agent te installeren.
Ze probeerden de agent ook in Docker uit te voeren, maar het Proxmox-virtio-kanaal:
/dev/virtio-ports/org.qemu.guest_agent.0functioneerde in hun test niet correct via de container.
De brondiscussie biedt daarom geen bevestigde oplossing voor QEMU Guest Agent in standaard-ZimaOS. Beloof geen normale functionaliteit van de guest agent alleen omdat de VM zelf opstart.
Gevirtualiseerd ZimaOS is nuttig voor tests, maar kent ondersteuningsgrenzen
In een latere reactie van de ZimaOS-communityondersteuning in december 2025 werd opnieuw gesteld dat ZimaOS is ontworpen als zelfstandig besturingssysteem en dat virtuele omgevingen niet officieel worden ondersteund, hoewel gebruikers Proxmox en VirtualBox werkend hebben gekregen.
Dat betekent dat een Proxmox-VM uitstekend geschikt is voor:
- de WebUI evalueren;
- Docker-applicaties testen;
- de opslaginterface leren kennen;
- updates uitproberen voordat je een afzonderlijk testsysteem verplaatst.
Het is minder representatief voor:
- direct schijfbeheer;
- USB-passthrough;
- GPU-passthrough;
- geneste virtualisatie van ZVM;
- hardwarematige slaapstand en energiebeheer;
- QEMU Guest Agent-integratie.
Opmerking over SMB-toegang in Windows 10 uit de reacties
Een latere gebruiker meldde dat Windows 11 en Linux Mint de ZimaOS-VM onmiddellijk vonden, terwijl Windows 10 handmatig een netwerkstation moest koppelen met Verbinding maken met andere referenties.
Dit is een detail over SMB-authenticatie aan de clientzijde, geen vereiste voor Proxmox-netwerken. Als de ZimaOS WebUI werkt maar Windows geen share kan koppelen, los je de SMB-inloggegevens afzonderlijk van de basisnetwerkadapter van de VM op.
Checklist voor ZimaOS op Proxmox
- Maak een test-VM met UEFI/OVMF-firmware.
- Geef de VM voldoende CPU, RAM, schijfruimte en een overbrugd netwerk voor de werklast die je wilt evalueren.
- Gebruik het huidige ZimaOS-installatieprogramma in plaats van een oude bètaversie uit het bericht van 2025.
- Schrijf voor de oorspronkelijke werkwijze het installatieprogramma naar een USB-stick en koppel die door aan de VM.
- Plaats het installatiemedium bovenaan in de opstartvolgorde.
- Installeer het systeem op de virtuele schijf en verwijder of koppel daarna het installatiemedium los.
- Ga er niet van uit dat QEMU Guest Agent beschikbaar is in standaard-ZimaOS.
- Controleer scripts van derden voor Proxmox voordat je ze als root uitvoert.
- Gebruik een VM om te testen, niet als bewijs dat alle hardware-specifieke functies van ZimaOS officieel worden ondersteund.
Veelgestelde vragen over ZimaOS op Proxmox
Kan ZimaOS in Proxmox draaien?
Ja, communitygebruikers hebben het succesvol uitgevoerd om te testen. In de bronhandleiding werden UEFI en USB-passthrough gebruikt.
Is Proxmox een officieel ondersteunde ZimaOS-implementatie?
In reacties van de community werd gevirtualiseerd ZimaOS als niet-ondersteund beschreven, hoewel Proxmox en VirtualBox kunnen werken. Beschouw dit als een community-/testimplementatie.
Heb ik UEFI nodig?
In de oorspronkelijke handleiding werd OVMF/UEFI gebruikt en werd dit aangeduid als de cruciale firmware-instelling.
Kan ik qemu-guest-agent installeren?
De brondiscussie vond geen werkende methode voor standaard-ZimaOS. Het onveranderlijke systeem en de toegang tot het virtio-kanaal werden als belemmeringen genoemd.


