
ZimaCube vs DIY NAS: Which One Is Right for You?


Buy a prebuilt system or build your own? This is a question every NAS buyer eventually has to face.
ZimaCube starts at $800 for the standard version, with the Pro version costing more. If you are familiar with hardware, a used-platform DIY build may immediately come to mind. So why should you still consider ZimaCube?
This article does not dodge the question. We compare the real differences between a prebuilt system and a DIY NAS, item by item, to help you choose what actually fits your needs.
First, Let’s Calculate the Real Cost of Owning a ZimaCube
Take the standard version with an i3-1215U as an example. It comes with 8GB DDR5 memory and a 256GB NVMe system drive. This configuration is enough to boot, but not enough for serious use.
A more realistic starting cost looks like this:
| Item | Cost |
|---|---|
| ZimaCube standard host | $800 |
| 32GB DDR5 SO-DIMM, self-installed | ~$80–100 |
| Storage drives, depending on your needs | Varies |
| Realistic starting cost | ~$900 |
If you start from zero and fully populate the six drive bays plus NVMe storage, the total investment will be around $1,400–$1,500. This number will serve as the baseline for the comparisons below.
Comparison 1: What Can You Build Yourself at the Same Price?
With an $800 budget, you can put together something like this on the used or consumer hardware market:
| Component | Option A: Used Server Build | Option B: New Consumer Build |
|---|---|---|
| CPU + motherboard | Used Xeon + server motherboard, ~$200 | i3-12100 + H610, ~$250 |
| Case | Used tower server case, ~$80 | Node 804, ~$130 |
| Memory | 32GB DDR4 ECC, ~$60 | 32GB DDR4, ~$70 |
| Power supply | Used 500W PSU, ~$50 | New 450W 80 Plus Bronze PSU, ~$60 |
| System drive | 256GB NVMe, ~$30 | 256GB NVMe, ~$30 |
| Network card | Onboard Gigabit Ethernet | Add-on 2.5GbE card, ~$40 |
| Total | ~$450–500 | ~$580–620 |
On paper, the DIY option is indeed 30%–40% cheaper. But numbers are not the same as experience. Let’s look deeper.
Comparison 2: Key Differences by Category
Size and Appearance
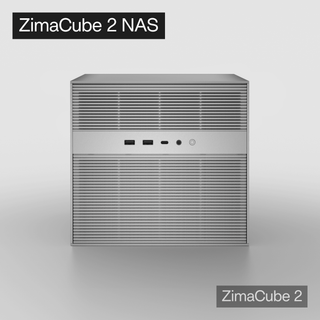
ZimaCube has a compact body. It takes up roughly the same desk footprint as an HP MicroServer, but it is shorter. The silver or black aluminum chassis does not look out of place on a desk.
A DIY build, especially one using a tower server case, is usually larger, louder, and more rugged-looking. A case like the Node 804 looks better, but it is still more than twice as large.
Conclusion: If you plan to place your NAS in the living room or on a desk, ZimaCube has a clear advantage in appearance and size. If it will sit in a storage room or rack, the size of a DIY build is less of an issue.

Port and Expansion Options
| Feature | ZimaCube | Used DIY Build | New DIY Build |
|---|---|---|---|
| 2.5GbE | Dual ports standard | Requires add-on card | Requires add-on card |
| 10GbE | Standard on Pro version | Requires add-on card | Requires add-on card |
| Thunderbolt 4 | Dual ports | Almost impossible | Requires a specific motherboard |
| NVMe slots | 6, 4+2 | Depends on motherboard | Usually 2–3 |
| PCIe expansion | Dual slots | Usually more | Depends on motherboard |
The key differentiator for ZimaCube is its dual Thunderbolt 4 ports. This configuration is rare in the NAS category. For video creators and Mac users, editing media directly from a NAS over Thunderbolt is a real productivity boost — and it is almost impossible to replicate in a DIY build at a reasonable cost.
Conclusion: In terms of ports and expansion, DIY can catch up with most specs by adding network cards or HBAs. But Thunderbolt 4 is ZimaCube’s unique advantage.
Time to Get Started
- ZimaCube: Unbox → plug in power → connect Ethernet → access from browser. You can start using it in 10 minutes.
- DIY: Buy parts → wait for delivery → assemble the system, 2–4 hours → install the OS, 1 hour → troubleshoot for an unknown amount of time.
For first-time hardware builders, a DIY NAS can take one or two weekends from ordering parts to getting everything running. If you enjoy the process, that is part of the fun. If you only want the NAS to work, it becomes a burden.
Conclusion: If you enjoy building PCs, those two days are fun. If you only want the result, ZimaCube saves you that time.
Maintenance and After-Sales Support
- ZimaCube: Whole-system warranty. If something goes wrong, you contact the manufacturer. The system comes pre-installed and ready to use.
- DIY: Each part has its own warranty. When something breaks, you have to figure out whether the issue comes from the motherboard, power supply, memory, or something else.
The frustration of troubleshooting compatibility issues alone often peaks late at night.
Conclusion: ZimaCube is for people who do not want to become their own IT operations team. DIY is for people who enjoy troubleshooting.
Performance Ceiling
- ZimaCube: Limited by mobile-class i3/i5 processors and PCIe bandwidth allocation. It is more than enough for daily NAS use plus several VMs, but it will not become a render farm.
- DIY: A used Xeon build may offer stronger multi-core performance and more PCIe lanes. It can also support higher-power GPUs. The trade-offs are higher power consumption and more noise.
Conclusion: If your needs go beyond “NAS + Docker + a few VMs,” such as building a GPU cluster for AI inference, DIY has the higher ceiling. But for 95% of users, ZimaCube’s performance limit is far above what they actually need.

Who Should Buy ZimaCube?
- You want a refined NAS/server that looks good on a desk
- You need Thunderbolt 4 direct connection for video or design workflows
- You do not want to spend time sourcing parts, assembling hardware, installing systems, and fixing compatibility issues
- You have limited space at home and care about device size
- You are willing to pay for out-of-the-box usability and whole-system warranty
Who Should Build a DIY NAS?
- You are on a tight budget and are willing to trade time for savings
- You enjoy building PCs and tinkering with hardware
- You need a specific hardware combination, such as more than eight drive bays or an all-flash 10GbE setup
- You already have spare used parts that can be reused
- You are not sensitive to noise or size because the NAS will live in a storage room or rack
An Honest Middle Ground
If you ask an experienced DIY builder whether ZimaCube is worth it, they will probably say, “I can build something more powerful for the same money.” They are not lying.
But that statement leaves out three things:
- Time cost: Sourcing parts, assembling the system, installing the OS, and troubleshooting can take several hours or even one or two weekends. That time is worth different amounts to different people.
- Integration: A compact prebuilt system with six drive bays, four NVMe slots, dual Thunderbolt 4 ports, and dual 2.5GbE ports is almost impossible to recreate through DIY in the same form factor.
- Certainty: You know all the parts work together because the manufacturer has already validated the system for you.
ZimaCube is not priced to compete with a used Xeon build on raw value. It sells integration, design, and peace of mind. Whether those are worth paying for depends on who you are.
Final Decision Framework
| Your Situation | Recommendation |
|---|---|
| NAS beginner who wants to get started quickly | ZimaCube + ZimaOS |
| Video creator who needs Thunderbolt direct connection | ZimaCube, because Thunderbolt 4 is the key requirement |
| Extremely limited budget | Used DIY build |
| You enjoy building PCs and tinkering | DIY |
| Need NAS + software router + VM all in one, but do not enjoy hardware tinkering | ZimaCube + Proxmox |
| Already have many spare parts | DIY, reuse what you have and save money |
There is no universally correct choice. There is only the choice that fits your current stage.
Acknowledgment:
This article is based on the ZimaCube Experience Blog by community user Bob. Special thanks to Bob for his detailed Proxmox hands-on notes and sincere sharing.

Recommended products
Zima Campaign Hub
More to Read

How a Small NAS Became a Family Archive With ZimaOS
A real home NAS story about preserving medical records, family photos, music, and everyday memories—and the practical lessons for protecting irreplaceable data.
2026 Software Freedom Day: The Best Open-Source Apps to Self-Host at Home
Explore useful self-hosted tools for storage, photo backup, media streaming, documents, and home automation on one reliable server at home.

World Photography Day: How to Back Up and Organize a Lifetime of Photos
Gather scattered photos, build a simple archive, automate backups, verify recovery, and learn when centralized storage becomes worthwhile.


