
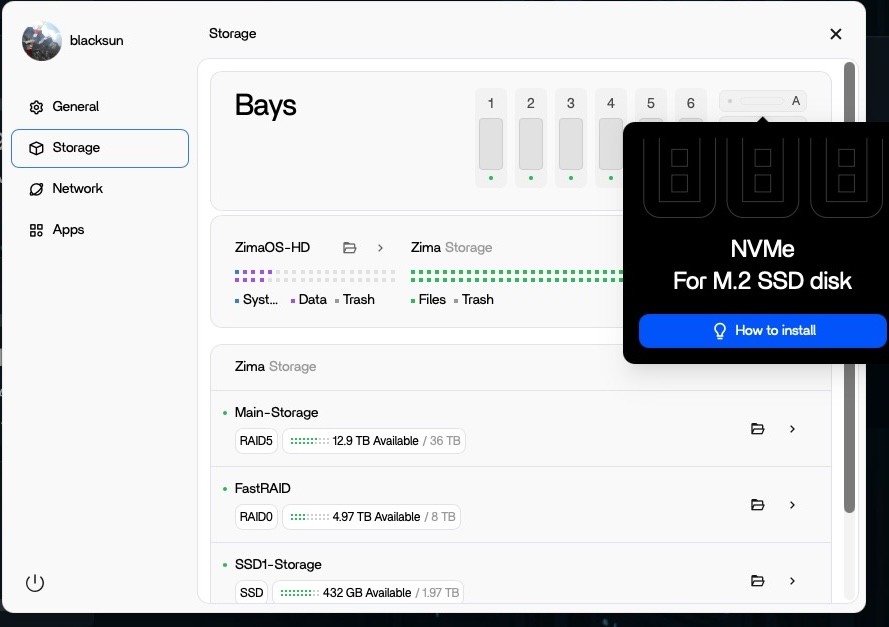
If an NVMe SSD is detected by Linux but shown in the wrong ZimaCube bay—or not shown correctly in the Storage UI—the problem can be the ZimaOS bay-mapping metadata rather than the SSD itself. Check PCIe detection first, then only use the local-storage.conf reset on hardware for which IceWhale has documented or recommended that workaround.
The source thread has an important model boundary: deleting the NVME=... line and restarting zimaos-local-storage.service fixed the original ZimaCube case, but IceWhale later said that method applied to ZimaCube and did not work the same way on a generic Intel NUC.
Step 1: Confirm the NVMe Exists at the PCIe Layer
Run:
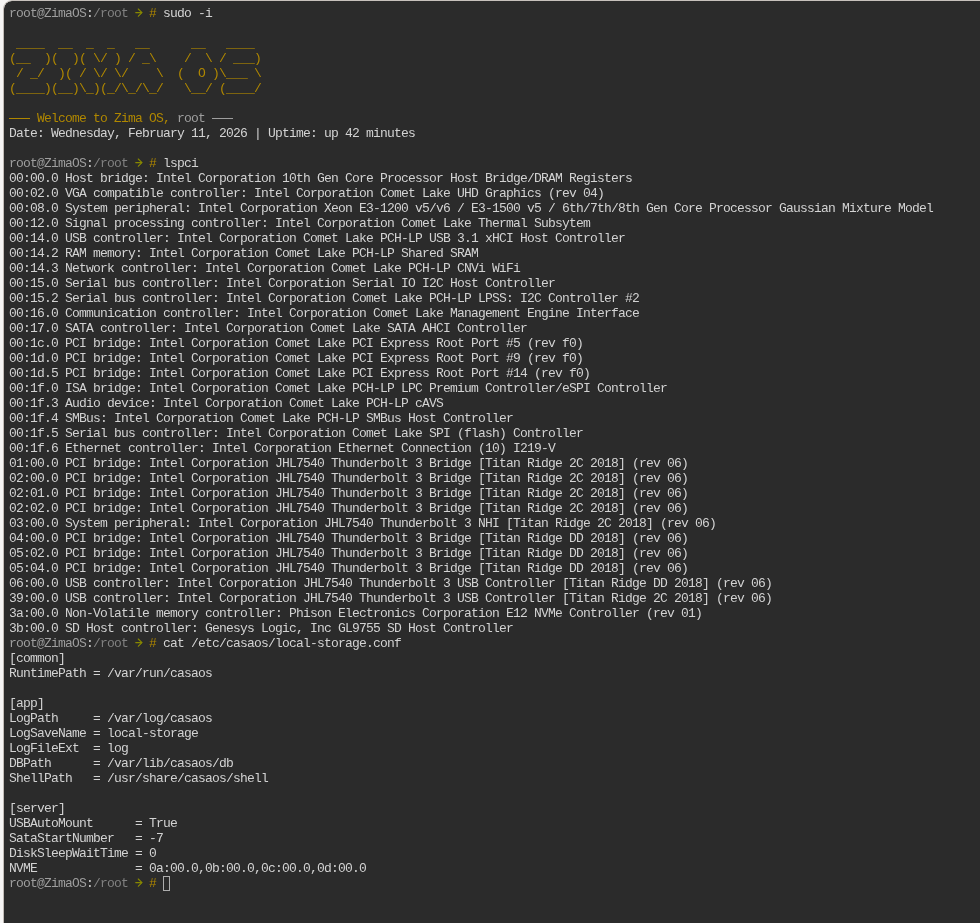
lspci | grep -i -E 'non-volatile|nvme'
lsblk -o NAME,SIZE,MODEL,SERIAL
If the SSD does not appear in either hardware view, the problem is not merely the ZimaOS bay graphic.
The storage troubleshooting guide is useful when the NVMe is missing at the hardware layer rather than only misrepresented in the web UI.
Step 2: Check the ZimaCube Bay Mapping
On the affected ZimaCube, IceWhale asked for:
sudo -i
cat /etc/casaos/local-storage.conf
The configuration contained an explicit NVME=... mapping that no longer matched the SSD location.
Step 3: Use the Reset Only on the Intended Model
IceWhale instructed the ZimaCube user to remove the NVME=... line and then run:
systemctl restart zimaos-local-storage.serviceThe original user confirmed this fixed the UI.
Why Moving the SSD Can Recreate the Problem
A later user moved the SSD from one bay to another and the incorrect mapping returned. That makes sense if the cached/custom bay map no longer matches the new physical slot.
Do Not Apply This to Generic Hardware Blindly
A user on an Intel NUC tried the same edit and the NVMe line returned without fixing the UI. IceWhale explicitly said the method applied to ZimaCube and that broader custom-drive-compartment behavior for other models was still being developed.
Check the Current Storage UI First
The current ZimaOS Storage Setup guide documents current disk detection and storage setup. If the SSD is visible as normal storage but the bay graphic is wrong, treat it as a presentation/mapping issue.
Use Root Privileges Carefully
The source thread also clarified that editing /etc/casaos/local-storage.conf requires root privileges. Do not force-write the file from a normal user session.
Separate Physical Detection from Bay Presentation
ZimaCube's Storage page tries to map detected NVMe controllers to physical slot labels. That extra presentation layer is why a disk can be perfectly visible to Linux yet appear under the wrong letter or with an odd bay graphic.
Before editing configuration, record the SSD model, PCI address, and physical slot. This gives you a before/after map and reduces the chance of “fixing” the wrong device.
Back Up local-storage.conf Before Editing
If IceWhale support directs you to modify the file, make a copy first:
sudo -i
cp /etc/casaos/local-storage.conf /etc/casaos/local-storage.conf.bak
Then make only the requested change. Avoid rewriting unrelated storage settings because the file contains more than the NVMe mapping.
Restart the Storage Service, Not the Whole Server First
The verified ZimaCube fix restarted zimaos-local-storage.service after clearing the stale mapping. This is a narrower test than rebooting the entire NAS and makes it easier to tell whether the local-storage service rebuilt the bay map correctly.
If the Mapping Keeps Returning
When the same stale mapping reappears after every restart, stop repeatedly editing the file. Capture the generated configuration, lspci, lsblk, physical slot, and current ZimaOS version for support. Persistent regeneration means another component is writing the mapping.
The {ilink("https://shop.zimaspace.com/pages/zimaos-installation-troubleshooting-guide","storage troubleshooting guide","Collect hardware detection and storage metadata before making repeated system-level edits")} provides a safer escalation framework.
FAQ
Does deleting the NVME line erase the SSD?
The source workaround changed the bay-mapping configuration, not the disk contents. Still, back up important data before system-level storage changes.
Why is the SSD visible in lspci but not correctly in the UI?
That points to ZimaOS storage metadata or bay mapping rather than basic PCIe detection.
Can I use this fix on an Intel NUC?
Not as a generic rule. IceWhale specifically said the workaround applied to ZimaCube.
What if the SSD is absent from lspci?
Then investigate the hardware slot, SSD, BIOS/PCIe settings, and physical connection first.


