
The community tutorial brings the main ZimaOS installation and upgrade paths into one place. It covers a clean installation on a new x64 device, installation inside a virtual machine, automatic stable updates, the beta channel, and the command-line update method.
The original guide was published in October 2025, so version-specific examples should be read as historical instructions from that post. The overall workflows remain useful, while current images, release numbers, and upgrade commands should always be checked against the latest ZimaOS download and release pages.
What Is ZimaOS?
The post describes ZimaOS as an operating system designed for homes and studios. It combines NAS storage, personal-cloud functions, multimedia services, smart-home workloads, and application hosting through one interface.
Its product direction is summarized as a simplified, focused, and open NAS operating system. The intention is to make personal data management accessible without requiring every user to configure a conventional enterprise NAS environment.
Many Zima devices ship with ZimaOS already installed, while the operating system can also be installed on compatible general x64 hardware. Users looking for a current compact x86 platform can review the ZimaBoard 2 single-board server.
Install ZimaOS on a New x64 Device
The physical installation method in the community tutorial begins with four items: an x64 target device, a USB drive with at least 8GB of capacity, balenaEtcher, and the latest ZimaOS .img image. A keyboard, mouse, and monitor are also included in the preparation list.
Download the current image from the ZimaOS download page. Open balenaEtcher, select the downloaded .img file, select the USB drive, and use Flash to write the image.
Insert the prepared USB drive into the target system and enter BIOS or UEFI settings during startup. Set the USB drive as the first boot option, save the firmware settings, and restart. The device should boot into the ZimaOS installer, where the on-screen prompts complete the installation.
Installation warning: the FAQ in the original tutorial confirms that installing ZimaOS formats the selected target drive. Back up important data before proceeding and confirm the destination disk before accepting the installation.
Install ZimaOS on a Virtual Machine
The tutorial also presents virtualization as a way to experience ZimaOS through VMware, Proxmox VE, VirtualBox, and similar platforms. For this path, download the ZimaOS .iso asset from the ZimaOS GitHub releases page.
Create a new virtual machine and select a general 64-bit Linux or Debian-compatible operating-system type. The general section of the post lists at least 2GB of RAM and 32GB of storage, then instructs the user to mount the ISO as a virtual CD or DVD and start the VM.
After booting from the ISO, the installation runs inside the virtual machine. When it finishes, the VM restarts into ZimaOS. The installer ISO should then be detached or moved below the virtual disk in the boot order so that the VM does not return to installation.
VMware Settings Shared in the Tutorial
The VMware notes are more specific than the general virtual-machine instructions. During the New Virtual Machine wizard, the community post recommends choosing the custom advanced workflow and selecting Other Linux 6.x Kernel 64-bit.
For the VMware configuration, the author suggests more than 4GB of RAM, 32GB of storage, and four processor cores. The tutorial also recommends a SATA virtual-disk controller instead of the default SCSI controller.
Before first boot, open the VM options and change its firmware from BIOS to UEFI. The post also links to a separate Proxmox VE installation tutorial and a community script for users who prefer that platform.
Automatic Upgrade: The Recommended Method
The community tutorial identifies the built-in automatic update workflow as the simplest and safest upgrade method. When a release is available, ZimaOS downloads the update package in the background.
After the package is ready, a small red notification dot appears on the Settings icon in the upper-left area of the ZimaOS interface. Open Settings and follow the update prompt to complete the upgrade.
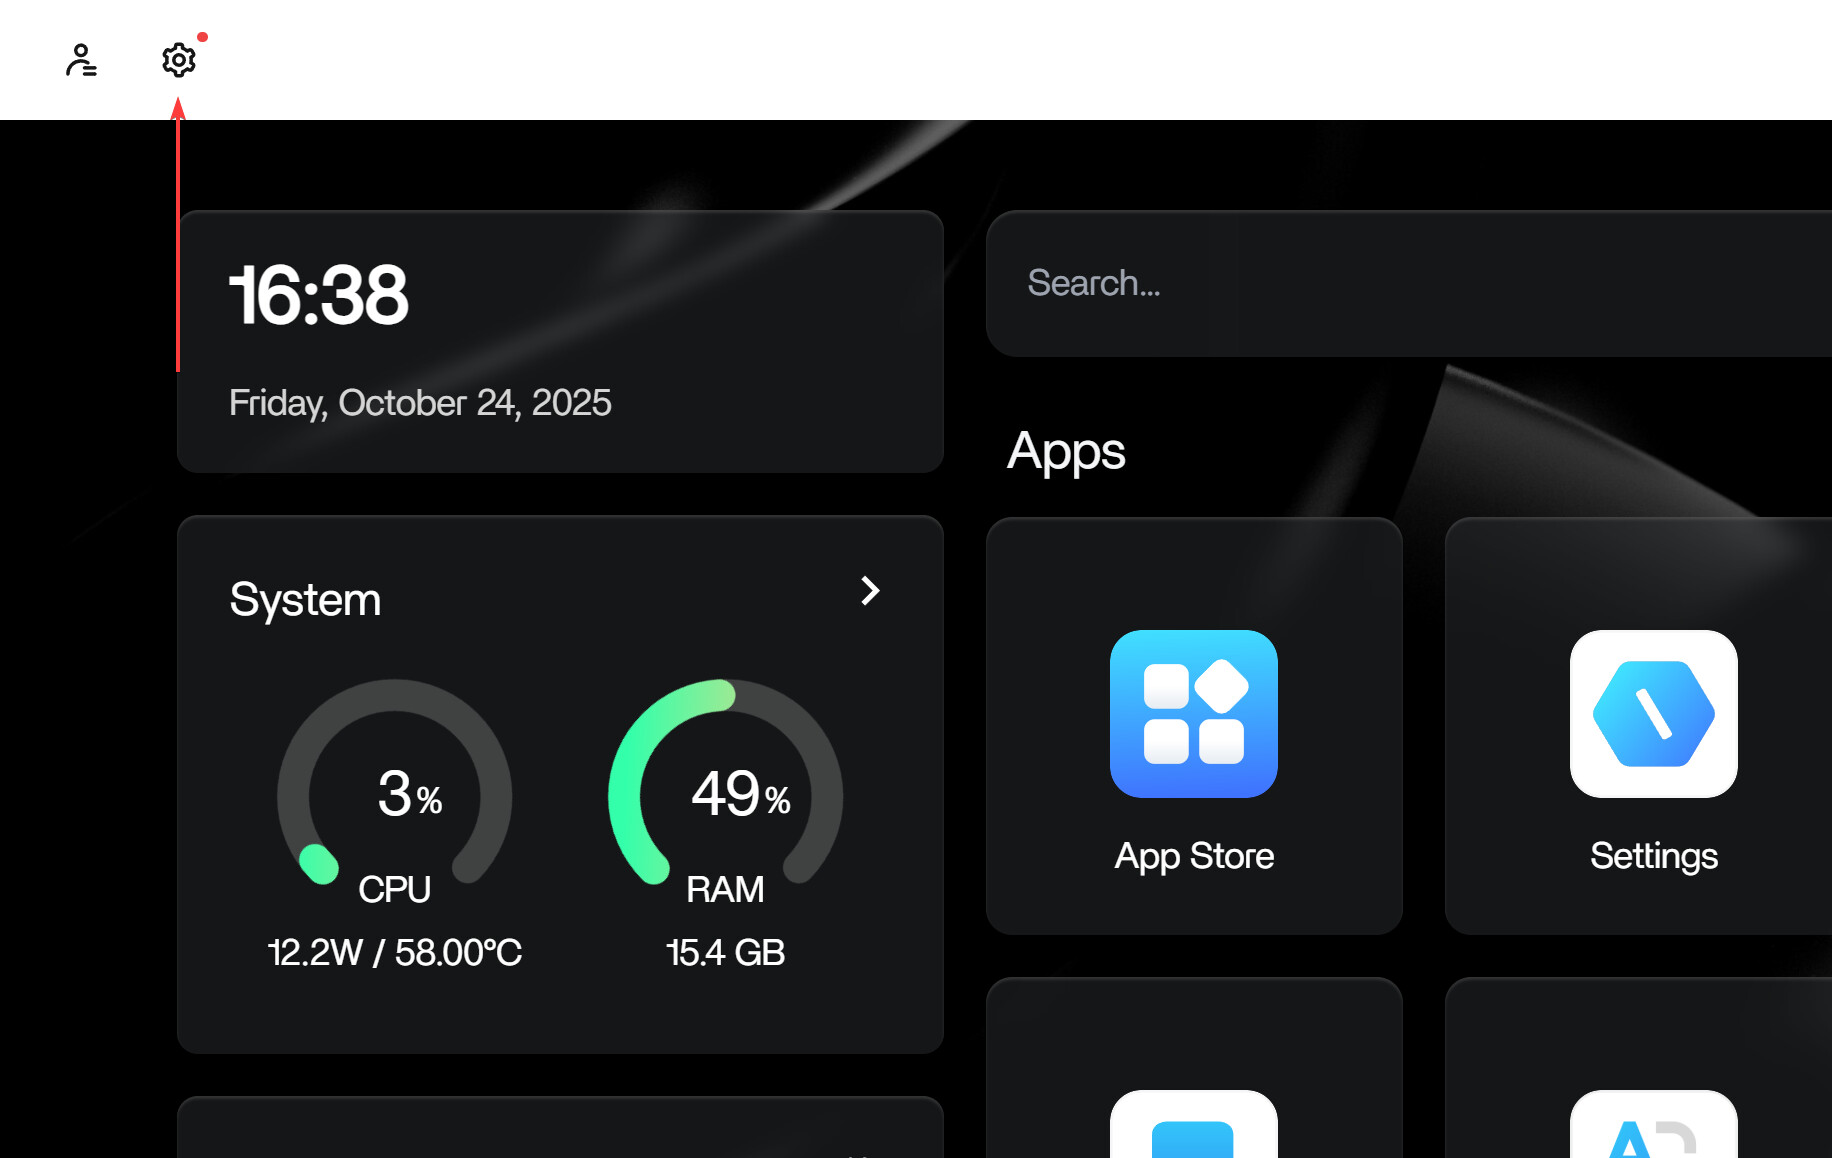
The author adds one operating requirement: keep the device on a stable internet connection so the update package can download successfully. The post does not describe forcing the graphical update before the notification appears.
Switch to the ZimaOS Beta Channel
The second upgrade path is intended for users who want to test new features before they reach the stable channel. Begin by enabling Developer Mode in the ZimaOS settings.
Open the developer options, locate the update-channel setting, and switch it to Beta. After the channel changes, ZimaOS should detect the current beta release and present an upgrade prompt through the same general update workflow.
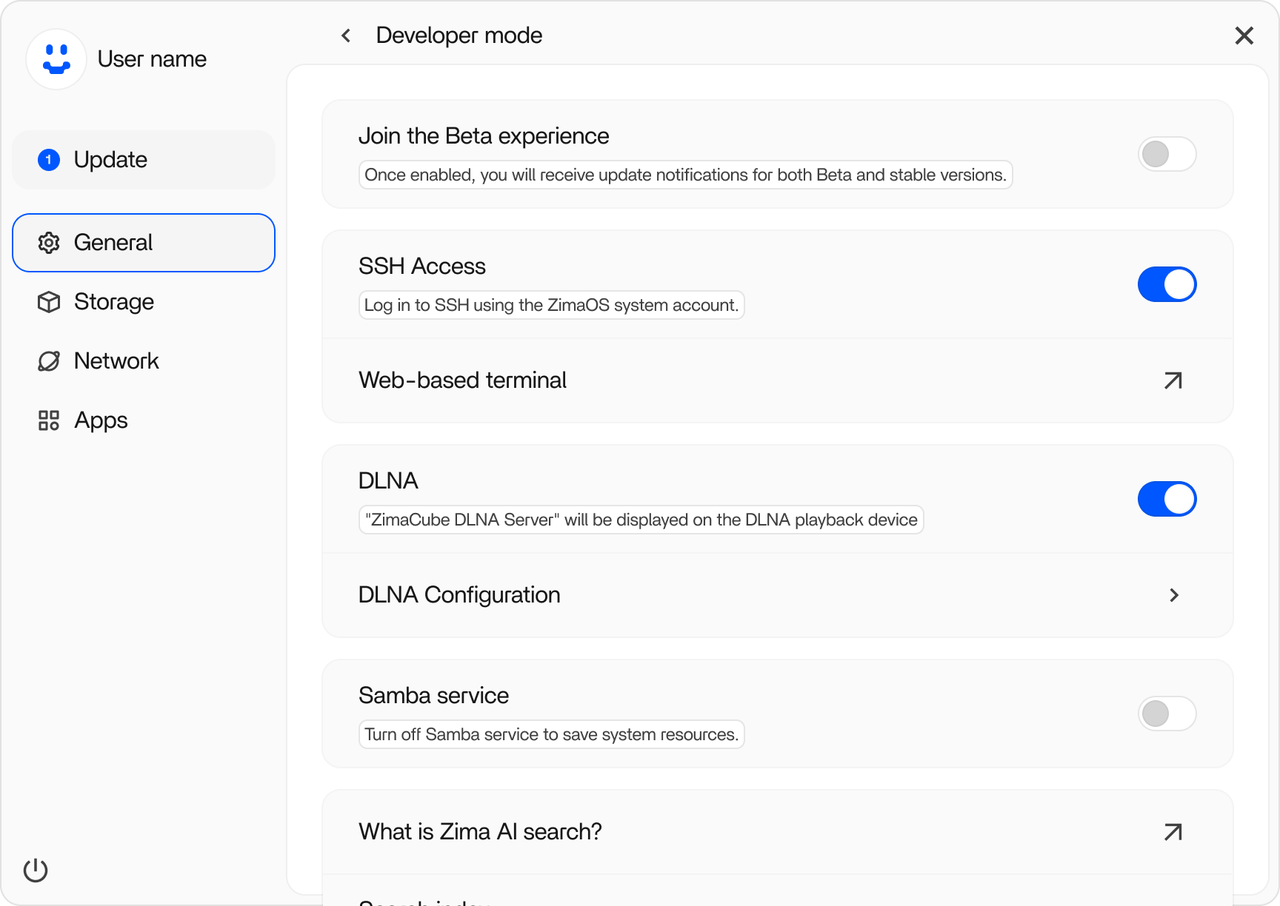
The post presents beta as an optional testing path, not the default recommendation. Users who rely on the server for important storage or applications should distinguish early feature access from the normal stable update process.
Force an Upgrade Through the Command Line
The third method is provided for cases where the automatic upgrade fails or an advanced user needs to move directly to a selected release. The tutorial instructs users to enable Developer Mode and SSH access, then use either SSH or the web terminal.
The command sequence shared in the October 2025 post was:
sudo -i

# Historical example: install ZimaOS 1.5.0
curl -fsSL 'https://ota.zimaos.com/1.5.0' | sh

# Select the latest release according to the stable or beta channel
curl -fsSL 'https://ota.zimaos.com/' | sh
The version-specific 1.5.0 command is preserved here because it was part of the original tutorial; it should not be treated as the current recommended target. Check the current release and desired channel before executing a remote update script with root privileges.
The post also records a transition rule for older systems: when the installed ZimaOS version is 1.2.4 or earlier, the script first upgrades the system to 1.2.5 before proceeding. According to the tutorial, this intermediate step is built into the script and the user follows the prompts.
What the Tutorial Recommends When an Upgrade Fails
The FAQ first recommends checking the network connection. This matches the automatic-upgrade section, which depends on a stable connection while the update package is downloaded.
If the network is working but the graphical update still fails, the post recommends the command-line method described above. Because that method uses root access and a remote script, confirm the current release target before running it.
If the problem continues, the tutorial directs users to the community forum for help. A separate ZimaOS installation troubleshooting guide can help organize USB, UEFI, storage, boot, and network information before posting.
ZimaOS Installation and Upgrade FAQ
Will installing ZimaOS erase the target hard drive?
Yes. The original tutorial states that the installation process formats the selected target disk. Back up all important data before beginning.
What should I do if the automatic upgrade fails?
Check the network connection first. If the connection is stable, the tutorial suggests using the command-line upgrade method and asking the community for help if the failure continues.
Can I use Wi-Fi during initial setup?
The community tutorial does not recommend it. A wired network connection is strongly preferred during initial setup.
Which image should I use?
The post uses the .img image with balenaEtcher for a physical x64 device and the .iso image as virtual installation media for VMware, Proxmox VE, VirtualBox, and similar platforms.
Do I need to switch to Beta to receive updates?
No. Automatic upgrade on the normal channel is the recommended method. The Beta channel is an optional Developer Mode setting for testing newer builds.


