
The 2024 ZimaBlade connection guide remains broadly correct for a stock ZimaBlade because current IceWhale documentation still says the device ships with CasaOS pre-installed. The important update is to separate stock CasaOS setup from a ZimaBlade that the user has intentionally flashed with ZimaOS.
For stock CasaOS, the console login, IP-discovery, and browser-by-IP flow remain relevant. For ZimaOS, use the current ZimaOS setup model: connect the device to the network, use ZimaClient or the IP address, and create a ZimaOS account during first-run setup.
Install RAM and Use a Suitable Power Supply
The source starts by telling users to install the SODIMM correctly and use a 12V 3A supply. Current ZimaBlade hardware documentation now describes USB-C PD 3.1 power and a broader drive/power setup, so use the current hardware guide for exact power arrangements.
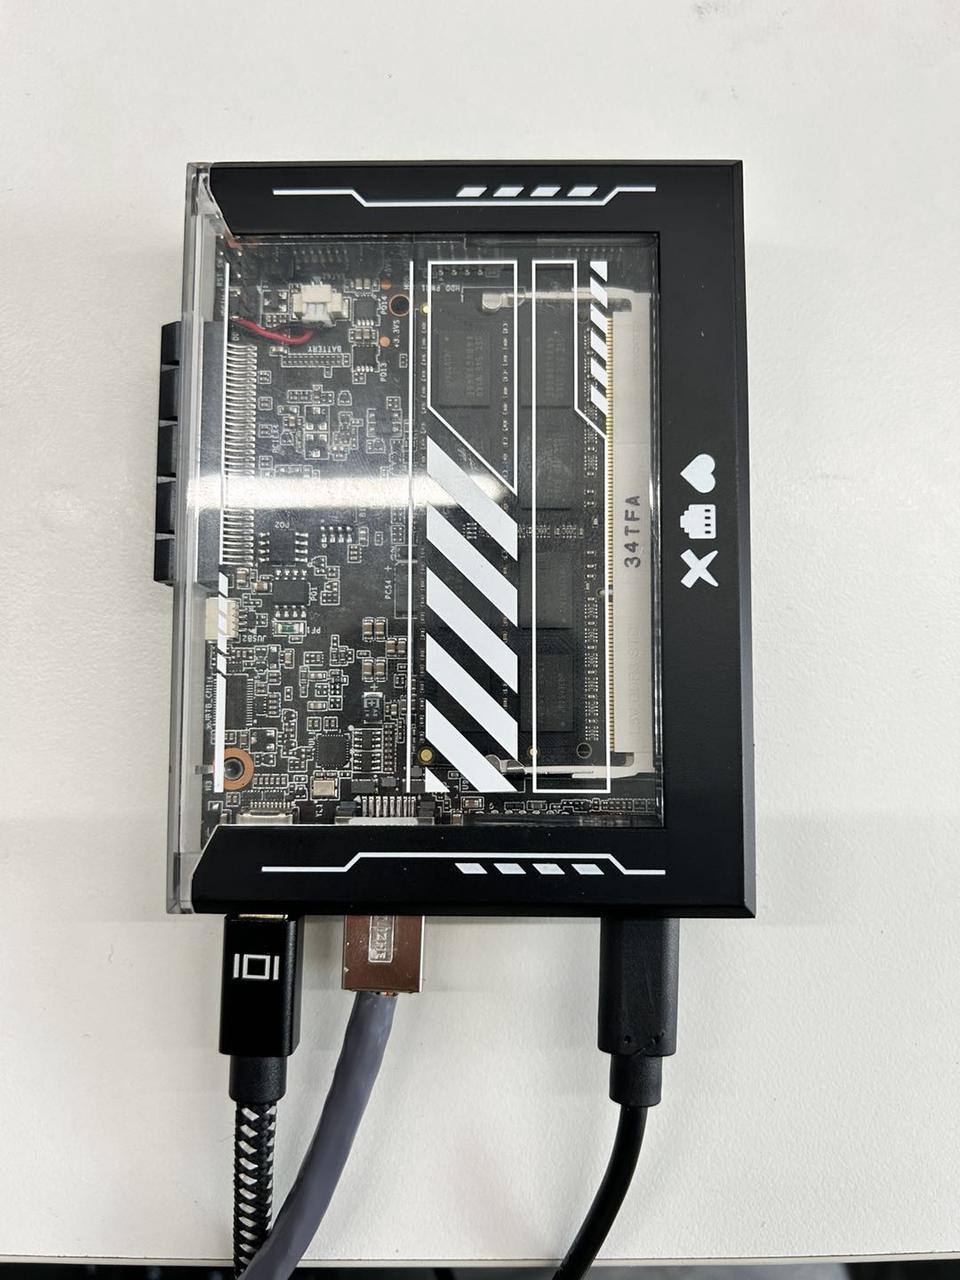
Stock ZimaBlade Still Ships with CasaOS
Current IceWhale ZimaBlade documentation says the board ships with CasaOS pre-installed. Therefore the old casaos/casaos console credentials still belong to the stock CasaOS first-boot path.
Use the current ZimaBlade CasaOS setup workflow.
Use ip addr to Find the Physical Ethernet Address

Ignore 127.x.x.x loopback and Docker bridge addresses when identifying the LAN address.
Open the IP Address from Another Device on the Same LAN
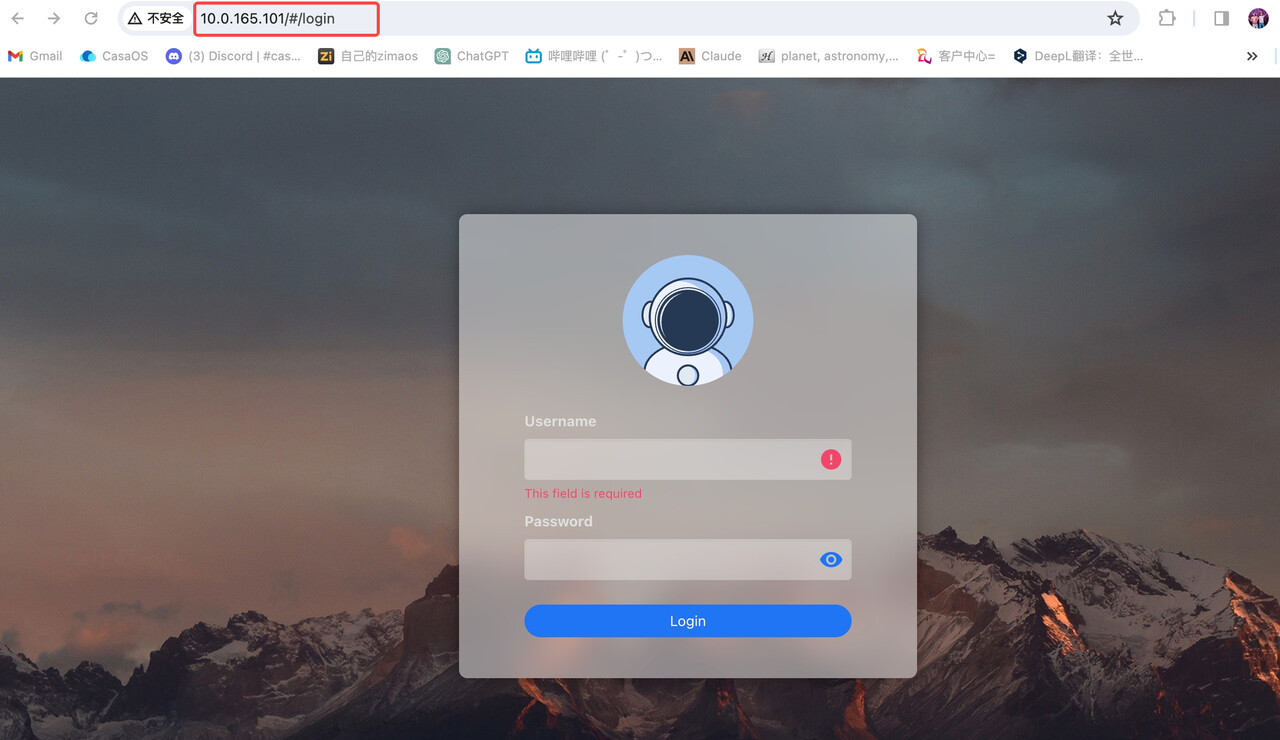
The Router DHCP List Is Often Easier Than Connecting a Monitor
Current ZimaBlade overview documentation explicitly suggests checking the router's DHCP client list when the device has no display or the Mini DisplayPort adapter is troublesome.
Do Not Depend on the Old findzima.com Discovery Path
The original official post already warned users not to rely on findzima.com from an older manual. IP discovery and current client-based discovery are better references.
If You Installed ZimaOS, the CasaOS Login Instructions No Longer Describe the System
Current IceWhale documentation says ZimaBlade can run ZimaOS as an alternative. After flashing ZimaOS, the first account is created through the ZimaOS setup screen; do not expect the stock CasaOS WebUI or default CasaOS credentials.
Use the current ZimaOS first-run setup.
Keep the Setup Device on the Same Local Network Initially
Whether using CasaOS or ZimaOS, first access is easiest when the ZimaBlade and the setup computer/phone are connected to the same router/subnet.
A Missing Display Does Not Necessarily Mean ZimaBlade Failed to Boot
Current IceWhale documentation notes that ZimaBlade has no power LED and that Mini DisplayPort adapters can be finicky. Give the board time to boot and check the router for a DHCP lease before assuming the board is dead.
Configure Storage Only After Basic Network Access Works
Once the browser interface is reachable, verify connected SATA disks and create storage through the appropriate CasaOS/ZimaOS UI. Keeping “can I reach the server?” separate from “is my disk configured?” makes first-boot troubleshooting much clearer.
Change Default CasaOS Credentials During Normal Web Setup
The console default is useful for first access, but the browser setup should create the normal WebUI account. Do not keep relying on shared default credentials for an exposed or long-lived home server.
ZimaBlade Access FAQ
Does stock ZimaBlade still ship with CasaOS?
Yes. Current IceWhale documentation still identifies CasaOS as the pre-installed system.
Can I find the IP without a monitor?
Yes. The router's DHCP client list is a practical current option.
Should a ZimaBlade running ZimaOS still use casaos/casaos for first setup?
No. Those credentials belong to the stock CasaOS console path; ZimaOS uses its own first-run account creation.


