
Una nota da Zima
Grazie, Active_Learner05, per aver trattato ZimaBoard 2 come una piattaforma da cui imparare, anziché come un dispositivo con un solo ruolo prestabilito. Trasformare uno ZimaBoard 2 1664 in un firewall OPNsense, per poi lavorare su archiviazione, ordine di avvio, assegnazione delle interfacce, conversione in punto di accesso e plugin di sicurezza, dimostra il tipo di esplorazione pratica che rende davvero utile un homelab.
Apprezziamo soprattutto il fatto che tu abbia condiviso il processo mentre era ancora in corso. L'aspetto utile non è soltanto che il firewall sia entrato in funzione, ma che gli altri utenti possano vedere le decisioni alla base del progetto: perché OPNsense è diventato il sistema operativo principale, come è stata collegata la rete, quali servizi di sicurezza sono stati attivati, cosa è andato storto durante la configurazione e cosa hai imparato risolvendo personalmente quei problemi.
— Zima
Conosciamo Active_Learner05
Active_Learner05 si descrive come una persona dai mille interessi, con esperienza nelle arti, nello sviluppo di videogiochi, nelle missioni spaziali, nella radioamatorialità e nella programmazione. Anche dopo essersi allontanato dal lavoro convenzionale per motivi di salute, ha continuato a creare scrivendo, pubblicando libri, vendendo prodotti digitali ed esplorando nuovi progetti tecnici.
È stata proprio questa curiosità a portare due sistemi ZimaBoard 2 1664 nella sua configurazione. Uno è diventato un dispositivo dedicato alla sicurezza della rete domestica, basato su OPNsense. Il secondo ha seguito una direzione completamente diversa, con una eGPU e una RTX 4060 Ti di precedente generazione per Ollama, Plex, IT Tools e altri esperimenti. In questa storia ci concentreremo sulla prima scheda: come l'ha trasformata nel firewall e router al centro della sua rete domestica.
Puoi seguire Active_Learner05 su Reddit per vedere come prosegue il progetto oltre questa pagina.
Perché ZimaBoard 2 è diventato la piattaforma del firewall
La scelta è partita dalle specifiche di ZimaBoard 2 1664, anziché da un'unica applicazione già pianificata. Active_Learner05 desiderava un hardware che gli permettesse di applicare ciò che già conosceva, continuando al tempo stesso a imparare nell'ambito del networking, della sicurezza domestica, della programmazione, della produttività e di altri carichi di lavoro self-hosted.
Per il progetto del firewall, ciò ha significato usare la scheda come host OPNsense dedicato, invece di lasciare ZimaOS come sistema operativo principale. La configurazione pubblicata indica un processore Intel N150, 16 GB di memoria, un SSD Crucial da 500 GB e uno stack OPNsense che include Suricata, Unbound, Zenarmor e CrowdSec.
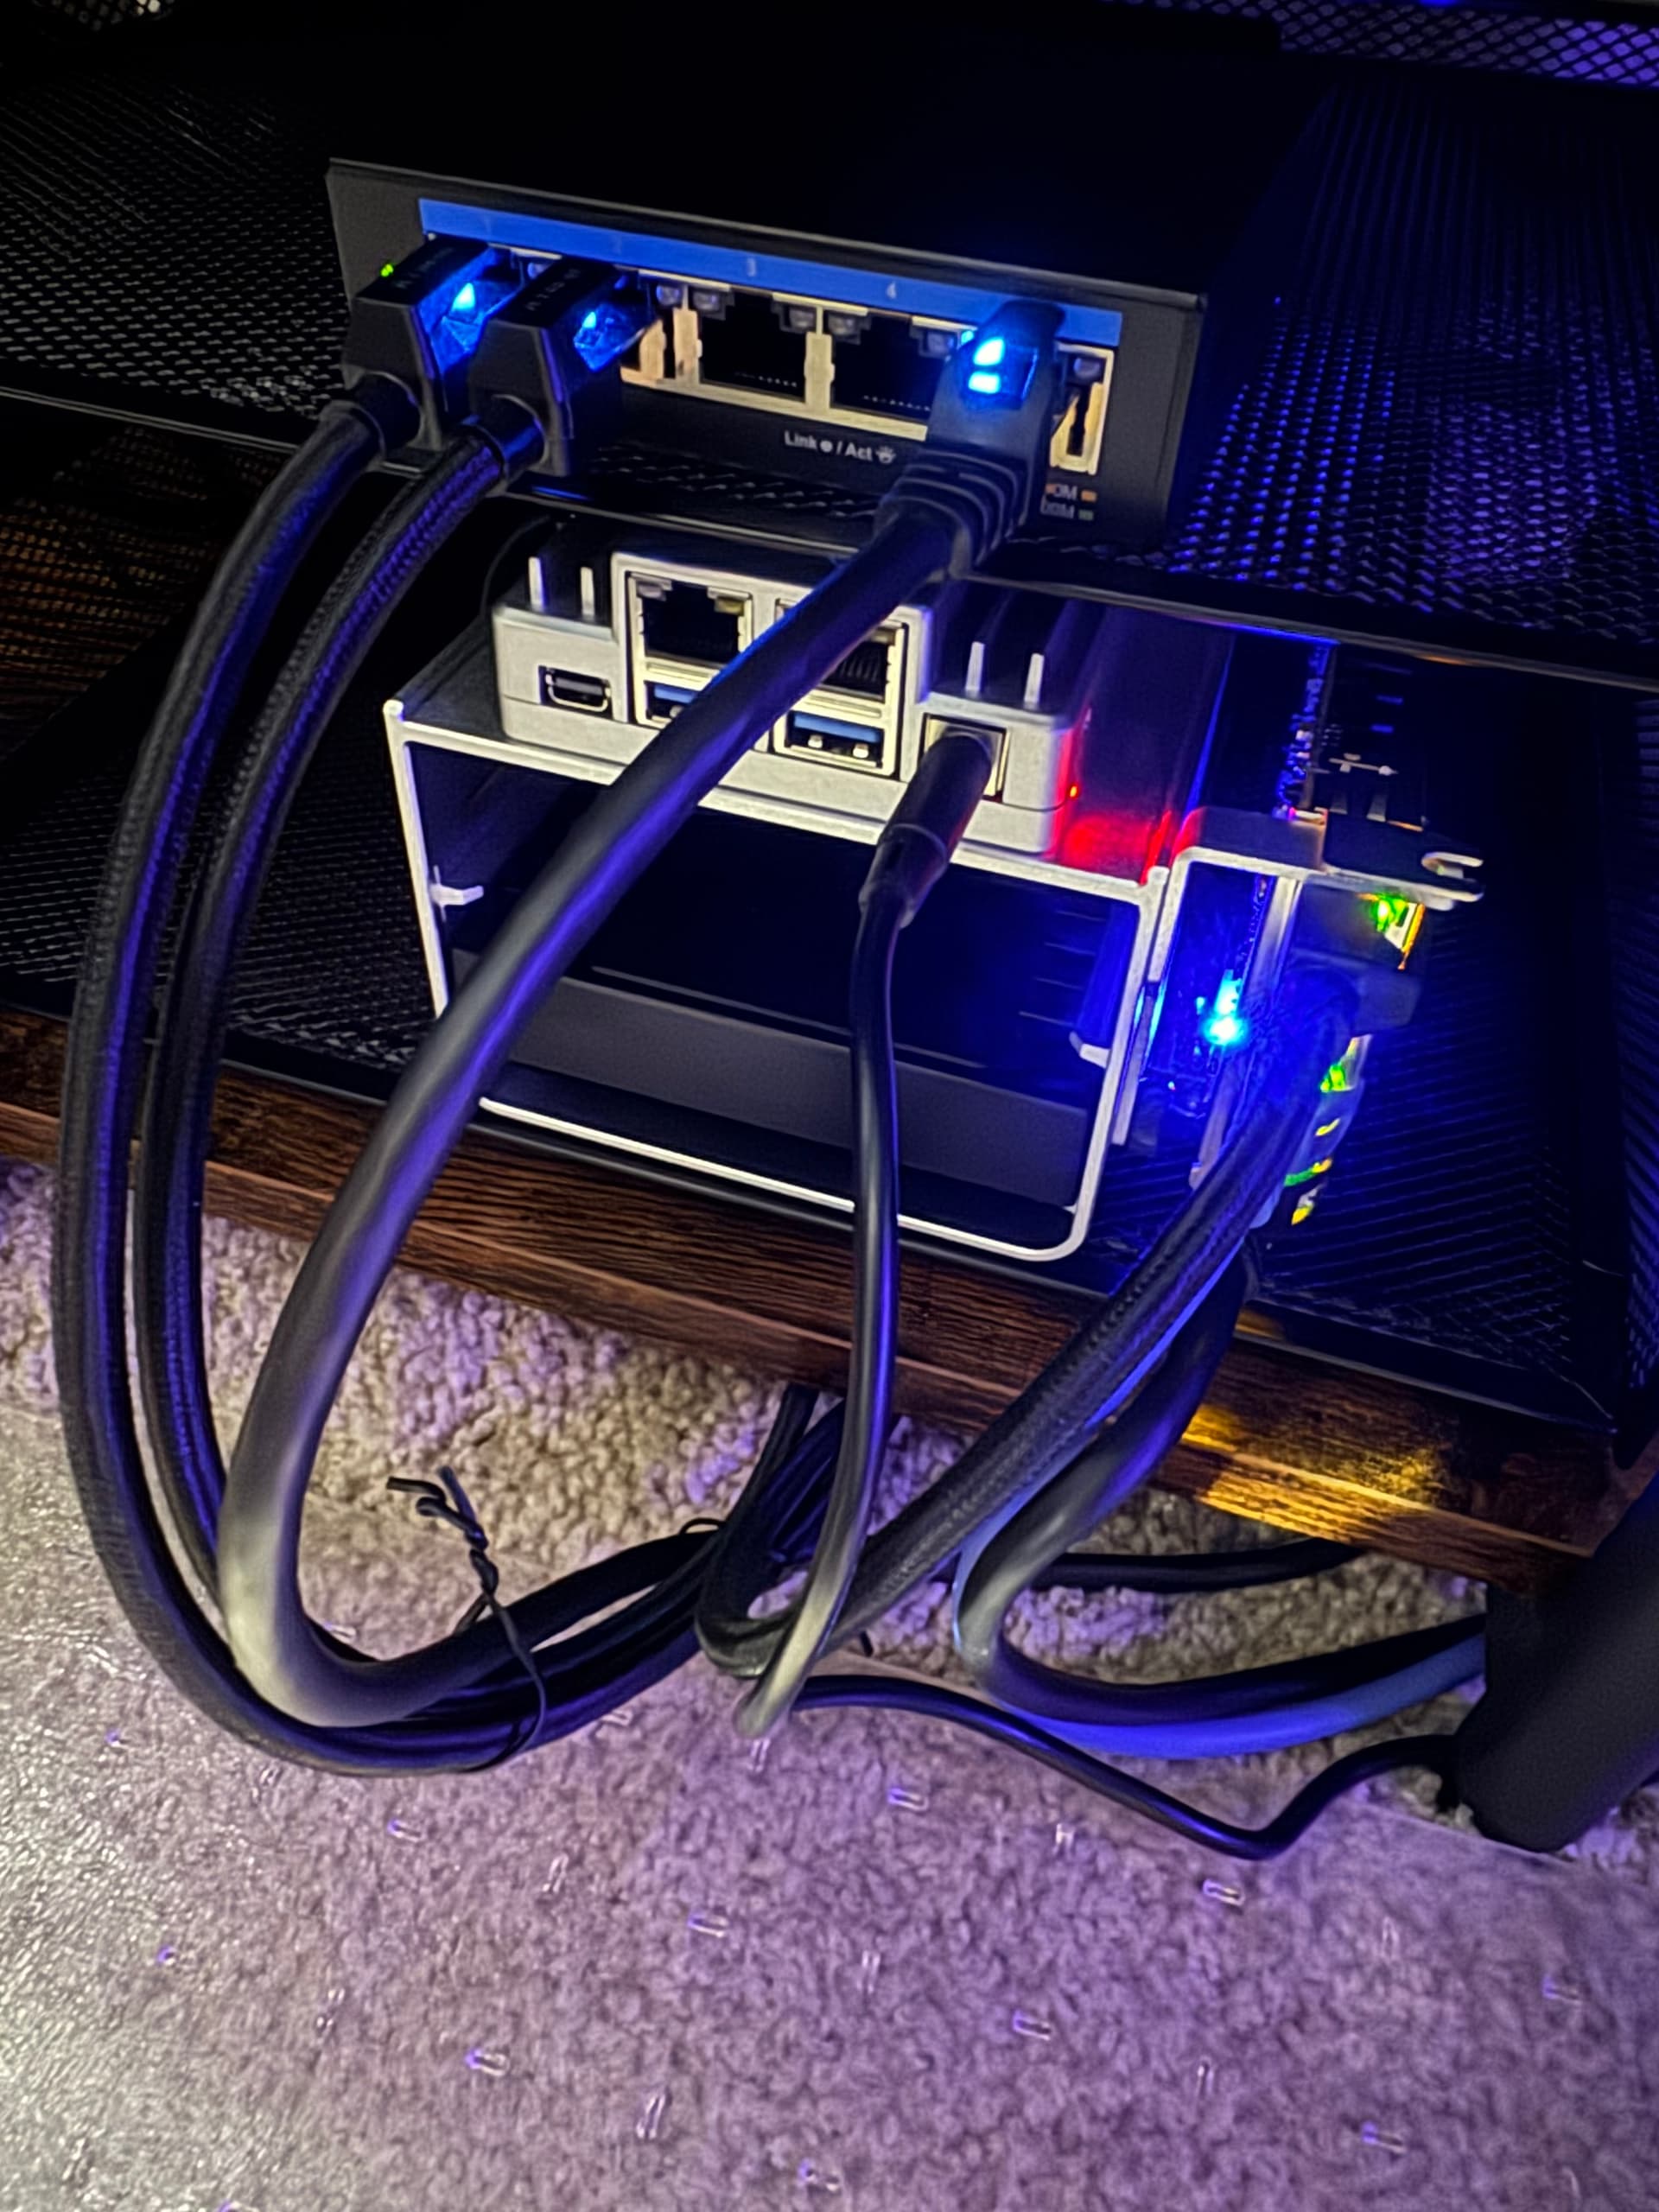
Installazione di OPNsense su un SSD SATA
Il primo avvio è stato semplice. Active_Learner05 ha descritto la scheda come facile da avviare e quasi plug-and-play, ma l'installazione di OPNsense ha introdotto il primo vero passaggio di apprendimento.
Voleva eseguire OPNsense da un SSD SATA, invece di continuare semplicemente a utilizzare il sistema di fabbrica presente sull'eMMC interno. Ciò ha richiesto la modifica della configurazione di avvio, in modo che l'SSD esterno diventasse il disco preferito per il sistema operativo. Nel suo registro del progetto su Reddit, ha documentato l'installazione dell'ambiente di ripristino di fabbrica di ZimaBoard per l'accesso di emergenza, la creazione del supporto di installazione di OPNsense e infine l'installazione di OPNsense dall'USB all'SSD.
Dopo l'installazione, l'ordine di avvio preferito è diventato:
1. SSD
2. Ambiente di ripristino CasaOS
Questo è coerente anche con la documentazione di ripristino di ZimaSpace, che indica come i sistemi installati su un disco esterno possano richiedere la modifica della sequenza di avvio del BIOS o del dispositivo di avvio. La guida al ripristino di fabbrica di ZimaBoard fornisce la procedura ufficiale di ripristino, mentre la guida all'installazione di OPNsense illustra l'installazione del firewall.
Assegnazione di WAN, LAN e delle interfacce aggiuntive
Una volta installato OPNsense, il passaggio successivo è stato trasformare le porte Ethernet in una vera struttura di instradamento, anziché limitarsi a collegare i cavi sperando che le impostazioni predefinite corrispondessero alla topologia desiderata.
Active_Learner05 ha documentato l'assegnazione iniziale di WAN e LAN, poi ha aggiunto le interfacce rimanenti e configurato porte aggiuntive come OPT1 e OPT2. In questo modo il firewall ha potuto separare i ruoli, invece di trattare ogni porta come parte di un'unica rete piatta.
Le componenti a monte e a valle erano volutamente semplici. Un router gaming ASUS è stato convertito in un punto di accesso senza bisogno di un ripristino di fabbrica, mentre uno switch D-Link DMS-105 plug-and-play 2.5GbE ha gestito la distribuzione cablata. ZimaBoard 2 si trovava tra questi componenti, come sistema responsabile dell'instradamento, delle policy del firewall, del DNS e dei servizi di sicurezza della rete.
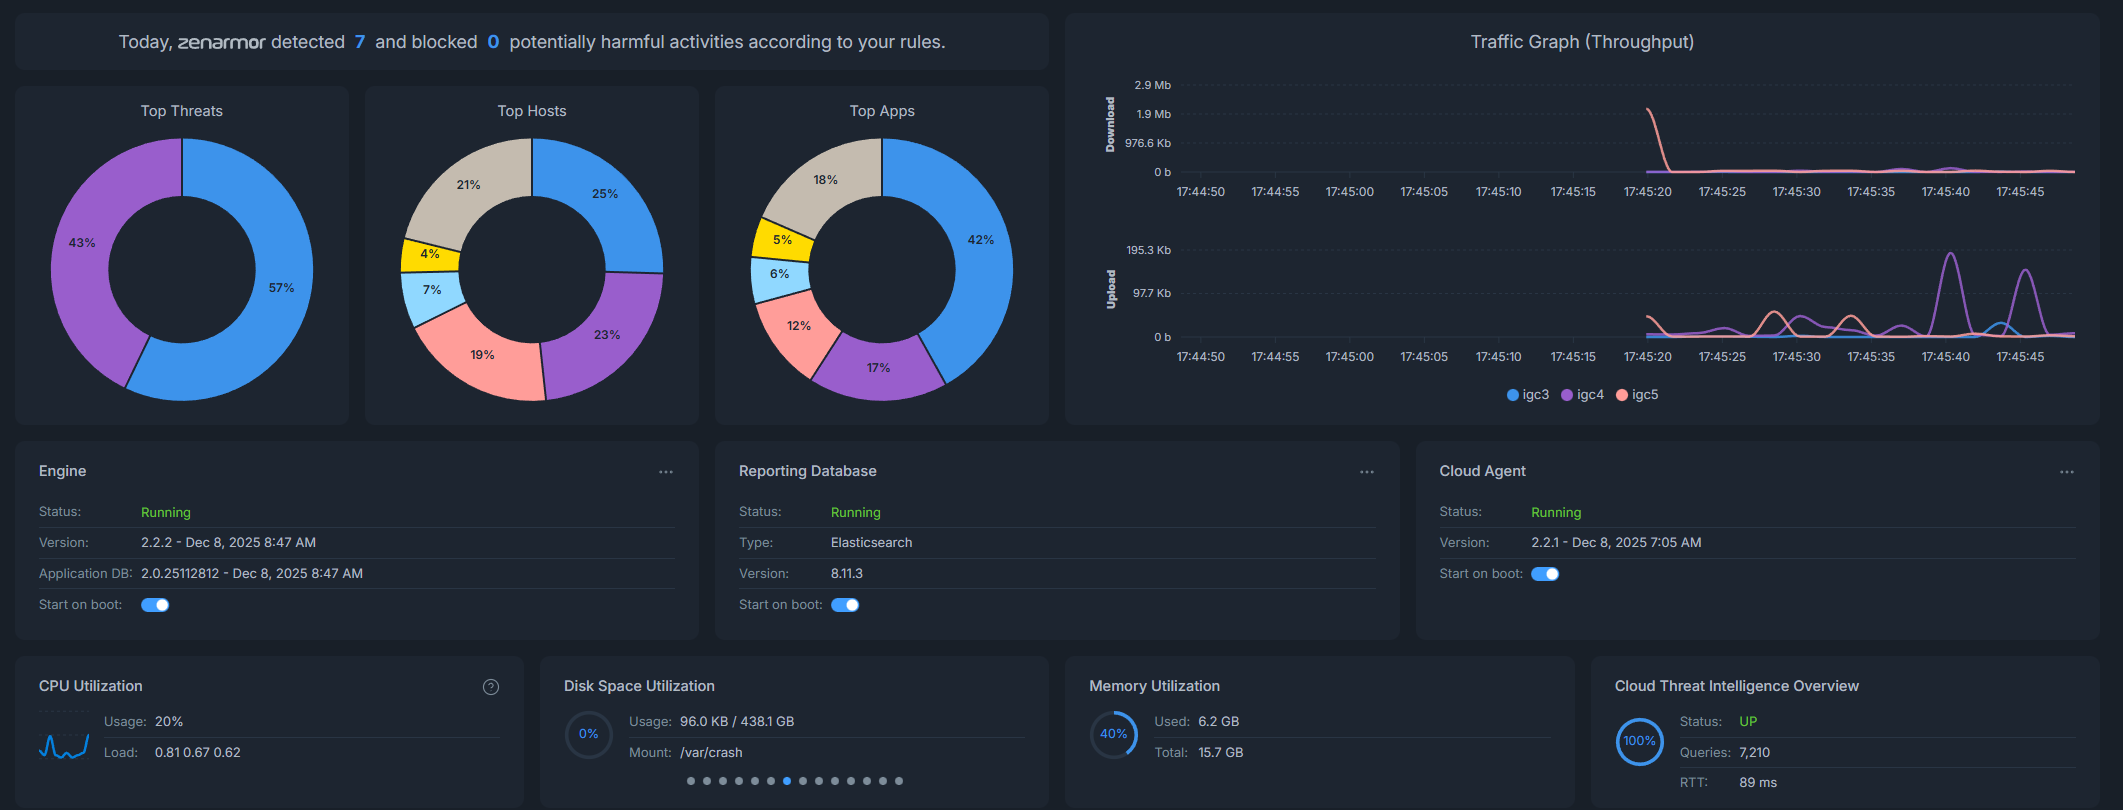
Creazione dello stack di sicurezza basato su OPNsense
Far passare i pacchetti dalla WAN alla LAN era solo l'inizio. La parte più interessante del progetto è stata lo stack di sicurezza che Active_Learner05 ha aggiunto a OPNsense.
Unbound ha gestito la risoluzione DNS. Suricata ha aggiunto funzionalità di rilevamento delle intrusioni e ispezione. Zenarmor ha fornito visibilità e report sul traffico basati sulle applicazioni. CrowdSec ha aggiunto un ulteriore livello per identificare e contrastare i comportamenti ostili.
Questa combinazione ha reso ZimaBoard 2 molto più di un semplice sostituto del router dell'ISP. È diventato un dispositivo che poteva essere ispezionato attivamente: era possibile controllare i servizi, monitorare l'utilizzo delle risorse ed esplorare il comportamento della rete, invece di nasconderlo dietro un'interfaccia semplificata da router consumer.
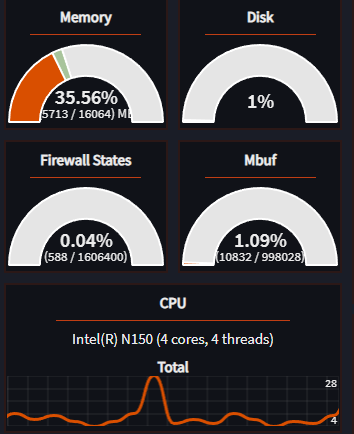

Cosa gli ha insegnato la prima configurazione
Il progetto non è stato completamente privo di difficoltà, ed è proprio questo a renderlo utile. Una delle sfide è stata abbandonare il percorso di avvio predefinito sull'eMMC, per consentire a OPNsense di risiedere sull'SSD SATA. Un'altra è comparsa in un esperimento PCIe separato: un cavo extender utilizzato con una scheda OCuLink non ha funzionato come previsto, portandolo a concludere che la lunghezza del cavo o la compatibilità impedissero un trasferimento dati affidabile.
Per quanto riguarda il firewall, in seguito ha riferito che l'utilizzo della memoria passava da circa il 40% a oltre l'80% a seconda dell'attività, mentre l'utilizzo della CPU raggiungeva picchi intorno al 50% sulla base delle osservazioni effettuate fino a quel momento. Ha inoltre notato che la scheda diventava più calda sotto il carico dei servizi di sicurezza e ha aggiunto una ventola AC Infinity da 80 mm con controllo della temperatura, che a suo dire ha migliorato le temperature.
Questi dettagli sono importanti perché trasformano la pagina da un semplice riepilogo dell'installazione in una vera storia di homelab: il sistema funzionava, ma il processo ha comunque richiesto di imparare come interagiscono dispositivi di avvio, assegnazioni delle interfacce, plugin, temperature ed espansioni hardware.
Da router consumer a una rete ispezionabile
Il cambiamento pratico nell'uso quotidiano non è stato semplicemente sostituire un router con un altro. OPNsense ha dato ad Active_Learner05 una rete che poteva analizzare.
Il punto di accesso poteva concentrarsi sul Wi-Fi. Lo switch 2.5GbE poteva occuparsi della distribuzione. ZimaBoard 2 poteva concentrarsi su instradamento e sicurezza. All'interno di OPNsense, DNS, servizi firewall, ispezione del traffico, rilevamento delle intrusioni e CrowdSec potevano essere monitorati separatamente, invece di essere racchiusi in un dispositivo opaco.
Questa separazione rispecchiava anche il motivo originario per cui aveva acquistato l'hardware: usare le specifiche come base per applicare le conoscenze esistenti e continuare a imparare. Il firewall non era la fine dell'esperimento, ma uno degli esempi più chiari di come una scheda x86 generica potesse diventare un dispositivo di rete specializzato.
Due sistemi ZimaBoard 2, due direzioni diverse
Il sistema OPNsense è solo un lato della configurazione di Active_Learner05. Il suo secondo ZimaBoard 2 1664 ha seguito il percorso opposto, abbinando la scheda a una GPU esterna e a una RTX 4060 Ti per Ollama, Plex con accelerazione GPU, IT Tools e ulteriori esperimenti.
Questo contrasto aiuta a comprendere il suo approccio a ZimaBoard 2. Non ha acquistato due macchine identiche per eseguire due carichi di lavoro identici. Una è diventata infrastruttura di rete; l'altra una piattaforma per esperimenti con GPU, contenuti multimediali e intelligenza artificiale. Il filo conduttore è l'esplorazione.
La storia è ancora in corso
La storia di Active_Learner05 e Zima è ancora in corso. Ha spiegato di essere ancora alle prime armi con i computer a scheda singola e di stare ancora esplorando le possibilità dell'hardware. Questo rende il firewall OPNsense meno un punto di arrivo definitivo e più il primo vero progetto di rete costruito intorno alla scheda.
Il suo consiglio, espresso in una sola frase, per i futuri utenti è semplice: "Provate ed esplorate." Per leggere la discussione completa sul firewall ancora in fase di sviluppo, visita il progetto OPNsense originale di ZimaBoard 2 su Reddit. Puoi anche seguire Active_Learner05 su Reddit mentre il progetto prosegue.


