
Inside the ZimaCube: From Unboxing to Teardown


Many people ask: “It’s just a NAS. What is there to tear down?”
The answer is hidden in every detail of the ZimaCube. From the custom foam inside the box to the copper-colored screws on the motherboard, this machine shows far more design intent than a spec sheet can reveal.
Today, we are going to take the ZimaCube apart from start to finish.
Unboxing: More Than Just a NAS Unboxing
The ZimaCube comes packed in high-density custom foam, with the main unit firmly secured in the center of the box. The power adapter, Ethernet cable, screw pack, screwdriver, and documentation all have their own dedicated compartments.
What’s included in the box:
- ZimaCube main unit ×1
- Power adapter + power cable ×1 set
- Cat 6 Ethernet cable, 1 meter ×1
- HDD screws + rubber foot screws ×1 pack
- Screwdriver ×1
- Quick Start Guide ×1
One detail worth mentioning is the Cat 6 cable. Its length is just right for running from a desktop setup to a router, and the connector is shielded. It does not feel like a throwaway accessory.

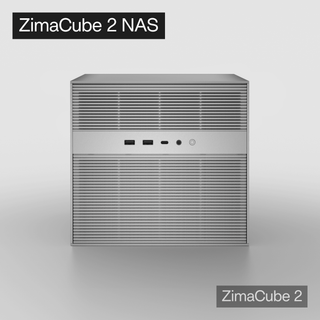
Exterior: Minimal, but Not Simple
The ZimaCube follows a restrained design language. The standard version uses a silver aluminum alloy chassis, while the Pro version comes in black. The front panel is extremely clean, with only indicator lights and no unnecessary decorative lines.
Front I/O:
- USB 3.0 Type-A ×2
- USB-C 3.0 ×1
Rear I/O:
- Thunderbolt 4 ×2
- USB 3.0 Type-A ×2
- 2.5GbE RJ45 ×2 (The Pro version additionally includes 10GbE ×1)
- HDMI ×1
- DisplayPort ×1
The overall footprint is compact, roughly comparable to an HP ProLiant MicroServer, but shorter. It does not look out of place on a desk.
First Step of the Teardown: No Tools Needed
The front panel is attached magnetically. Gently pull from the bottom with your fingers, and it comes right off. There are no plastic clips, so there is no worry about snapping anything.
The two side panels use a sliding rail design and can be removed by simply pushing them outward. Even better, the left and right side panels are identical and interchangeable. That is not accidental. This kind of symmetry only happens when it is designed intentionally.
Within two minutes, without using any tools, you can see the full internal layout of the ZimaCube.

Internal Layout: Spacious at First Glance, Full of Details
The first impression after opening it up is that everything is tidy. The internal structure can be divided into six clear areas.
-
Drive Cage: 6 Bays
The drive cage takes up most of the front section of the chassis. It supports six 3.5-inch drive bays, each with its own drive tray.
The trays are not tool-less. You still need screws to secure the drives. But considering that hard drives usually stay installed for months at a time, this is not a real usability issue. When pushed into place, the trays have a clear, tactile click and feel solid.
-
NVMe Expansion Board: 4 Slots
Behind the drive cage is a compact NVMe expansion daughterboard with four M.2 slots. The board connects to the motherboard via PCIe. Because the bandwidth is shared, the read/write ceiling for these four slots is around 800 MB/s.
This makes them better suited for a large-capacity storage pool rather than high-performance SSD workloads. There is also a USB-C port on the back of the daughterboard, but its purpose has not yet been disclosed.
A heatsink sits above the daughterboard to provide passive cooling for the NVMe SSDs.
-
Motherboard NVMe Slots: 2 Full-Speed Slots
The motherboard itself also includes two M.2 NVMe slots. These use CPU-direct PCIe lanes and are not subject to the 800 MB/s limitation.
One slot comes preinstalled with a 256GB boot drive for ZimaOS. The other is empty, allowing users to add a high-performance NVMe SSD for cache or as a system drive.
Recommendation: If speed matters, install your primary NVMe SSD in one of the motherboard slots, and leave the four expansion-board slots for higher-capacity storage.
-
Memory Slots: Dual DDR5 SO-DIMM
The two DDR5 SO-DIMM slots are located on the front side of the motherboard. After removing the side panel, they are directly accessible without taking out any other components. This is not common in compact NAS systems.
The official maximum supported memory capacity is 64GB.
-
PCIe Expansion Slots: 2 Slots
The ZimaCube provides two PCIe expansion slots:
- Slot 1: PCIe Gen 4 ×4, physical ×16 connector
- Slot 2: PCIe Gen 3 ×2, physical ×8 connector
It supports half-height, low-profile cards. However, power is supplied only through the PCIe slot, with no auxiliary power connector available.
That means you can install a quad-port network card, an HBA card, or a low-profile GPU such as a GTX 1650 LP or RTX A2000. Cards that require external power are not supported.
-
Internal USB 2.0 Header
There is a standard internal USB 2.0 9-pin header on the motherboard, the same kind commonly used for desktop front-panel USB connections.
This means you can:
- Install an internal USB boot drive for Unraid
- Keep a recovery USB drive connected long term
- Connect other USB devices without using the external ports
Seeing this header inside a NAS is genuinely unexpected. But considering the ZimaCube’s positioning, it also makes sense.

Fan System: Independent Controller + Unused SYS_FAN Header
The ZimaCube comes with two rear exhaust fans responsible for cooling the drive cage area. During normal operation, the noise level is low enough not to interfere with work. In a quiet room, you can hear it, but it is far from loud.
One interesting discovery during the teardown is that the motherboard has a SYS_FAN header, but it is unused. The rear fans are connected to an independent controller instead of being managed through the motherboard BIOS fan-control logic.
This means two things:
- If you want an ultra-quiet setup, you could consider connecting the rear fans to the motherboard SYS_FAN header and manually adjusting the fan curve in the BIOS.
- Alternatively, you could replace the stock fans with third-party quiet fans, such as Noctua NF-A8 models, while using the default behavior of the independent controller.
This design may be intentional. An independent controller can resume operation automatically after power loss or reboot, without depending on BIOS settings.

Power Design: External Power Adapter
The ZimaCube uses an external power adapter with a DC barrel jack input. This is one of the few parts of the overall design that makes you think, “It would be nice if this were internal.”
From the teardown, there does appear to be some space above the drive cage. If a future version could integrate the power supply inside the chassis and switch to a standard C13 power inlet, it would remove the inconvenience of having another power brick on the desk and make the whole machine feel closer to a professional small-form-factor server.
That said, the external design also has an advantage: if the power adapter fails, you can simply replace it without sending the entire unit in for repair.
Two Unsolved Mysteries
During the teardown, two intriguing details stood out.
The Mysterious Standoffs
There are four evenly spaced standoffs on one side of the chassis. They are clearly reserved for something. But what exactly?
An additional fan bracket? A different drive cage configuration? At the moment, there is no official answer.

The USB-C Port on the NVMe Daughterboard
What exactly is the USB-C port on the back of the NVMe daughterboard for?
Data transfer? Debugging? External storage? We may only find out through future firmware updates or documentation.
These two details are interesting because they suggest that the ZimaCube may have more “unlockable” potential hidden in its design.
Conclusion: Designed to Be Opened
After tearing down the ZimaCube, the biggest takeaway is not simply how much hardware it packs inside. It is that the machine actively encourages you to tinker with it.
- Magnetic front panel and sliding side panels allow tool-free access in two minutes
- Memory, PCIe, and NVMe slots are all within easy reach
- The internal layout deliberately leaves room for modification
- Hidden ports and reserved standoffs seem to say: “Go ahead, try something”
This is not a closed device that expects you to buy it, use it, and never touch the inside.
Quite the opposite. Every detail of its design language invites exploration, upgrades, and customization.
For NAS enthusiasts and homelab users who love to tinker, that feeling of being trusted may be more appealing than any spec on paper.
Learn more: https://shop.zimaspace.com/collections/all-products/products/zimacube-2-personal-cloud-nas
Acknowledgments: This article is based on community user Bob’s ZimaCube Experience Blog. Thanks to Bob for his detailed teardown notes and honest user experience sharing.

Recommended products
Zima Campaign Hub
More to Read

How a Small NAS Became a Family Archive With ZimaOS
A real home NAS story about preserving medical records, family photos, music, and everyday memories—and the practical lessons for protecting irreplaceable data.

2026 Software Freedom Day: The Best Open-Source Apps to Self-Host at Home
Explore useful self-hosted tools for storage, photo backup, media streaming, documents, and home automation on one reliable server at home.

World Photography Day: How to Back Up and Organize a Lifetime of Photos
Gather scattered photos, build a simple archive, automate backups, verify recovery, and learn when centralized storage becomes worthwhile.


