
How to Build a Local NVR Camera Server Without Monthly Cloud Fees


Quick Answer
You can build a local NVR camera server without monthly cloud fees by using IP cameras that support open video streams, storing recordings on a local server or NVR device, and accessing the system through a secure local or private remote connection.
The simplest path is to buy an all-in-one hardware NVR and compatible cameras. The more flexible path is to run self-hosted NVR software on a small server, mini PC, NAS, or Docker host. In both cases, the key is not just “recording locally.” You need a reliable camera stream, stable network, persistent recording storage, and a safe remote access plan.
A good local NVR setup usually needs:
-
RTSP or ONVIF-compatible IP cameras;
-
stable wired networking, often with PoE;
-
a local server or NVR device that stays on;
-
enough storage for the retention period you want;
-
NVR software that can record, play back, and manage camera feeds;
-
secure remote access that does not expose camera ports directly.
What Problem Are You Really Solving With a Local NVR Camera Server?
A local NVR camera server solves three problems at once: cloud subscription cost, video privacy, and local control. Instead of sending recordings to a vendor cloud, your cameras send video feeds to a server inside your own network.
But a local NVR is not just a cheaper version of a cloud camera. You become responsible for camera compatibility, storage, network reliability, software updates, user permissions, and remote access security.
Use The Local NVR Signal Path to understand the full setup. A working local NVR depends on the path from the camera feed to the network, the NVR app, the recording folder, and the device you use to view footage.
| Framework Module | Key Question | What It Helps You Decide | Validation Signal |
| Camera Stream Path | Can the server receive a usable camera feed? | Whether the camera supports RTSP / ONVIF, whether credentials are correct, and whether the stream URL is reachable | Live feed loads inside the NVR app |
| Network Path | Can camera traffic reach the NVR server reliably? | Whether to use PoE, wired Ethernet, static IPs, router settings, firewall rules, or isolated camera networking | Camera IPs stay stable and feeds do not randomly disappear |
| App Runtime Path | Where and how does the NVR software run? | Whether to use a hardware NVR, native software, Docker container, VM, or lightweight self-hosted app | NVR app restarts cleanly and remains available after reboot |
| Recording Storage Path | Where do video files, config, and event data persist? | Storage location, volume mounts, recording folders, retention rules, and whether footage survives app updates | Recordings remain available after reboot, update, or container recreation |
| Access Boundary | Who can view cameras, and from where? | Local-only access, VPN, secure tunnel, user accounts, permissions, and whether to avoid direct port exposure | Remote viewing works without exposing camera ports directly |
| Validation Loop | How do you know the system is actually working? | What to test after setup: live view, recording, playback, motion rules, retention, storage usage, and security controls | Live view, recording, playback, and remote access tests all pass |
If a camera feed does not appear, start with the Camera Stream Path and Network Path. If recordings disappear after an update, start with the Recording Storage Path. If remote viewing fails, start with the Access Boundary.
Local NVR vs Cloud Camera Recording
A cloud camera usually sends video clips or events to a vendor’s cloud platform. A local NVR keeps the recording pipeline inside your network, depending on the cameras, server, storage, and software you control.
What a Local NVR Does
A local NVR receives camera streams, records video, stores clips or continuous footage, and provides a way to view live or recorded video. The cameras normally send video over the local network using supported stream protocols.
The NVR server can be a dedicated appliance, a desktop computer, a mini PC, a NAS-style server, or a Docker host. The important requirement is that it stays online and has stable access to both the cameras and storage.
A local NVR can support live view, motion-based recording, continuous recording, event playback, and remote access depending on the software and configuration.
What You Stop Paying for When You Avoid Cloud Storage
You can usually avoid monthly fees for vendor cloud storage when footage is recorded locally. That can be useful if you want continuous recording, longer retention, or more control over where video files live.
However, “no cloud fees” does not mean “no cost.” You still pay for cameras, storage drives, networking gear, power, replacement hardware, and possibly paid NVR software if you choose a commercial platform.
The practical benefit is control. You decide where recordings are stored, how long they are kept, and who can access them.
What You Still Need to Manage Yourself
A local NVR shifts responsibility from the vendor to you. You need to maintain the camera network, app updates, disk space, user accounts, and secure remote access.
Common responsibilities include:
-
keeping camera firmware updated;
-
assigning stable camera IP addresses;
-
protecting camera passwords;
-
checking recording retention;
-
monitoring storage usage;
-
testing playback after updates;
-
avoiding unsafe public exposure.
This is why local NVR setup should be treated as a system design task, not just an app installation task.
What You Need Before You Start
Before choosing software, confirm the physical and network requirements. A local NVR fails most often because the camera cannot provide a usable stream, the server cannot reach it, or recordings are not saved to persistent storage.
RTSP or ONVIF-Compatible IP Cameras
For self-hosted NVR software, cameras should support open video streams such as RTSP or ONVIF. These protocols make it easier for a local server to ingest camera feeds without relying only on a vendor cloud app.
Many IP cameras hide RTSP or ONVIF settings inside the camera’s web interface or mobile app. Some models disable these features by default, and some cloud-first cameras may not expose them at all.
Before buying cameras, check whether the model can provide a local stream URL and whether your chosen NVR software supports that camera type.
PoE Switch, Router, and Stable Local Network
A wired camera network is usually more stable than Wi-Fi for continuous video. Power over Ethernet can simplify installation because one Ethernet cable can carry both network data and power to a camera.
A typical local NVR network may include:
-
IP cameras;
-
a PoE switch;
-
a router;
-
an always-on local server;
-
one or more viewing clients;
-
optional VPN or secure tunnel access.
Stable networking matters because camera feeds are continuous. If a camera changes IP address or drops from Wi-Fi, the NVR may stop recording even though the software itself is still running.
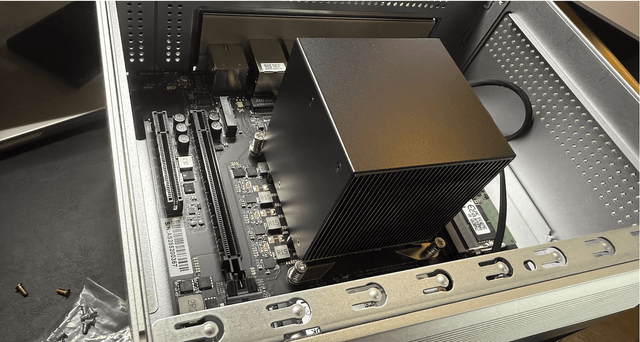
Local Server Hardware for Recording and Processing
Your server needs to handle camera ingest, recording, playback, and possibly motion or object detection. Hardware needs depend on the number of cameras, resolution, frame rate, recording mode, and whether the system performs local analysis.
A simple one-camera setup may run on lightweight hardware. A multi-camera system with continuous high-resolution recording and detection rules may require stronger CPU, more memory, faster storage, or a hardware accelerator depending on the software.
Do not assume that “it can run Docker” means “it can run every NVR workload.” Camera count, bitrate, retention, and detection features all change the load.
Storage for Continuous or Motion-Based Recording
Storage planning depends on whether you record continuously, only on motion, or based on events. Continuous recording uses more space but gives a complete timeline. Motion or event recording saves space but depends on detection settings.
You also need to decide where configuration and recordings live. App config and video files should survive reboots, updates, and container recreation.
For Docker setups, storage should be mapped deliberately. If recordings are left only inside the container, they may disappear when the container is recreated.
Secure Remote Access Plan
Many users want phone access when away from home. That does not mean cameras should be exposed directly to the public internet.
A safer plan is to keep cameras local and access the NVR through a VPN-style private network or secure tunnel. Tailscale’s private camera access setup describes a camera stream that can be reached only by devices inside a user’s private Tailscale network, rather than exposing a home camera directly to the public internet.
This kind of remote access pattern is useful for local NVR planning because it separates “I can view it remotely” from “the camera is open to the internet.”
Choosing the Right Local NVR Setup
There is no single correct local NVR setup. The right choice depends on your technical comfort level, camera count, remote access needs, and whether you want plug-and-play simplicity or self-hosted control.
All-in-One Hardware NVR for the Simplest Setup
A hardware NVR is the easiest route for most beginners. You buy an appliance from a vendor, connect compatible cameras, install storage, and use the vendor’s interface for recording and playback.
This is a good choice if you want fewer setup decisions. The trade-off is that camera compatibility may be more limited, and some features may depend on the vendor ecosystem.
Hardware NVRs work best when you choose cameras, storage, and NVR hardware from the same compatible system.
Self-Hosted NVR Software for More Control
Self-hosted NVR software gives you more control over camera brands, recording rules, storage paths, and integrations. It can run on a local machine, mini PC, NAS-style server, VM, or Docker host depending on the software.
Kerberos provides one example of this type of workflow. Its Kerberos camera server installation options describe several installation paths, including Docker, and note that Docker can be useful when you have many IP cameras or do not want to manage dependencies directly.
There is one important boundary: the Kerberos Open Source page is marked as deprecated and points users toward Kerberos Agent. In this article, it is best understood as evidence for the general self-hosted NVR setup pattern, not as the only recommended software choice.
Camera MicroSD Recording for Small Setups
Some IP cameras can record locally to microSD cards. This may be enough for one or two cameras if you only need simple local recording and do not need a central dashboard.
The limitation is that storage, access, retention, and management are spread across individual cameras. If a camera is stolen, damaged, or reset, footage may be harder to recover.
MicroSD recording is best treated as a small-scale option, not a full local NVR replacement for multi-camera setups.
When Docker Makes NVR Apps Easier to Manage
Docker can make NVR deployment more repeatable because the app runtime, ports, and storage mappings are defined explicitly. This is useful when you want the NVR to run next to other self-hosted apps.
Docker also adds failure points. You need to know which host folders map to which container folders, which ports are exposed, and whether recordings are stored outside the container layer.
For NVR apps, Docker is most useful when you care about app isolation and data persistence, and you are comfortable checking volumes, bind mounts, ports, and permissions.
How to Build a Local NVR Camera Server Step by Step
Build the system in layers. Do not start with remote access before local live view and recording work reliably.
A practical setup order is:
-
choose cameras that support open local streams;
-
prepare the local network and camera IPs;
-
find or confirm the RTSP / ONVIF stream URL;
-
install the NVR software;
-
map recording and config storage;
-
add camera feeds and recording rules;
-
test live view, recording, playback, retention, and remote access.
Step 1: Choose Cameras That Support Open Video Streams
Choose IP cameras that can provide local streams through RTSP or ONVIF if you want a flexible self-hosted setup. This reduces dependence on the vendor’s cloud app.
Check the camera’s own manual or management interface for local stream settings. Camera brands and models vary, so the exact RTSP path, port, username, password, and stream profile may differ.
Avoid buying cameras only because they have a mobile app. The key question is whether your local NVR software can ingest the video stream.
Step 2: Prepare the Network and Assign Stable Camera IPs
Connect cameras to the same local network as the NVR server. For wired cameras, a PoE switch can simplify power and network cabling.
Assign stable IP addresses to cameras through the router or the camera interface. If a camera’s IP changes, the NVR may continue looking for the old address and the feed may fail.
For privacy-focused setups, consider keeping camera traffic separated from general devices when your router or switch supports it. Network isolation is a more advanced step, but it can reduce exposure if a camera has weak firmware or cloud behavior.
Step 3: Get the RTSP or ONVIF Stream URL
Find the camera’s RTSP or ONVIF setting in the manufacturer app, web dashboard, or manual. The stream URL usually includes the camera address, protocol, username, password, port, and stream path.
A typical RTSP URL pattern may look like:
rtsp://username:password@camera-ip-address:554/stream-path
Do not publish real camera credentials in documentation, screenshots, or shared support tickets. Treat camera stream URLs like passwords because they may contain login details.
Step 4: Install the NVR Software on Your Local Server
Install your chosen NVR software on an always-on system. This could be native software, a VM, a hardware NVR, or a Docker container.
If using Docker, confirm that the host has Docker installed and that the app exposes the correct web interface and stream ports. For multiple camera containers, each container needs unique names and unique host ports.
After installation, open the NVR web interface locally first. Create an account, confirm the app runs after restart, and do not configure remote access yet.
Step 5: Map Recording Storage and App Config Paths
This step is critical for Docker and self-hosted apps. The NVR needs persistent locations for recordings, configuration, logs, and event data.
Docker’s bind mount storage model explains that a host file or directory can be mounted into a container, while Docker volumes are created and managed in Docker’s storage area. It also notes that bind mounts can persist files on the host, but they are tied to the host filesystem structure and have write access by default unless configured otherwise.
For a local NVR, this means you should deliberately map:
Host recording folder → Container recording folder Host config folder → Container config folder Host logs folder → Container logs folder
After setup, confirm the recordings appear on the host storage, not only inside the container.
Step 6: Add Camera Feeds and Configure Recording Rules
Add one camera first. Enter the stream URL, credentials, resolution profile, and recording settings.
Start with simple recording rules before adding complex detection logic. Confirm that live view works, then test recording, playback, and retention.
After the first camera works, add more cameras gradually. This makes it easier to identify whether problems come from one camera, the network, storage, or the NVR app.
Step 7: Test Live View, Recording, Playback, and Retention
Do not assume the system works just because the live feed appears once. A local NVR must be tested over time.
Check these items:
-
live view loads after refresh;
-
recording starts when expected;
-
clips can be played back;
-
recordings are stored in the intended folder;
-
storage usage grows as expected;
-
the app still works after reboot;
-
remote access does not bypass security controls.
A system is not finished until you can find and play back recorded footage after a reboot or app update.
Common Problems With Local NVR Setups
Most NVR failures map back to the Local NVR Signal Path. Start with the lowest-risk check before changing software or reinstalling containers.
The Camera Feed Does Not Connect
A missing feed usually means the camera stream path or network path is broken. The camera may not support RTSP / ONVIF, the feature may be disabled, credentials may be wrong, or the NVR server may not be able to reach the camera IP.
First, test whether the camera is reachable from the same network. Then verify the stream URL, username, password, port, and stream profile.
If one camera works and another does not, the problem is probably camera-specific rather than a full NVR software failure.
Recordings Disappear After a Reboot or App Update
This is usually a recording storage path problem. The app may have been saving footage inside a container, temporary directory, or unmapped internal folder.
Check the host folder and container folder mapping. Then confirm whether config, recordings, and logs are persistent after the container or app restarts.
In Docker setups, avoid recreating containers until you understand where the recordings and app database are stored.
Video Playback Is Choppy or Delayed
Choppy playback can come from the camera, network, server, storage, or client. A weak Wi-Fi link, high bitrate stream, overloaded CPU, slow disk, or browser playback issue can all look similar.
Check one camera at a time. Lowering resolution, testing a substream, using wired network, or reducing simultaneous playback can help identify the bottleneck.
Do not assume the NVR app is the problem until you confirm network stability and server load.
Storage Fills Up Faster Than Expected
Storage fills quickly when cameras record continuously, use high bitrate streams, or keep footage longer than planned. Motion recording can reduce storage use, but it depends on detection settings.
Check retention rules, recording mode, resolution, frame rate, and whether old clips are being deleted. Also confirm that recordings are not duplicated across multiple folders.
Storage planning should be reviewed after real usage starts. Estimated needs can differ from actual camera behavior.
Remote Viewing Works Locally but Not Away From Home
If local viewing works but remote viewing fails, the issue is usually the access boundary. The NVR app may be working, but external devices cannot reach it safely.
Check whether you are using a VPN, secure tunnel, reverse proxy, or direct port forwarding. Also check authentication, firewall rules, DNS, and whether the remote device is allowed to reach the private network.
Avoid solving this by exposing camera ports directly. A working remote connection is not useful if it creates a privacy or security risk.
How to Keep Your Local Camera System Private and Reliable
A local NVR can improve privacy, but only if the network and access model are designed carefully. A camera system is sensitive because it records private spaces, routines, people, and property.
Avoid Exposing Camera Ports Directly to the Internet
Do not treat port forwarding as the default remote access method. Opening camera or NVR ports directly can expose login screens, streams, or vulnerable firmware to the public internet.
A safer pattern is to keep cameras on the local network and access the NVR through a private remote access method. This keeps camera devices away from direct public traffic.
If you must expose any service, use strong authentication, restricted access, updates, and a clear reason for doing so.
Isolate Camera Traffic When Possible
Camera isolation means placing cameras on a separate network segment or access boundary when your hardware supports it. This can reduce the risk of cameras communicating broadly with other devices.
For beginners, this may be as simple as using a dedicated PoE switch and stable IP assignments. For advanced users, it may involve VLANs, firewall rules, or blocking direct internet access for camera devices.
Do not implement advanced network isolation unless you understand how the NVR server will still reach the camera streams.
Use VPN or Secure Tunnels for Remote Access
A VPN-style private network or secure tunnel is often a better remote viewing method than direct port exposure. It lets trusted devices reach the NVR while keeping the camera system off the open internet.
This approach is especially useful if you want phone access while traveling. The phone joins the private network, then accesses the NVR as if it were on the local network.
Remote access should be tested after local recording works. If local recording is unstable, remote access will only make troubleshooting harder.
Keep Camera Firmware, Passwords, and User Permissions Under Control
Change default camera passwords and use separate accounts when supported. Avoid sharing admin credentials with every viewer.
Keep firmware and NVR software updated, but back up configuration before major changes. Updates can change stream behavior, permissions, or app settings.
Limit access based on need. Not every household member or office user needs admin control over cameras, recording rules, or retention settings.
How to Check Whether Your NVR Server Is Working
A working local NVR should pass more than a live-view test. It should record, save, play back, survive reboot, and remain secure under the access model you chose.
Use this validation checklist:
| Check | What to Confirm | If It Fails, Check |
| Live view | Camera feed loads reliably | Camera Stream Path, Network Path |
| Recording | Clips or continuous footage are created | Recording rules, app status, storage path |
| Storage | Files appear in the intended host folder | Docker mounts, permissions, retention settings |
| Playback | Recorded footage can be played back | App database, file location, browser or client |
| Reboot test | App and recordings survive restart | App Runtime Path, Recording Storage Path |
| Remote access | Trusted remote device can view the NVR safely | Access Boundary, VPN or tunnel settings |
| Security | Cameras are not exposed directly without need | Firewall, router, user permissions |
Live Camera Feeds Load Consistently
Refresh the NVR dashboard and test live view from more than one device. A single successful load does not prove the camera feed is stable.
If the feed drops after a few minutes, check camera network stability, stream profile, and server load. For Wi-Fi cameras, compare with a wired camera if possible.
Recordings Are Saved to the Correct Storage Location
Record a short clip or wait for a motion event, then confirm the file appears in the intended storage folder. This is especially important for Docker deployments.
The correct storage location should be outside the container layer. If you cannot find recordings on the host, the mapping may be wrong.
Also confirm that the folder has enough space and correct permissions.
Motion or Event Rules Trigger as Expected
Motion and event rules should be tested with controlled movement. Walk through the camera view and check whether the NVR records the event.
If events do not trigger, check detection zones, sensitivity, stream choice, and whether the camera or NVR software is responsible for motion detection.
Do not rely on alerts until you have confirmed that recordings are actually saved.
Playback Works After Reboot or Update
Restart the NVR app or host system, then confirm the dashboard, camera feeds, and recordings are still available. This test catches weak persistence settings.
If recordings remain but the library or event timeline disappears, the video files may be saved but app configuration may not be persistent.
Both footage and app data matter. Losing either can make the system unreliable.
Remote Access Does Not Bypass Security Controls
Test remote access from a trusted device outside your local network. Confirm that access requires the expected private network, account, or authentication path.
Also confirm that the camera itself is not directly reachable from the public internet unless you have intentionally designed and secured that exposure.
A local NVR should reduce cloud dependency without replacing it with unsafe public access.
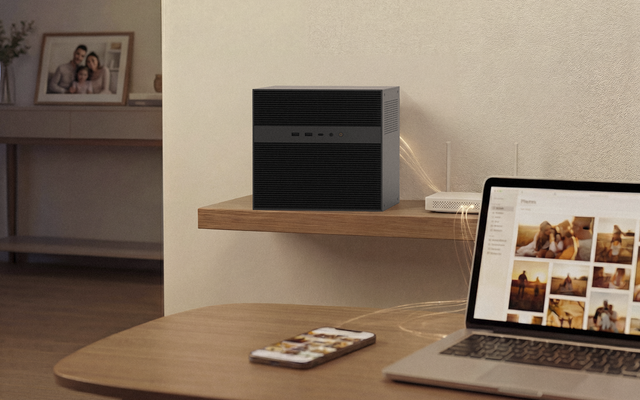
How This Works in a Self-Hosted Home Server Environment
Once you understand the general signal path, a real setup still depends on the specific system, Docker environment, and camera model. The practical handoff is to map each layer: camera stream, network path, app runtime, recording storage, access boundary, and validation.
For example, the ZimaOS NVR camera server setup shows a self-hosted workflow using CasaOS, Docker custom installation, Kerberos, a mapped web port, a mapped recordings folder, and an RTSP-compatible IP camera. It also shows why users need to get the RTSP link from the camera manufacturer or camera interface rather than assuming all cameras use the same stream path.
For users turning a small server into a lightweight local camera recording system, ZimaBoard 2 home server fits the type of low-power, always-on self-hosted environment where Docker apps, local services, network devices, and storage paths need to work together. It is not the only way to build a local NVR, but it is a relevant device class for this kind of self-hosted camera server workflow.
The same rule applies to any system: do not treat the official setup page as a full design substitute. Use it after you already understand what each layer is supposed to do.
FAQ
Can I build a local NVR without paying for cloud storage?
Yes. A local NVR stores recordings on your own server, NVR appliance, or local storage instead of sending them to a vendor cloud plan. You still need to pay for hardware, storage, power, and maintenance, and some NVR software may have paid features or licenses depending on what you choose.
Do I really need PoE cameras for a home NVR?
Not always, but PoE cameras are often more reliable for continuous recording because they use wired Ethernet and receive power through the same cable. Wi-Fi cameras can work in small setups, but they are more sensitive to signal issues, bandwidth limits, and dropouts. The more cameras you add, the more valuable wired networking becomes.
Is a mini PC or small server enough for camera recording?
It can be enough for a small setup, depending on the number of cameras, resolution, bitrate, recording mode, and detection features. Simple recording is usually lighter than continuous high-resolution recording with local analysis. Test with one camera first, then scale gradually instead of assuming the hardware can handle every workload.
Why is my RTSP camera feed not working?
The most common causes are wrong credentials, wrong stream path, disabled RTSP / ONVIF settings, changed camera IP address, firewall rules, or unsupported camera behavior. First confirm the camera is reachable on the local network. Then verify the exact stream URL in the camera manual or management interface.
Should I use VPN or port forwarding for remote camera access?
For most home users, a VPN-style private network or secure tunnel is safer than exposing camera or NVR ports directly. Port forwarding can work, but it increases the risk of public exposure if authentication, updates, or firewall rules are weak. Remote viewing should preserve the privacy advantage that made you choose a local NVR in the first place.

Recommended products

Support & Tips
More to Read
How to Deploy a Local LLM Without Breaking Storage or Apps
This guide explains how to safely deploy a local LLM on a shared home NAS or home server. It covers model storage paths, Docker...
What to Check Before Adding a GPU to a Home NAS
This guide explains what to check before adding a GPU to a home NAS. It covers workload fit, PCIe slots, physical clearance, PSU headroom,...
What Are the Local AI Limits of a Home NAS?
This guide explains the local AI limits of a home NAS by workload type, hardware resources, and real-world impact. It covers OCR, media analysis,...


