
Energy-Efficient Computing: How to Replace Power-Hungry Legacy Systems in Your Homelab


A lot of people build a homelab with spare parts because that is what is sitting around the house. It works at first, then the hidden costs show up. The old tower runs hot, stays noisy, and draws power all day for workloads that barely stress modern hardware. A better setup usually comes from three things: measuring what you already use, choosing hardware that fits the job, and moving services over in a sequence you can control.
Why Does Old Homelab Hardware Use So Much Power?
The biggest mistake is assuming an older machine is “free” because it was already paid for. In practice, an always-on system creates a recurring electricity cost. Even modest differences in power draw can add up over time, especially when multiple devices run 24/7.

Electricity is only part of the issue. Extra power turns into heat, which affects room temperature, fan noise, and cooling needs. A single modern system that replaces several older machines can reduce both power use and heat output.
Legacy hardware is also often oversized for common self-hosted tasks. DNS filtering, local backups, dashboards, file syncing, lightweight containers, and small media libraries rarely need workstation-class power budgets. When an old desktop spends most of the day idling above the needs of the workload, efficiency drops and operating costs rise.
How to Measure Performance Per Watt in a Homelab
To measure it, record wall power at idle, under normal workloads, and under heavier load, then compare that data with the number of services the system can run smoothly.
- Measure idle power on the wall. Let the system finish booting and sit for a few minutes, then record the idle wattage with a plug-in power meter.
- Measure power during normal workloads. Run the tasks you actually use, such as file syncing, backups, media indexing, or a few containers, then record the power draw again.
- Check peak load power if needed. Test a heavier workload to see how much power the system uses under stress and whether temperatures or fan noise rise sharply.
- Record the useful output. Note how many services the system can handle smoothly, how fast backup jobs finish, or how responsive containers remain under load.
- Compare systems by efficiency, not headline speed. A system that uses less power while completing the same tasks more smoothly usually has better performance per watt.
Processor specifications can still help, but they do not tell the full story. TDP or Processor Base Power is a thermal reference, not total system power draw. Memory, storage, networking, and expansion cards all affect the final number at the outlet.
[[related_products_1]]
What Hardware Is Best for an Energy-Efficient Homelab?
Good hardware selection begins with the workload. A small file server, backup target, media organizer, or home automation host has different needs from a heavy transcoding box or a dense virtualization node. For many people, the sweet spot is a compact x86 system with low idle power, enough memory for several services, direct storage connectivity, and quiet cooling.
One example in that category is ZimaBoard 2, which is described as a fanless x86 single-board server with an Intel N150, dual 2.5GbE, dual SATA 3.0, and PCIe 3.0 expansion for home server, NAS, and homelab use. That combination reflects what many buyers now look for in an efficient always-on platform: modest processor power, quiet operation, and expansion that supports a serious setup without pulling you back into oversized hardware.
The hardware checklist below usually leads to better results:
- Low-power processor class: Pick a CPU family designed for efficient 24/7 operation.
-
Quiet thermal design: Passive cooling or a very conservative fan profile works well in bedrooms, offices, and media rooms.
-
Sensible memory capacity: Buy enough RAM for present workloads plus a small buffer for future services.
-
Native storage connectivity: SATA support is still valuable for local disks and simple NAS layouts.
-
Modern networking: 2.5GbE gives useful breathing room for backups, large transfers, and multi-device access.
Storage decisions matter, too. In most homelab builds, SSDs are better suited to boot drives, containers, app data, and other latency-sensitive workloads, while HDDs remain a practical choice for backups, media archives, and larger cold data sets. Power figures vary by model, but SSDs generally idle lower and respond faster, while HDDs still offer better cost per terabyte for bulk storage.

For many users, a mixed layout is the most practical option. SSDs improve system responsiveness, while HDDs provide affordable capacity for large files and long-term storage.
How Can You Migrate from Legacy Systems in a Homelab?
Legacy systems often include undocumented services, old scripts, and leftover dependencies. A structured consolidation plan reduces migration risk and can also lower power, cooling, and maintenance overhead.
A clean migration usually follows a short sequence:
- Inventory every service. List shares, ports, scheduled tasks, containers, and attached drives.
-
Classify them by importance. Critical, useful, retired is enough.
-
Move the light services first. DNS, dashboards, sync tools, and small apps are good early candidates.
-
Create a rollback path. Keep a backup, image, or snapshot before cutover.
-
Run both systems briefly. Watch logs and actual user behavior.
-
Power off the legacy box. Leave it off unless a real problem appears.
Virtualization allows multiple workloads to run on one physical system, which makes consolidation easier without requiring a full rebuild. A VM can retain an older environment when a service cannot be moved immediately, while containers work well for lighter apps that are easy to redeploy. Moving workloads in stages is usually safer than migrating everything at once.
A structured migration also lowers maintenance overhead. Fewer physical devices mean fewer components to manage, less always-on hardware, and a simpler homelab overall.
Start Building a Smarter, More Efficient Homelab Today
Measure one machine this week. Check its wall power, list the services it runs, and decide if that hardware still earns its place. In many homes, one modern low-power server can handle the work of several aging systems with less noise, less heat, and less wasted electricity. That is the point of energy-efficient computing in a homelab: lower overhead, fewer compromises, and a setup you can live with every day.
FAQs about homelab power and hardware
Q1. Does power supply efficiency affect homelab energy use?
Yes, it can. An inefficient power supply wastes more electricity as heat, especially at low loads where many homelab systems spend most of their time. A right-sized PSU with good low-load efficiency can improve overall power use, reduce excess heat, and make the system more consistent under 24/7 operation.
Q2. Should a homelab server be turned off when it is not in use?
Sometimes, yes. It depends on how often the system is needed and how many background tasks must stay available. If a server only handles occasional jobs, scheduled shutdowns can save power. If it supports backups, remote access, or automation, sleep states and power scheduling are usually more practical.
Q3. Can BIOS or firmware settings improve energy efficiency?
Yes, in many cases. Power-saving features such as C-states, CPU package limits, ASPM, and fan profiles can reduce idle draw without changing hardware. The best approach is to enable conservative power-saving settings first, then test stability, temperatures, and service responsiveness under normal homelab workloads.
Q4. Does RAM capacity affect power consumption in a homelab?
Yes, although the impact is usually smaller than CPU or storage choices. More memory modules increase baseline power draw, and higher-capacity systems may also encourage heavier virtualization use. The practical goal is to install enough RAM for current services plus reasonable growth, not maximum capacity by default.
Q5. Is ECC memory worth considering for an always-on homelab?
Often, yes, especially for storage, virtualization, and long-uptime systems. ECC memory helps detect and correct certain memory errors, which can improve reliability over time. It does not directly lower power use, but it can reduce the risk of silent data issues in systems expected to run continuously.

Recommended products

Zima Campaign Hub
More to Read

How SjslTech Streams PC Games to R36S with ZimaBoard 2
This creator-led build shows how SjslTech combines ZimaBoard 2, Sunshine, Tailscale, Moonlight, and an R36S into a remote PC game-streaming path.
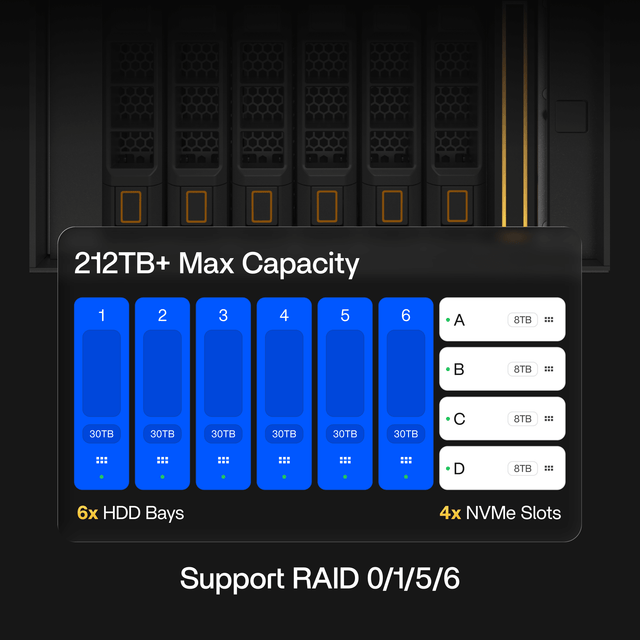
What Is RAID and How Does It Work?
A beginner-friendly RAID guide covering RAID 0, 1, 5, 6, and 10, usable capacity, rebuilds, NAS drive choice, and backup limits.
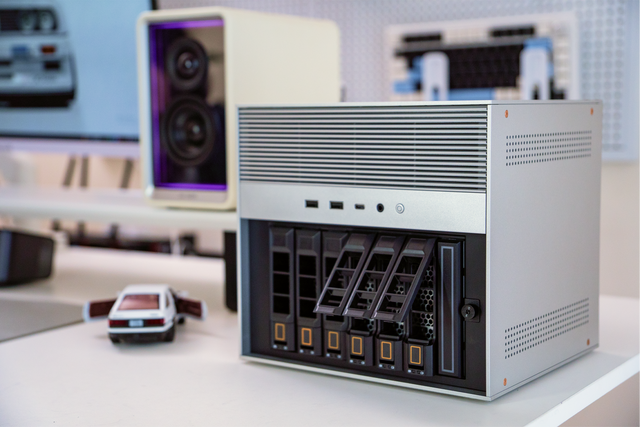
I Turned an Ikea Kallax Into a 10-Inch Rack Homelab With the ZimaCube 2
Rack-mounted homelabs sound great until you realize you don't want an enterprise jet engine invading your living room. The 10-inch mini rack movement is...


