
How to Deploy OpenClaw on Your Home Server: The Complete 2026 Guide


Your AI just got smarter. Now it needs a place to live. Large language models are everywhere in 2026 — in your browser, your phone, your IDE. But if you want an AI agent that actually does things for you — manages your messages, runs automations, connects to every chat platform you use — you need more than a cloud subscription. You need a gateway running 24/7 on hardware you own.
That's exactly what OpenClaw is. And in this guide, we'll show you how to deploy it on a home server in under 30 minutes.
What Is OpenClaw, Really?
Let's clear up a common misconception: OpenClaw is not a chatbot. It's not a web scraper. It's an AI agent gateway.
Think of it as the operating system for your personal AI. OpenClaw connects large language models (Claude, GPT, Gemini, Llama, DeepSeek — you name it) to the real world through:
- Chat channels: Telegram, WhatsApp, Discord, Signal, Slack, Feishu, iMessage, and 20+ more
- Tool execution: shell commands, file operations, web browsing, code execution
- Multi-agent routing: run multiple specialized AI agents from a single gateway
- Session management: persistent conversations with memory across channels
- Automation: cron jobs, webhooks, heartbeat tasks
It runs as a Node.js service on your own hardware. Your data stays local. Your API keys stay private. You control everything.
Why Your AI Agent Deserves Its Own Hardware
You could run OpenClaw on a cloud VPS. Many people do. But there's something satisfying — and practical — about running it on a silent little box sitting on your shelf. Here's the real question for 2026: what's the best budget hardware for a home AI agent?
The go-to answer used to be Raspberry Pi. But let's look at the numbers:
Raspberry Pi 5 (8GB kit on Amazon): $163.99
- ARM architecture (aarch64)
- 8GB RAM
- MicroSD storage (slow, wear-prone)
- Requires active cooling, case, power supply (kit price)
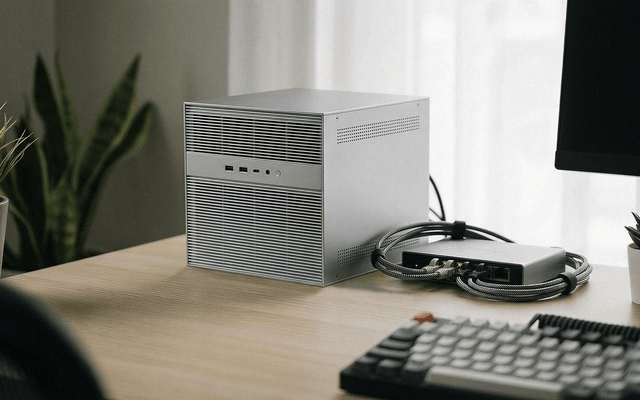
ZimaBlade (16GB RAM kit): $175.9
- x86 architecture (Intel -E3950)
- 16GB RAM — double the Pi
- SATA + PCIe for real storage (SSD/HDD)
- Passive cooling, silent operation
- CasaOS pre-installed — Docker-ready out of the box
For $12 more, you get twice the RAM, x86 compatibility (which means broader Docker image support, no ARM build headaches), and real storage interfaces. For a 24/7 AI agent gateway, that's not even a close call.

The x86 advantage matters more than you think. OpenClaw's Docker image is built on node:24-bookworm and works natively on x86. While ARM builds exist, the x86 ecosystem has fewer edge cases, broader package compatibility, and better performance-per-watt for sustained Node.js workloads.
What You'll Need
- A ZimaBlade (or any x86 home server running CasaOS/ZimaOS)
- Internet connection (wired recommended for stability)
- An AI model API key (OpenAI, Anthropic, DeepSeek, or any OpenAI-compatible provider)
- A Telegram account (we'll use Telegram as the example channel — but OpenClaw supports 20+ platforms)
- 15-30 minutes

Step-by-Step Installation
Step 1: Install OpenClaw from the ZimaOS App Store
Open your CasaOS dashboard in a browser (usually http://your-device-ip). Navigate to the App Store, search for "OpenClaw", and click Install.
That's it for installation. CasaOS handles the Docker container setup automatically.
Step 2: Open a Terminal
You need terminal access to configure OpenClaw. Two options:
Option A (Recommended): SSH from your computer
ssh username@your-device-ipOption B: Connect a keyboard and monitor directly to your ZimaBlade.
Step 3: Enter the OpenClaw Container
Switch to admin mode and enter the container:
su
# Enter password (default: casaos)
docker exec -it openclaw bash
Your prompt should change to root@openclaw:/app — you're now inside the OpenClaw environment.
Step 4: Run the Configuration Wizard
node /app/dist/index.js configThe wizard will walk you through:
- Gateway location — select "Local (this machine)"
- Model configuration — choose "custom provider", enter your API base URL, API key, and model ID
- Channel setup — we'll configure Telegram next
Tip: Use spacebar to select options, Enter to confirm.
Step 5: Configure Telegram (or Your Preferred Channel)
In the config wizard:
- Select Channels → Configure/link → Telegram
- Open Telegram, message @BotFather, send /newbot
- Follow the prompts to create your bot (name + username ending in "bot")
- Copy the HTTP API Token that BotFather gives you
- Paste the token into the OpenClaw wizard
- Set DM policy to "Pairing" (recommended)
- Select "Continue (Done)"
Step 6: Pair Your Bot
Send /start to your new bot in Telegram. It will reply with a pairing code.
Back in the terminal:
openclaw pairing approve telegram YOUR-PAIRING-CODEDone. Your AI agent is now live on Telegram.
Step 7: Access the Web Dashboard
Open a browser and navigate to:
https://your-device-ip:24190?token=casaosWeb UI maybe throw pairing required, you need enter the container and run:
openclaw devices listFind your device and run:
openclaw devices approve <YOUR_DEVICE_ID>Return Web UI , enter
This gives you a full web UI to monitor your OpenClaw gateway — view logs, check status, and manage configuration.
Beyond Telegram: What Else Can OpenClaw Do?
Once your gateway is running, you can:
- Add more channels: WhatsApp, Discord, Signal, Slack, iMessage, IRC, Matrix, LINE, and more
- Set up multiple AI agents: route different conversations to different models or personas
- Enable automation: cron jobs, webhooks, heartbeat monitoring
- Use tools: let your AI agent browse the web, execute code, manage files, search the internet
- Connect mobile apps: pair your phone as a companion device
The configuration lives in ~/.openclaw/openclaw.json (inside the container) and supports hot-reload — edit the config, and the gateway picks up changes automatically.
Security Basics
A few things to keep in mind for a 24/7 deployment:
- Network access: The gateway binds to your local network by default. Don't expose ports to the public internet without a VPN (Tailscale works great) or reverse proxy with authentication.
- API keys: Stored in your local config file. Never share your openclaw.json.
- DM pairing: The pairing system ensures only approved users can chat with your bot. Keep it enabled.
- Updates: Run regular updates to stay current with security patches.

Give Your AI Agent a Quiet Home
There's a reason the home server community gravitates toward fanless, silent hardware. An AI agent gateway runs 24/7 — it's always on, always listening for your next message. You don't want a fan whirring on your desk at 2 AM. ZimaBlade's passive cooling means zero noise. Pair that with CasaOS's one-click Docker management, and you have a home AI setup that just works — no maintenance, no noise, no fuss.
Your AI agent deserves a home that's as reliable as it is: a small, silent, always-on x86 box with real storage and enough RAM to handle whatever you throw at it. That's not a Raspberry Pi; that's a ZimaBlade. Ready to give your AI agent a permanent home?
👉 Check out ZimaBlade at ZIMA Store !

Recommended products


Zima Campaign Hub
More to Read
How I Turned the ZimaCube 2 Into a Zero-Trust Ingress Controller for My Entire Homelab
Stop exposing your homelab with open router ports. This guide details how to build a secure, zero-trust ingress architecture on ZimaCube 2 using Cloudflare...
ZimaCube 2 Pro Unboxing — The First NAS That Feels Like a Design Object
Discover the ZimaCube 2 Pro: a premium, compact NAS that redefines homelab hardware. Featuring an Intel i5, 10GbE, Thunderbolt 4, and a sleek aluminum...
Why I Replaced Rack Servers With a ZimaCube 2 — A Homelab Evolution Story
ZimaCube 2 replaces noisy rack servers and limited mini PC setups with a quiet all-in-one homelab for Docker, ZFS storage, NVMe, backups, self-hosting, and...


