
Homelab Beginner’s Guide: Getting Started with Docker on Your NAS Server


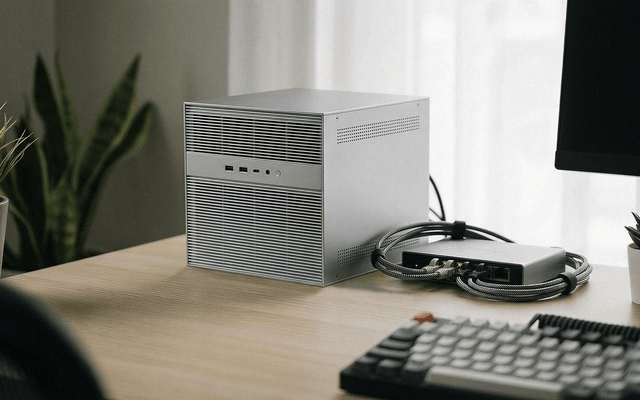
A NAS becomes a real home server when it runs services you depend on daily: stable DNS, a media library, and private file sync. Early homelab builds usually fail for boring reasons: settings disappear after an update, a reboot breaks access, or ports end up open without a clear plan. Docker reduces that chaos by running apps in containers with repeatable configuration, plus straightforward options for persistence and networking.
Before You Start: A Quick Checklist

- Confirm CPU architecture (common: amd64 or arm64) so image compatibility stays predictable.
- Reserve a stable LAN address (DHCP reservation or static IP).
- Pick one persistent location for container configs and databases, separate from large media shares.
- Choose a management style and stick to it (GUI manager or Compose projects).
- Decide which services must remain LAN-only versus remotely reachable.
- Set a backup destination for persistent data.
How to Install Docker on Your NAS and Deploy Your First Container Step-by-Step
Docker on a NAS usually lands in one of two patterns. Some NAS platforms include Docker as a built-in feature. Others behave like a standard Linux host, where Docker Engine is installed using official instructions for your distribution.
Install Docker Engine with Predictable Admin Access
On Linux, post-install steps describe how to manage Docker without typing elevated commands every time. That convenience comes with a trade-off: membership in the Docker group effectively grants high privileges, so treat that account as an admin account and keep it protected.
A lower-privilege option also exists. Rootless mode runs the Docker daemon and containers as a non-root user. It has prerequisites, yet it is a useful context for anyone serious about a safer homelab foundation.
Deploy a First Container
The first container is not about features. It is a systems check: the service runs, stays up, and stays private until you choose otherwise.
Publishing ports can be risky because a published port may become reachable beyond the NAS. During early testing, bind access to the NAS itself so you can validate the service without opening it to the network.
After the service responds locally, set a restart policy so it comes back after a NAS reboot. That prevents the classic "it vanished after reboot" problem.
Pick One Workflow for Repeatable Deployments

Consistency matters more than the tool. Many people lose the thread by mixing one-off runs, multiple UIs, and undocumented changes.
Docker Compose is a clean way to define services and their configuration in a single file and bring them up consistently. If your NAS operating system offers a visual Docker "app" manager, use it as long as it still makes paths and persistence clear. ZimaOS, for example, documents how Docker app paths are organized in its UI, which can reduce early confusion.
Docker Storage on a NAS: Volumes vs. Bind Mounts
Storage decides how updates feel later. Most "Docker broke my setup" stories in a homelab trace back to missing persistence or to data saved in a location nobody can find again. A bind mount maps a host file or directory into a container. In contrast, a volume is managed by Docker and stored under Docker's own storage area.
| Storage method | Best fit on a NAS | Why it works | Common failure |
| Bind mounts | App configs you want visible in NAS shares | Easy to inspect and back up with NAS tools | Path typos or permissions break the app |
| Volumes | Databases and internal app state | Fewer host-path mistakes, cleaner portability | Backups require volume-aware handling |
A simple, durable approach: keep configs and databases on a dedicated "docker-data" location that gets backed up frequently, then keep bulk media on your normal share. This avoids slow UI problems caused by metadata hammering HDDs, while keeping large files where they belong.
Backup scope matters. Back up the persistent container data or volumes, not images. Test at least one restore early so you know your backup includes the right data and permissions.
Best Docker Containers for a NAS Homelab
The first services should solve real household problems with low maintenance overhead. Three categories tend to deliver a quick win on a NAS server, and each teaches a useful skill that carries to the next project.
DNS-Based Network Filtering
A DNS-level filter improves every device on the network without installing anything per phone or TV. It also forces the right fundamentals: stable IP planning and a clear understanding of reachability. Reliability is the core requirement here, because a DNS outage makes the whole network feel broken.
Keep the admin interface private on your LAN, and treat this service as a network appliance rather than an experiment.
Media Library Streaming
A NAS is a natural home for a media library because storage is already centralized. The real work is organization: folder structure, metadata location, and permission consistency across shares.
Performance complaints often come from small files, not big ones. Metadata and thumbnails create frequent reads and writes. Keeping application data on faster storage can improve responsiveness even when media stays on HDDs.
Personal Cloud Sync and Remote File Access
Private sync is appealing because it keeps files under your control while staying convenient across devices. The homelab pitfall is persistence: if the service stores its database inside the container filesystem, updates and redeploys can wipe state.
Use a bind mount or volume for the service's database and config so the container can be replaced without losing the data that matters.
How to Expose Docker Services Safely: Reverse Proxy, HTTPS, and Ports

Remote access is where a homelab can drift into real risk. A clean model keeps most services private on the LAN and exposes only a controlled front door.
Use a Reverse Proxy as the Single Entry Point
A reverse proxy gives you one place to route traffic and enforce access rules. It also makes services easier to live with, because hostnames are simpler than IP addresses plus ports.
Expose only the reverse proxy publicly, and keep internal services on private networks whenever possible.
Use TLS for Any Remote Access
If a service is reachable off your home network, encryption is a baseline requirement, not an upgrade. Use HTTPS for remote access, and avoid sending logins or cookies over plain HTTP.
Keep Port Publishing Deliberate
During early testing, keep service ports local to the NAS. When remote access is needed, publish the minimum set of ports required for the reverse proxy, then route internally.
If you plan to use public hostnames, certificate automation helps keep HTTPS sustainable. Domain validation is part of certificate issuance, so a real domain name and a deliberate exposure plan usually go together.

Maintenance Checklist: Updates, Monitoring, and Restore Drills
A homelab stays enjoyable when maintenance is predictable. This section focuses on routines that prevent silent failure, not on elaborate tooling.
Update with Intent
Update container images during a quiet window, then validate the critical paths afterward: logins, mounts, and remote access behavior. Keep notes on what changed, especially when you upgrade the reverse proxy or anything authentication-related.
Monitor the Few Signals That Matter
Two things drift quietly on a NAS: disk usage and exposure scope. Images, logs, and orphaned data can fill the system drive; review storage growth periodically. Confirm router forwards remain intentional and narrow.
Rehearse Restores
Backups build confidence only when a restore works. Rehearse one restore on a non-critical service so you can confirm that data paths, permissions, and credentials come back cleanly.
Launch Your First Self-Hosted Stack on Your NAS
A homelab feels "done" when it survives ordinary life: a reboot, an update, and one mistake that needs rollback. Keep the first stack small, keep data persistent, and keep remote access behind a reverse proxy with HTTPS. Before diving into Docker, make sure you have a solid foundation with our guide on how to build a home server. Build reliability first, then add services one at a time, with clear notes on data paths and what is exposed to the internet.
For storage planning, understanding the 3-2-1 backup rule helps ensure your data stays protected. When you need secure remote access to your services, consider overlay VPNs or WireGuard for safe connectivity. And if media streaming is on your list, setting up a Plex media server on your Docker-enabled NAS is a natural next step.
FAQs
Q1: Can I run Docker containers on an ARM-based NAS, or do I need x86?
Yes, often. Many popular images publish both amd64 and arm64 variants, yet some projects still ship only one architecture. If a container won't run, check the image's supported platforms and the app's documentation, or choose an alternative image that offers multi-arch support.
Q2: How much RAM does a practical NAS homelab usually need for a few services?
It depends, and many small setups work fine with modest memory. The safer way to size RAM is to list the services you plan to run, check each project's baseline requirements, then watch real peak usage after a few days of uptime. Add headroom for updates, caching, and occasional spikes.
Q3: Do I need to use Docker Compose, or is a GUI manager enough?
Not necessarily. A good GUI can be enough for simple stacks, especially early on. Compose becomes valuable when you want repeatable deployments, easy migration, and versioned changes. If you expect to reinstall or move to new hardware later, Compose usually pays off quickly.
Q4: Should I run each container on its own user-defined network?
Usually, yes for multi-service setups. User-defined networks make service-to-service communication cleaner and reduce the temptation to publish extra ports. You can group related services on one network, then keep unrelated apps separated. For a small homelab, two or three networks are often plenty.
Q5: What's the safest way to handle remote access if I don't want to expose my NAS directly?
A common approach is to use a Personal VPN you run at home, then access services as if you were on a LAN. This reduces the need for public ports and certificates. It still needs strong authentication and device security, but it typically lowers risk compared with exposing multiple web apps publicly.

Recommended products

Zima Campaign Hub
More to Read
Why I Replaced Rack Servers With a ZimaCube 2 — A Homelab Evolution Story
ZimaCube 2 replaces noisy rack servers and limited mini PC setups with a quiet all-in-one homelab for Docker, ZFS storage, NVMe, backups, self-hosting, and...
Running Docker, CI/CD, and 10+ Self-Hosted Services on the ZimaCube 2
This community spotlight features ZimaCube 2 Pioneer Michael Luckenbill’s full self-hosted infrastructure test. Running 10+ Docker containers, local GitHub Actions CI/CD, dual ZFS HDD/NVMe...

What Happens When Two AI Agents Fight Over One Server?
Zero Noichi’s AI cybersecurity experiment used two ZimaBoard 2 devices to simulate attacker and defender agents, showing how homelab servers can support safe AI,...


