
How to Set Up a Home NAS for the First Time Without Getting Lost


Quick Answer
Set up a home NAS in this order: hardware first, local network access second, admin account third, drive detection fourth, storage pool or volume fifth, shared folder sixth, and backup planning before important files.
Do not start by copying files, enabling remote access, or installing apps. For a first-time NAS setup, the safest path is:
-
Connect the NAS to power and Ethernet.
-
Find it on the local network.
-
Complete first login and create a secure admin account.
-
Confirm all drives are detected.
-
Create a storage pool or volume.
-
Create one test shared folder.
-
Connect from your computer.
-
Test file copy, delete, and permissions.
-
Plan backup before storing important data.
-
Enable remote access only after local access works.
The main goal is not to finish every feature on day one. The goal is to make the NAS reachable, usable, and safe enough for your first files.
What Should You Set Up First on a Home NAS?
The first thing to set up on a home NAS is not RAID, apps, or remote access. It is local access.
A NAS becomes much easier to manage once you can reliably open its dashboard from a computer on the same network. After that, you can create an admin account, check whether drives are detected, create storage, and then test one shared folder.
A general NAS network setup usually depends on a few basic prerequisites: a NAS device, compatible drives, a router or switch, NAS software, and a stable network connection. One practical setup overview describes a NAS as a standalone system with its own IP address that allows shared file access across devices, and it also emphasizes hardware, software, and network preparation before configuration: NAS network setup prerequisites.
For a beginner, the best rule is simple: do not move important files onto the NAS until you can find it, log in, see all drives, create one shared folder, and verify that file access works from your daily computer.
What You Need Before Turning On the NAS
Before turning on the NAS, prepare the physical device, the network connection, and the information you will need for first login. Many first-time setup problems happen because one of these basic pieces is missing.
Check the NAS Hardware and Drive Bays
Start with the hardware. Make sure the NAS is on a stable surface with airflow, the drive bays are properly closed, and the drives are seated correctly.
For a multi-bay NAS, label the drives or drive trays before you begin. This makes future troubleshooting easier if a drive reports an error or needs to be replaced.
Check these items before booting:
-
NAS device and power adapter.
-
Installed drives.
-
Ethernet cable.
-
Router or network switch.
-
Daily computer on the same network.
-
Browser or vendor discovery tool.
-
Place to save the admin username and password.
-
Backup target for important files later.
If the NAS is diskless, do not assume the operating system will create storage automatically. You may still need to create a pool, volume, or mirror before files can be stored.
Connect Power, Ethernet, and Your Main Computer
For first setup, use Ethernet rather than relying on wireless discovery. A wired connection is usually easier to troubleshoot because the NAS, router, and computer are all on the same local network.
Connect the NAS to your router or switch, then connect your main computer to the same network. If possible, avoid guest Wi-Fi networks, VPNs, or network isolation during first setup because they can prevent the computer from seeing the NAS.
Wait for the NAS to finish booting before searching for it. Some devices take several minutes before their dashboard, discovery tool, or IP address becomes available.
Prepare Your Router, Browser, and Login Information
Your router can help you find the NAS if the discovery tool does not work. Most routers have a client list or connected devices page that shows device names and IP addresses.
Prepare a modern browser and keep a note-taking window open. During setup, you may need to record the NAS IP address, admin username, shared folder name, and test user credentials.
Do not use weak or reused passwords. The first admin account controls storage, users, sharing, apps, updates, and sometimes remote access.
A Simple First-Time Home NAS Setup Path
Use The First-NAS Setup Ladder as your first setup model. It keeps the process in the right order and helps you identify where to go back if something fails.
| Setup Layer | Key Question | What It Helps You Decide | Validation Signal |
| Hardware Ready | Is the NAS physically ready before software setup begins? | Whether power, Ethernet, drive bays, router access, and the main computer are ready | NAS powers on, Ethernet is connected, drives are seated, and a router or discovery tool can be used |
| Network Found | Can the NAS be discovered on the local network? | Whether to continue setup or fix LAN, cable, IP, or browser access first | NAS appears in a client app, router list, discovery tool, or browser dashboard |
| Admin Secured | Has the first admin account been created safely? | Whether management access is protected before storage and shares are configured | Admin login works and weak/default credentials are avoided |
| Storage Confirmed | Are all drives detected before creating storage? | Whether it is safe to create a pool, volume, mirror, or RAID option | Expected drives appear with the correct status |
| Share Tested | Can one simple shared folder be opened from a computer? | Whether file sharing works before creating many folders or moving important data | A test folder opens from Windows, macOS, or mobile, and file copy/delete works |
| Protection Planned | Is the NAS ready for important files, backups, and remote access? | Whether to start saving data, configure backup, or delay remote access | Backup target is defined, permissions are understood, and remote access is not enabled blindly |
This ladder is not a brand-specific setup path. It is a beginner validation sequence. If you get stuck, identify which layer failed instead of randomly changing settings.
Step 1: Find the NAS on Your Local Network
After the NAS boots, find it on your local network. Depending on the device, this may happen through a desktop client, mobile app, web scanning page, router device list, or direct IP address.
-
Is the NAS powered on?
-
Is the Ethernet cable fully connected?
-
Is the computer on the same network?
-
Is the NAS still booting?
-
Does the router show a new device?
-
Is the computer using a VPN or guest Wi-Fi?
Do not reset the NAS immediately. Network discovery issues are often caused by cable, router, subnet, browser, or timing problems.
Step 2: Complete the First Login and Admin Account Setup
Once you reach the NAS dashboard or initialization page, complete the first login. This usually includes selecting language, setting device name, creating an admin account, and saving credentials.
The admin account should be used for management, not daily file access. If you use the admin account for everyday file sharing, a compromised computer or accidental permission mistake can affect more data than necessary.
A safer pattern is:
-
Create a secure admin account for management.
-
Create a standard user account for daily file access.
-
Use folder-level permissions for shared folders.
-
Avoid giving everyday users full control unless needed.
This keeps management access separate from normal file use.
Step 3: Confirm That All Drives Are Detected
Before creating storage, confirm that all expected drives appear in the NAS interface. If a drive is missing, do not continue with pool or volume creation until the issue is understood.
A missing drive can be caused by an unseated bay, incompatible drive, faulty cable, failed disk, unsupported enclosure, or controller issue. Creating storage while a drive is missing can lead to the wrong layout or force you to redo the setup later.
For systems that use storage pools and volumes, a Windows NAS setup manual describes the relationship between storage pools, virtual disks, and volumes: drives are grouped into storage pools, virtual disks use pool capacity, and volumes appear as usable storage locations for folders and network access.
The key lesson is the same across many NAS systems: confirm the drives first, then create the storage structure.
Step 4: Create Your First Storage Pool or Volume
A storage pool or volume is where your shared folders will live. The exact name depends on the NAS system, but the practical goal is the same: turn detected drives into usable storage.
For a first-time setup, do not create the most complex layout immediately. Choose a layout you understand, especially if the NAS will store important files.
A simple decision pattern is:
| Situation | Safer Beginner Direction | Why |
| One drive | Single volume plus separate backup | No drive redundancy is available |
| Two drives | Mirror-like setup if supported | One drive can hold a copy of the other, depending on system design |
| Three or more drives | RAID or parity option if supported | Can balance capacity and redundancy, depending on configuration |
| Important files | Backup plan before import | Redundancy does not replace backup |
| Testing only | Small test folder first | Prevents mistakes before moving real data |
If the system warns that a drive will be formatted, stop and confirm that the drive does not contain needed data. Storage creation can erase existing files.
Step 5: Create Shared Folders for Daily Use
After storage is ready, create one shared folder for testing. Do not create ten folders before confirming that the first one works.
A good first shared folder might be called Test, Home, Media, or Backups. Keep the name simple and avoid special characters while testing.
SMB is commonly used for Windows and macOS file sharing. TrueNAS describes SMB share management as a separate layer from file system permissions, and its share ACL options can define whether users have read, change, or full access at the share level.
This matters because a shared folder may exist but still fail if the user, group, share ACL, or file system permissions are not aligned.
Step 6: Connect from Windows, macOS, or Mobile Devices
Once the shared folder exists, test access from your daily computer. The goal is not speed testing yet. The goal is confirming that normal devices can open the share and perform basic file actions.
For Windows, this often means using File Explorer and connecting to the NAS by name or IP address. For macOS, this often means using Finder and connecting to an SMB address. Mobile access may depend on the NAS app, Files app, or a third-party file manager.
Run a simple test:
-
Open the shared folder.
-
Create a small test file.
-
Rename the file.
-
Delete the file.
-
Log out and reconnect.
-
Confirm that the same user still has the expected access.
If these tests fail, do not import important files yet. Fix permissions or sharing first.
What to Configure Before Saving Important Files
Before storing important files, configure user access, storage behavior, backup, and basic security. This is where a NAS changes from “it turns on” to “I can trust it with files.”
User Accounts and Folder Permissions
Create at least one standard user account for daily file access. This account should have only the permissions needed for normal work.
A simple beginner permission model is:
-
Admin account: used only for system management.
-
Daily user account: used for personal file access.
-
Shared family or team account: avoided when possible; individual users are easier to audit.
-
Guest access: disabled unless there is a specific reason.
-
Public folders: used carefully, not for private files.
Permissions should match real use. If a user only needs to view media files, read-only access may be enough. If a user needs to edit documents, write access may be needed.
RAID or Mirror Settings
RAID or mirror settings can help with drive failure, depending on the system and configuration. They do not make the NAS immune to data loss.
RAID 0-style layouts can improve capacity or performance but typically do not provide redundancy. Mirror-style layouts store copies across drives but reduce usable capacity. Parity-style layouts may balance capacity and redundancy but often require more drives and careful rebuild planning.
The important beginner rule is: do not choose a storage mode because it sounds powerful. Choose it because you understand what happens when one drive fails and what still requires backup.
Backup Location and Restore Plan
A NAS is not automatically a backup. It can be a backup destination, a file server, or a central storage system, but important files still need a separate recovery plan.
Before moving valuable files, decide:
-
Which files are irreplaceable?
-
Which files also exist on another device?
-
Where is the second copy?
-
Is there an external drive or cloud backup?
-
How often should backup run?
-
How would you restore one deleted folder?
-
How would you recover if the NAS itself fails?
A backup plan is not complete until you know how to restore.
Basic Security and Update Settings
Basic security should be configured before the NAS becomes part of daily use. Start with account security, updates, local access, and remote access decisions.
For most beginners, the safer order is local first, remote later. Do not expose the NAS dashboard, SMB shares, or admin pages to the internet before you understand permissions and access controls.
A basic security checklist:
-
Use a strong admin password.
-
Avoid using admin for daily file access.
-
Create standard users for file sharing.
-
Keep the NAS updated.
-
Disable services you do not use.
-
Test local file access before remote access.
-
Make sure backups exist before major changes.
Security is easier when the first setup stays simple.
Common Mistakes That Make First NAS Setup Confusing
Most first-time NAS mistakes are not caused by one big failure. They come from doing the right tasks in the wrong order.
Expecting the NAS to Appear Instantly on the Network
A NAS may take time to boot, obtain an IP address, start services, or appear in a discovery tool. If it does not appear immediately, wait a few minutes and check the router’s device list.
If the NAS still does not appear, focus on the network layer first. Check cable, router port, subnet, VPN, firewall, guest Wi-Fi, and whether the computer is on the same LAN.
Do not change storage settings or reset the device while the real issue is local network discovery.
Using the Admin Account for Everyday File Access
The admin account should manage the NAS. It should not be the account you use from every laptop, phone, or media device.
Using the admin account for daily file access increases the damage that a mistake or compromised device can cause. A standard user account with limited folder access is usually safer.
This is especially important for shared family or team folders, where users may need different levels of access.
Confusing RAID with a Complete Backup
RAID or mirror settings may help keep a system available when a drive fails, depending on configuration. But RAID does not protect against every kind of data loss.
It does not automatically protect against accidental deletion, file overwrite, ransomware, theft, fire, power damage, or a failed storage rebuild. That is why important files need a separate backup target.
A useful rule is: RAID helps with availability; backup helps with recovery.
Creating Too Many Shares Before Testing One Folder
New users often create many folders before testing permissions. This can make troubleshooting harder because it is unclear whether the issue is the folder, user, share protocol, or client device.
Start with one test shared folder. Confirm that one user can open it, write a file, delete a file, and reconnect after logging out.
After that works, create your real folder structure.
Turning on Remote Access Before Local Access Works
Remote access should come after local access is stable. If you cannot reliably open the NAS from inside your home network, remote access will only add more variables.
Remote access may involve VPNs, private tunnels, vendor client apps, permissions, and security policies. These are useful, but they should not be used to hide a broken local setup.
Finish local dashboard access, storage confirmation, shared folder testing, and backup planning first.
How to Check Whether Your Home NAS Is Working
A home NAS is working when it can be found, managed, accessed, and tested from real devices. Do not judge success only by whether the device powers on.
The NAS Dashboard Opens Reliably
The dashboard should open from a computer on the same network. You should know how to reach it by app, hostname, IP address, or browser.
If dashboard access works only once and then disappears, check whether the IP address changed, whether the NAS rebooted, or whether the computer moved to another network.
Reliable dashboard access is the control point for everything else.
Drives and Storage Pools Show the Expected Status
The NAS should show the expected drives and storage status. If the interface reports missing, degraded, uninitialized, or unhealthy storage, pause before copying files.
For a first-time setup, the goal is not to master every storage option. The goal is to confirm that the storage you created matches your intention and that no unexpected warning appears.
If the system warns that data will be erased, read carefully before continuing.
Shared Folders Can Be Opened from Your Computer
A shared folder should open from your main computer using a non-admin account. You should be able to reconnect after closing the file browser.
If the share appears but cannot be opened, the problem may be username, password, SMB settings, share ACL, file system permissions, or saved credentials on the client computer.
Fix one variable at a time. Do not create more shares until the first one works.
File Copy, Delete, and Permission Tests Work
A basic permission test should include file copy, rename, delete, logout, and reconnect. This confirms that the NAS is not only visible but usable.
For shared folders with multiple users, test at least two roles:
-
A user who should have write access.
-
A user who should not have write access.
This helps confirm that the permission model matches your real use case.
Backup and Recovery Steps Are Clear
Before saving important files, you should know where backup copies will go and how you would restore a file.
At minimum, you should be able to answer:
-
What files will be backed up?
-
Where will the backup live?
-
How often will backup happen?
-
How do you restore one folder?
-
What happens if the NAS itself fails?
If you cannot answer these questions yet, keep testing with non-critical files.
What to Do After the Basic NAS Setup Is Finished
After the basic setup works, expand slowly. A stable simple NAS is better than a complex system you do not understand.
Good next steps include:
-
Create real shared folders.
-
Create standard user accounts.
-
Set up backup from your computer to the NAS.
-
Add an external or cloud backup for important files.
-
Enable update notifications.
-
Install only the apps you need.
-
Set up remote access after local sharing works.
-
Document your IP address, accounts, shares, and backup plan.
Do not install every app on day one. File storage, permissions, and backup should come before media servers, remote access, or advanced services.
How to Apply This in a Real Home NAS Setup
The setup ladder gives you the general order, but every real NAS system has its own discovery tool, initialization screen, user setup, storage workflow, file manager, and remote access model.
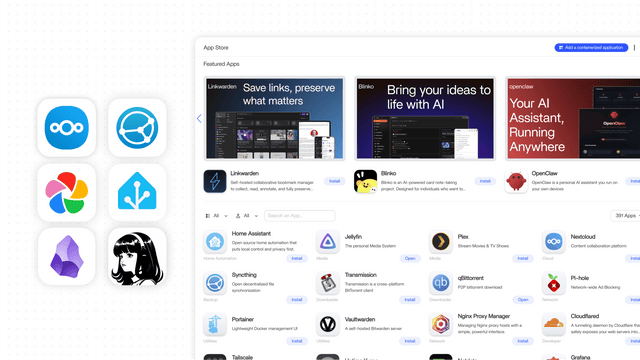
For example, the ZimaOS Get Started onboarding path shows one device-specific approach where a client app can scan for available devices, connect to the system, open the initialization interface, create a user, and then move into file management, RAID options, Samba sharing, app installation, and remote access settings.
For users setting up a storage-heavy home NAS for private cloud files, media libraries, backup, SMB sharing, and remote file access, ZimaCube 2 personal cloud NAS fits the kind of device category where this first-setup sequence becomes practical. It is still important to follow the same neutral order: local discovery first, admin account second, storage confirmation third, shared folder testing fourth, and backup planning before important files.
The real takeaway is simple: use the official setup path for your device, but keep the first-time NAS sequence universal. Find it, secure it, confirm storage, test sharing, then protect your data.
FAQ
Can I set up a home NAS without advanced networking knowledge?
Yes. Most first-time NAS setup only requires basic local network access: the NAS and your computer should be on the same router or LAN, and you need a way to open the NAS dashboard. Advanced networking becomes more relevant later when you add remote access, VPNs, custom DNS, or multiple subnets.
Do I really need RAID for my first home NAS?
Not always. If you are using one drive or only testing the NAS, RAID may not be the first priority. If you are using multiple drives and storing important files, a mirror or RAID option may help with drive failure, but you still need a separate backup plan.
Is a NAS the same as a backup?
No. A NAS is a storage system that can be used as a backup destination, but it is not automatically a complete backup. If the only copy of a file is on the NAS, then the NAS is primary storage, not backup.
What should I check first if my NAS does not appear on the network?
Check power, Ethernet, router connection, boot status, and whether your computer is on the same local network. Then check the router’s connected device list or the vendor discovery tool. Avoid resetting the NAS until you have confirmed the basic network layer.
Should I enable remote access during the first setup?
For most beginners, no. Enable remote access after local dashboard access, storage setup, shared folders, permissions, and backup planning are working. Remote access adds security and troubleshooting complexity, so it should not be used before the local setup is stable.

Recommended products
Support & Tips
More to Read
How to Deploy a Local LLM Without Breaking Storage or Apps
This guide explains how to safely deploy a local LLM on a shared home NAS or home server. It covers model storage paths, Docker...
What to Check Before Adding a GPU to a Home NAS
This guide explains what to check before adding a GPU to a home NAS. It covers workload fit, PCIe slots, physical clearance, PSU headroom,...
What Are the Local AI Limits of a Home NAS?
This guide explains the local AI limits of a home NAS by workload type, hardware resources, and real-world impact. It covers OCR, media analysis,...


