
The source tutorial is still broadly valid for a stock ZimaBlade: install compatible DDR3L SODIMM memory, connect one or two SATA drives, attach Ethernet and power, boot CasaOS, find the LAN IP, and finish setup from another device's browser.
The two main updates are power and operating-system boundaries. Current IceWhale guidance says ZimaBlade supports one to two SATA HDDs or SSDs and recommends considering external drive power for long-term HDD use. If the board has been flashed with ZimaOS instead of stock CasaOS, use the current ZimaOS first-run flow rather than the CasaOS default-login steps.
Install the SODIMM Before Powering the Board
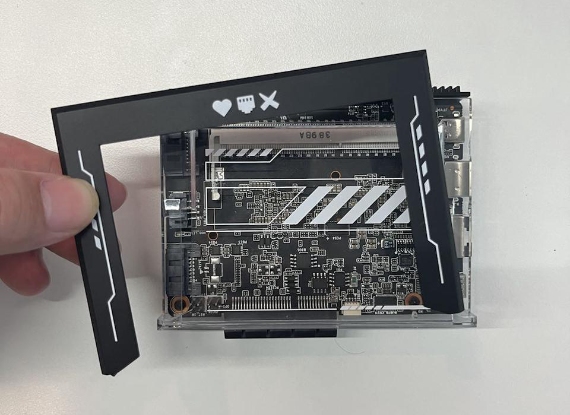
Seat the module fully and reassemble the protective covers before connecting storage or power.
Connect One or Two SATA Drives with Both Data and Power
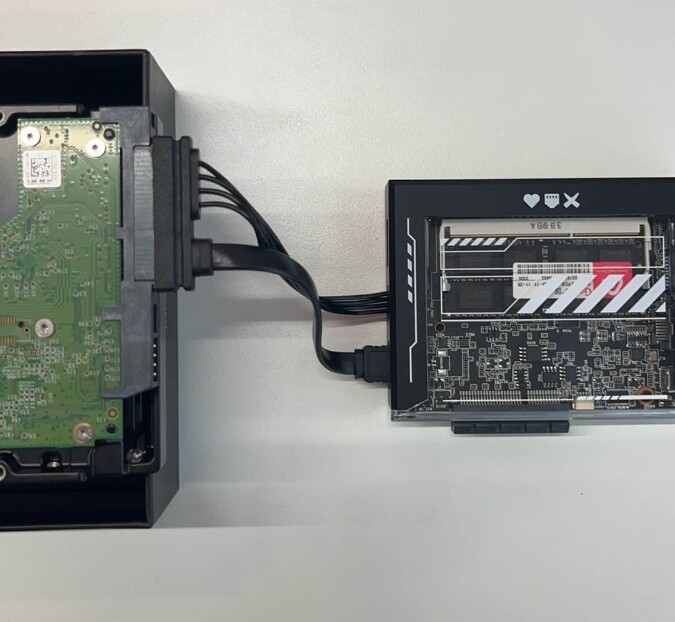
Current IceWhale documentation still describes one to two SATA HDDs or SSDs as the normal ZimaBlade NAS storage path. For mechanical disks used continuously, IceWhale also says to consider a separate external power source.
Use the current ZimaBlade hardware setup for present-day drive and power guidance.
Use Ethernet for the First NAS Setup
Connect ZimaBlade to the router or switch with Ethernet. Wired networking removes Wi-Fi driver and discovery variables during first boot.
Stock ZimaBlade Boots into CasaOS
The source tutorial uses the stock CasaOS console login casaos/casaos. After login, run ip addr and identify the physical Ethernet IPv4 address. Do not mistake loopback or Docker-network addresses for the LAN address.
Finish Setup from Another Device's Browser
Open the ZimaBlade IP address on a computer or phone on the same LAN and create the normal CasaOS WebUI account.
Create Storage Only After the Drive Is Detected
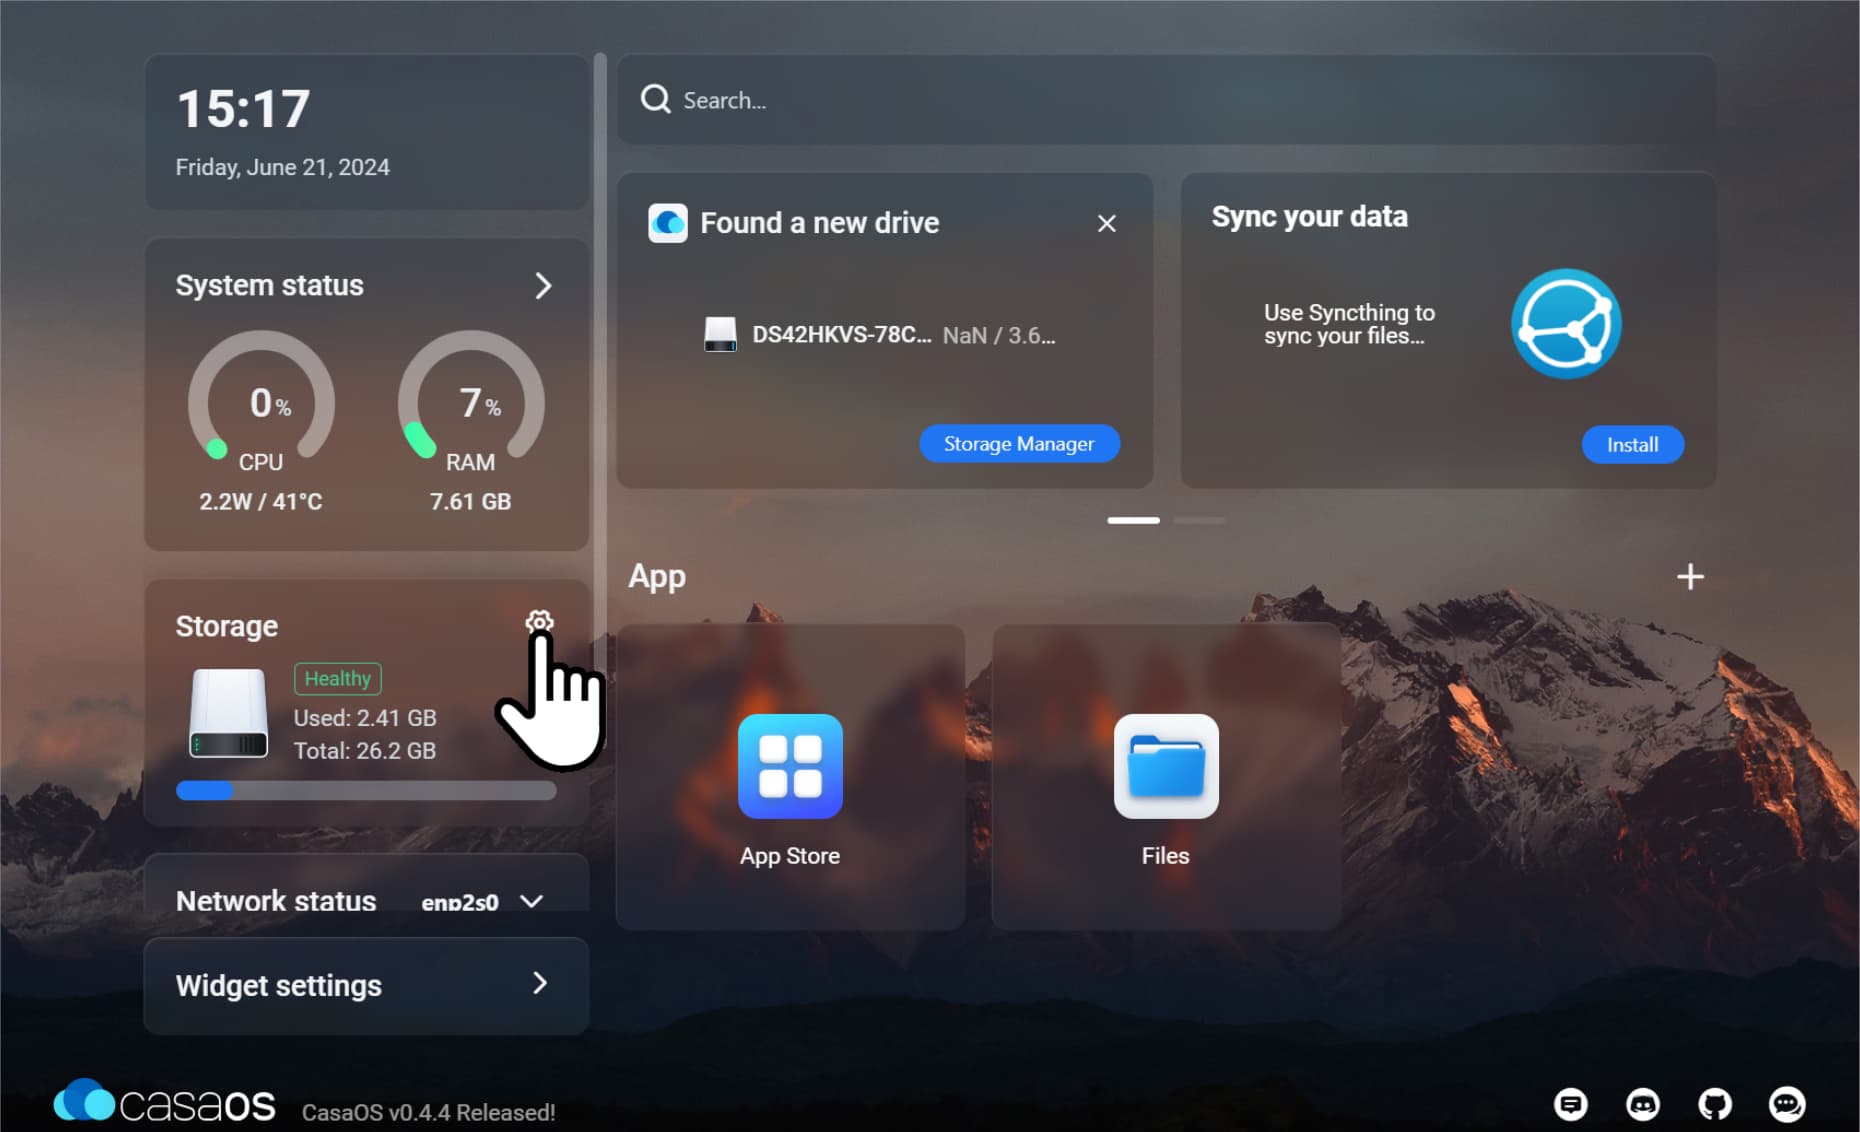
Before initializing or formatting anything, confirm the target disk model and capacity. Storage creation can erase existing data.
Use Files After the Storage Space Exists
Once CasaOS has created the storage, Files can upload, browse, and organize user data. Applications should map the actual storage folders they need instead of writing large datasets to the small system disk.
If You Installed ZimaOS, Stop Following the CasaOS Login Steps
ZimaBlade can also run ZimaOS. A ZimaOS installation uses the ZimaOS account/setup model, ZimaClient or direct IP access, and the current ZimaOS Storage page.
Treat Drive Power as Part of the NAS Design
A SATA disk that is detected at idle can still disappear during spin-up or heavy I/O if power is marginal. This matters more with mechanical drives than SSDs because HDD startup current can be much higher than steady-state consumption.
If two HDDs behave inconsistently, test each drive separately and consider the current IceWhale recommendation for external drive power before assuming the storage controller or filesystem is defective.
Formatting a New NAS Disk Is a Destructive Step
The original tutorial moves quickly from “drive detected” to creating storage. Before doing that on a reused disk, verify that it contains no data you need. Creating a fresh storage space can overwrite existing filesystem structures.
If the disk already contains data that should be preserved, first check whether CasaOS/ZimaOS supports that filesystem and whether the intended workflow is import/mount rather than format.
Create a Share Only After the Local Storage Path Works
A healthy NAS workflow has layers: hardware detection, local filesystem/storage creation, folder creation, then SMB or application access. If the disk is not healthy locally, exposing it as a network share only makes the failure harder to diagnose.
After storage is ready, create a test folder, write and read a small file locally, then share that folder to another computer.
RAID or Multiple Disks Do Not Replace Backup
ZimaBlade can be a compact two-disk NAS, but mirroring protects mainly against one drive failure. It does not protect against accidental deletion, filesystem corruption, malware, theft, or a failed enclosure/power event.
Keep at least one independent copy of important files and verify you can restore it before migrating the only copy of personal data onto the new NAS.
ZimaBlade NAS Setup FAQ
How many SATA drives does ZimaBlade officially support?
Current IceWhale documentation lists one to two SATA HDDs or SSDs.
Should long-term HDD use have separate power?
IceWhale currently recommends considering an external power supply for long-term HDD use.
Does the 2024 CasaOS tutorial apply unchanged after installing ZimaOS?
No. The hardware steps remain useful, but the operating-system login, storage UI, and first-run workflow are different.


