
Home Movie Day: How to Digitize, Preserve, and Stream Family Videos


Most families have at least one box that nobody quite wants to deal with: VHS tapes from school plays, camcorder cassettes from vacations, MiniDV tapes from the early 2000s, or reels that have not been watched in decades. The recordings may be ordinary, but that is exactly why they matter. A shaky birthday video or a few minutes of someone talking in the kitchen can become more valuable with time than anything that was professionally produced.
Home Movie Day is a good reason to finally bring those recordings back into everyday family life. The practical goal is not simply to “convert tapes to MP4.” A better workflow identifies what you have, handles fragile originals carefully, creates a high-quality digital preservation copy, makes smaller versions that are easy to watch, and stores everything in a system the family can still understand years from now.
Why Home Movies Are Harder to Preserve Than They Look
Home movies tend to survive in formats built for a specific generation of cameras and playback equipment. A family collection might include 8mm or Super 8 film, VHS and VHS-C tapes, Video8 or Hi8 cassettes, MiniDV, DVDs, and digital files copied from several older computers.
The problem is not only the age of the recording. Access depends on having working playback equipment, compatible cables, and media that is still safe to run. The Center for Home Movies uses Home Movie Day to celebrate amateur film and family recordings while helping people learn how to care for personal moving-image collections. In 2026, the official date falls on October 17.
That makes preservation a two-part problem: protect the original recording, and create digital files that no longer depend on one aging camcorder or tape deck.
Start by Identifying What You Actually Have
Before buying a capture device or sending a box to a transfer service, inventory the collection. Work through one box, shelf, or family branch at a time.
For each item, write down whatever you can identify without forcing playback:
- Format: VHS, VHS-C, Video8, Hi8, MiniDV, 8mm film, Super 8, DVD, or an existing digital file
- Approximate date
- People or event named on the label
- Physical condition
- Whether working playback equipment is still available
- Whether the recording appears unique or has another copy
Do not assume an unlabeled tape is unimportant. A simple temporary identifier such as TAPE-001 is enough to connect the physical item with notes and future digital files.
This first inventory also prevents a common mistake: digitizing twenty tapes and ending up with twenty files named capture1.mp4, capture2.mp4, and final-final.mp4.
Do Not Force Fragile Film or Tape Through Old Equipment
If a reel is brittle, warped, moldy, sticky, has a strong vinegar-like odor, or otherwise looks damaged, stop before trying to play it. The same caution applies to a tape that has visible mold, a damaged shell, or tape pulled out of the cassette.
The National Archives advises caution with old motion-picture film because material that looks usable may still be too brittle or warped for safe projection. For fragile, unique, or difficult-to-replace material, professional transfer is the safer path.
For ordinary VHS, Hi8, or MiniDV tapes in good condition, a careful DIY transfer can be reasonable if you still have reliable playback equipment. The decision should depend on the value and condition of the recording, not only on the cost of digitization.
Choose Between DIY Capture and a Professional Transfer
DIY capture makes sense when you have a modest number of tapes, working equipment, and time to monitor the transfer. Most analog video capture happens in real time: a two-hour tape takes roughly two hours to play through while it is being captured.
A basic analog setup usually follows this path:
VHS / VHS-C / Hi8 PLAYER
          ↓
   VIDEO + AUDIO OUT
          ↓
   CAPTURE DEVICE
          ↓
        COMPUTER
          ↓
   DIGITAL VIDEO FILE
MiniDV is different because the recording is already digital on tape. When compatible hardware is available, transferring the original DV data is preferable to playing it through an analog output and capturing it again.
Professional transfer becomes more attractive when the collection includes film reels, damaged media, rare family recordings, formats without working playback equipment, or simply more hours of footage than the family can realistically capture at home.
Whatever method you choose, ask one question before the work begins:
What files will we receive when the transfer is finished?
The answer matters because a convenient streaming file and a long-term preservation file do not have to be the same thing.
Create a Preservation Master and an Access Copy
For important home movies, keep at least two digital versions with different jobs.
Preservation master
The preservation master should retain as much useful information from the transfer as practical. It is the file you avoid repeatedly editing, recompressing, or replacing.
Depending on the transfer workflow, this may be a high-bitrate or lossless file that is much larger than the version you normally watch.
Access copy
The access copy is made for normal family use. It can be smaller, easier to stream, and encoded in a format that phones, TVs, tablets, and browsers handle comfortably.
Professional archives make the same distinction. The National Archives recommends keeping preservation and access copies separate so the family can preserve quality without forcing every playback device to handle the largest file.
A simple structure might look like this:
FAMILY_VIDEO_ARCHIVE/
└── 1996-summer-trip/
    ├── preservation/
    │   └── 1996-summer-trip-tape01-master.mov
    ├── access/
    │   └── 1996-summer-trip-tape01.mp4
    └── notes/
        └── tape01-notes.txt
Keep the Raw Transfer Before You Start Editing
Once an old tape is finally on a computer, it is tempting to immediately trim blank sections, improve color, remove noise, add music, and export a cleaner version.
Do that on a copy.
The first successful transfer is part of the preservation record. Keep it separate from edited versions so future changes do not erase information from the original capture.
A useful three-file model is:
- Master: the closest practical digital representation of the source
- Edited version: trimmed, color-corrected, stabilized, or otherwise improved
- Access copy: a smaller file optimized for convenient family playback
Not every home movie needs all three versions. The point is to avoid turning the only high-quality transfer into a heavily edited file that cannot be reversed later.
Name Family Videos So Someone Else Can Understand Them
A family archive should not depend on one person remembering what every file contains.
Use names that capture the information you already know:
YYYY-MM-DD_event_people_source_version.extExamples:
1994-12-25_christmas-grandparents_vhs_master.mov
1994-12-25_christmas-grandparents_vhs_access.mp4
2001-06-16_school-graduation_minidv_master.dv
If the exact date is unknown, do not invent one. A year, decade, or descriptive label is better than false precision:
1980s_family-picnic_tape07_master.movNames alone cannot preserve every story. Keep a short note for recordings that need context:
- Who appears in the video?
- Where was it recorded?
- Who recorded it?
- What event was happening?
- What physical tape or reel did it come from?
- Who identified the people or date?
That context is often more valuable to the next generation than a technically perfect filename.
Organize the Archive Around Family Events, Not Capture Devices
After digitization, avoid recreating the physical box inside the digital archive.
Folders named VHS, Hi8, and MiniDV are useful during transfer, but most relatives will look for a birthday, vacation, wedding, school year, or person—not the camera format used at the time.
A family-facing structure can be much simpler:
FAMILY_ARCHIVE/
├── 1980s/
├── 1990s/
│   ├── 1994-christmas/
│   ├── 1996-summer-trip/
│   └── 1999-school-events/
├── 2000s/
└── UNKNOWN_DATE/
The technical details can remain in filenames or notes while the top-level folders stay understandable.
If photos, phone videos, scanned albums, and newer digital media are eventually joining the same collection, keep the preserved files independent from the browsing app by organizing a durable family media archive first.
Check Every Transfer Before Packing the Originals Away
Do not assume a file is good because the transfer software reached the end of the tape.
Open the master file and check:
- The beginning, middle, and end all play
- Audio is present where expected
- Video and audio remain synchronized
- The file duration roughly matches the source
- No major section was skipped during capture
- The file can be opened on more than one device or application
Then compare the filename or ID with the physical tape before moving on to the next item.
For especially important files, checksums add another layer of verification. The National Archives also recommends ongoing integrity checks, storage migration, and other practices that help digital moving-image files remain usable over time.
Do Not Throw Away the Original Tapes or Film After Digitizing
A digital copy gives the family easier access, but it does not automatically make the original worthless.
Keep important originals after transfer, especially unique film or tape that cannot be recreated. A better transfer method may become available later, the first capture may contain an unnoticed problem, or future family members may value the physical object and its labels.
Store original film and tape in a stable, dry location away from heat, sunlight, moisture, flooding, and large temperature swings. Avoid attics, damp basements, and places where a single household accident could damage the whole collection.
The goal is not to keep every duplicate cassette forever. It is to avoid discarding the only physical source immediately after making one digital file.
Turn Preserved Home Movies Into a Family Streaming Library
Preservation solves one problem: keeping the recordings alive. Access solves another: making sure people actually watch them.
If the access copies sit on an external drive in a drawer, the family may still see them only once every few years. A home media server can make those videos available on TVs, tablets, phones, and computers around the house.
Keep the preservation masters in their archive folders and let the media server index the access copies. This keeps the large archival files separate from the files used for everyday playback.
For example:
FAMILY_VIDEO_ARCHIVE/
├── PRESERVATION_MASTERS/
│   ├── 1980s/
│   ├── 1990s/
│   └── 2000s/
└── STREAMING_LIBRARY/
    ├── Family Holidays/
    ├── Birthdays/
    ├── School & Sports/
    └── Vacations/
Once the access copies are organized, a home media server can make them available across TVs, phones, tablets, and browsers. The same library can also be organized around Plex or Jellyfin without changing the preservation master itself.
This separation gives the family something archives have understood for a long time: the best copy for preservation does not have to be the copy everyone watches.
Plan Storage for the Files You Will Keep for Decades
Digitization can produce much more data than families expect. A few compressed MP4 files are manageable almost anywhere, but high-quality transfers, edited versions, access copies, scanned photos, and newer phone videos can quickly turn one preservation project into a growing family media archive.
At first, an external drive may be enough. Central storage begins to make more sense when:
- The archive is larger than one computer comfortably holds
- Several family members need access
- Preservation masters and streaming copies need separate folders
- New phone photos and videos are joining the archive
- The same storage also runs a family media server
- Backups need to happen on a regular schedule
At that stage, a NAS becomes more than a place to put large files. It can serve as the stable home for preservation masters, edited family videos, streaming copies, scanned photos, and other media that should remain available even as laptops and phones are replaced.
For households building that kind of long-term library, a ZimaCube 2 Personal Cloud NAS can provide one centralized storage layer for high-quality video transfers, family archives, and the access copies used by a home media server.
The important part is the order: digitize and organize the memories first, understand how much data the family is actually keeping, and then choose storage that fits the archive instead of designing the archive around a piece of hardware.
A NAS Is Not the Only Backup of Your Family History
Centralizing the archive makes it easier to manage, but one NAS is still one location.
Family recordings that exist nowhere else should have additional copies. That could mean another external drive stored separately, another NAS, or an off-site or cloud copy for the most important files.
Keep backup planning separate from RAID. RAID can help a storage system continue operating after certain drive failures, but it does not protect against accidental deletion, corruption, theft, fire, or every other event that can affect the entire system.
If the video archive is becoming part of a larger family backup plan, a 3-2-1 backup strategy helps keep additional copies beyond the primary NAS.
A Simple Home Movie Preservation Workflow
FIND THE ORIGINALS
        ↓
IDENTIFY + LABEL
        ↓
CHECK CONDITION
        ↓
DIY OR PROFESSIONAL TRANSFER
        ↓
PRESERVATION MASTER
        ↓
QUALITY CHECK
     ↙       ↘
ARCHIVE      EDIT
               ↓
          ACCESS COPY
               ↓
       HOME MEDIA SERVER
               ↓
        FAMILY WATCHING

PRESERVATION MASTER + ACCESS COPY
               ↓
        MULTIPLE BACKUPS
The workflow does not need to be completed in one weekend. Start with the recordings that are unique, emotionally important, or most difficult to play. Digitize a small batch, make sure the naming and storage system makes sense, and then continue.
A successful home movie project is not measured by how many tapes disappear from a box. It is measured by whether the memories can still be found, understood, watched, and protected after the original camera and playback equipment are gone.
Home Movie Digitization FAQ
Should I convert old VHS tapes to MP4?
MP4 is useful as an access copy because it is easy to play and stream on modern devices. For important recordings, however, keep the highest-quality practical transfer as a separate preservation master rather than relying only on a heavily compressed viewing copy.
Should I keep VHS, Hi8, or MiniDV tapes after digitizing them?
Keep unique or important originals after the first transfer. The digital copy may later reveal a capture problem, or a better transfer method may become available. Store originals in a stable, dry location away from heat and moisture.
Is it better to digitize home movies myself or use a professional service?
DIY capture can work well for ordinary tapes in good condition when you have reliable playback equipment and time to monitor the process. Fragile film, damaged tapes, rare formats, or irreplaceable recordings are better candidates for an experienced transfer service.
What is the difference between a preservation master and a streaming copy?
A preservation master prioritizes retaining information from the original transfer and is usually larger. A streaming or access copy prioritizes compatibility and convenient playback. Keeping both lets you preserve quality while still making family videos easy to watch.
Can I stream digitized family videos from a NAS?
Yes. Store the preservation masters separately and add smaller access copies to a media library. A home media server can then make those viewing copies available to supported TVs, phones, tablets, and computers without repeatedly modifying the preservation files.

Recommended products


Zima Campaign Hub
More to Read
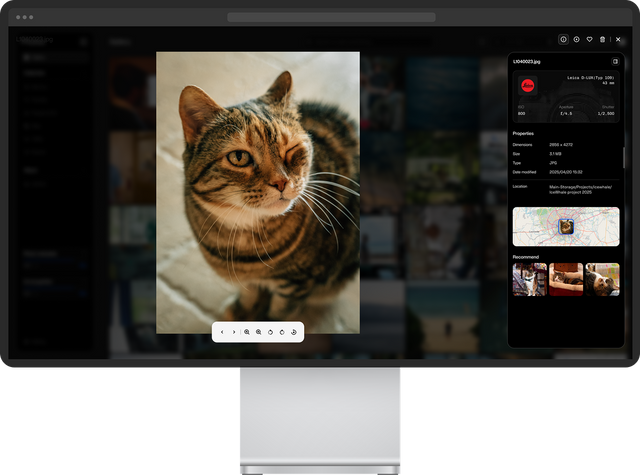
How to Build a Private Digital Hub for Your Pet’s Photos, Records, and Safety Information
Build a private digital hub for your pet’s photos, videos, medical records, identification documents, and safety information. Learn how to organize everything in one...
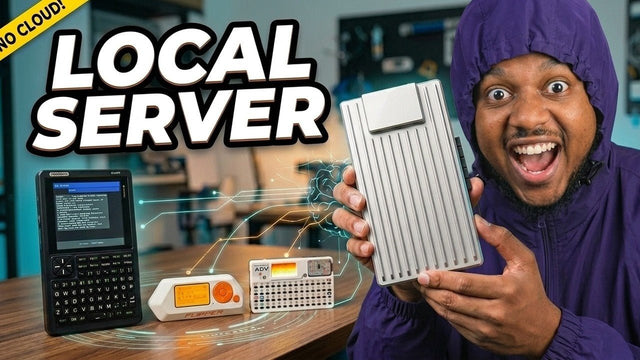
How JBlanked Connects Flipper Zero, Cardputer, and PicoCalc to Local AI with ZimaBoard 2
JBlanked turns ZimaBoard 2 into a shared local AI server for Flipper Zero, Cardputer-ADV, and PicoCalc. Using ZimaOS, Ollama, Picoware, and GPU acceleration, the...
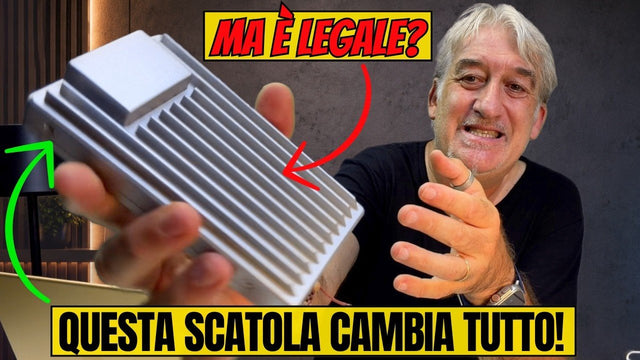
How Bighenet Builds a Private Personal Cloud With ZimaBoard 2
Bighenet explores how ZimaBoard 2 and ZimaOS can reduce dependence on third-party cloud services. His walkthrough covers the reusable packaging, ZimaOS dashboard, local file...


